JOHNSON CONTROLS
40
FORM 201.30-ICOM1 (519)
ISSUE DATE: 05/22/2019
SECTION 3 - HANDLING, STORAGE, INSTALLATION AND REASSEMBLY
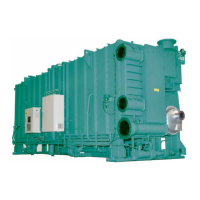
Installing Oil Separator
Use the following instructions to install the oil separator,
as shown in Figure 19 on page 41.
1. Attach the rigging chains from the overhead lift
to the two lifting holes on top of the oil separator.
2. Remove all cover closures from the oil separator
anges and wipe all connection surfaces clean.
3. Install the oil separator isolator pads.
4. Lower the oil separator carefully, keeping it level
to the mounting isolators on the condenser shell.
5. Align the oil separator inlet connection with the
expected location of the compressor discharge
and the mounting holes in the pad on the condens-
er shell.
6. Loosely fasten the oil separator to the condenser
shell mounting pad through the isolators, using
the correct hardware.
Installing Discharge Muffler Line
Use the following instructions to install the discharge
line as shown in Figure 19 on page 41
1. Lift the line (with mufer) and remove the pack-
ing materials. Clean all sealing surfaces.
2. Bolt the line to the ange on the oil separator and
to compressor discharge using the proper gaskets
and hardware.
3. Align the anges between compressor, suction, oil
separator, and condenser using the proper torque
sequence a values. Make sure that all anges are
parallel and give even gasket compression.
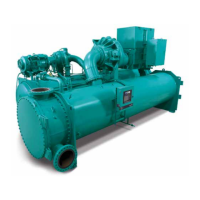
Installing Oil Separator Discharge Piping
Use the following instructions to install the discharge
piping as shown in Figure 19 on page 41.
1. Remove the shipping covers from the anges,
clean all sealing surfaces.
2. If the unit is equipped with an isolation valve,
place a gasket on the condenser ange, set the
valve on top of the gasket, and place another gas-
ket on top of the isolation valve.
3. Install the the discharge piping from the oil sep-
arator outlet to the isolation valve face. Use the
proper gaskets at the anges. Loosely bolt the
anges, so nal t-up can be done to the compres-
sor.
TABLE 8 - OIL SEPARATOR WEIGHT AND DIMENSIONS ON SINGLE COMPRESSOR UNITS
COMPRESSOR (PIN 9) WEIGHT (LB/KG) LENGTH (IN/MM) WIDTH (IN/MM)
F & G 340 (155) 36 (914) 22.4 (569)

 Loading...