7 - 2 LI4278 Product Reference Guide
Connecting an RS-232 Interface
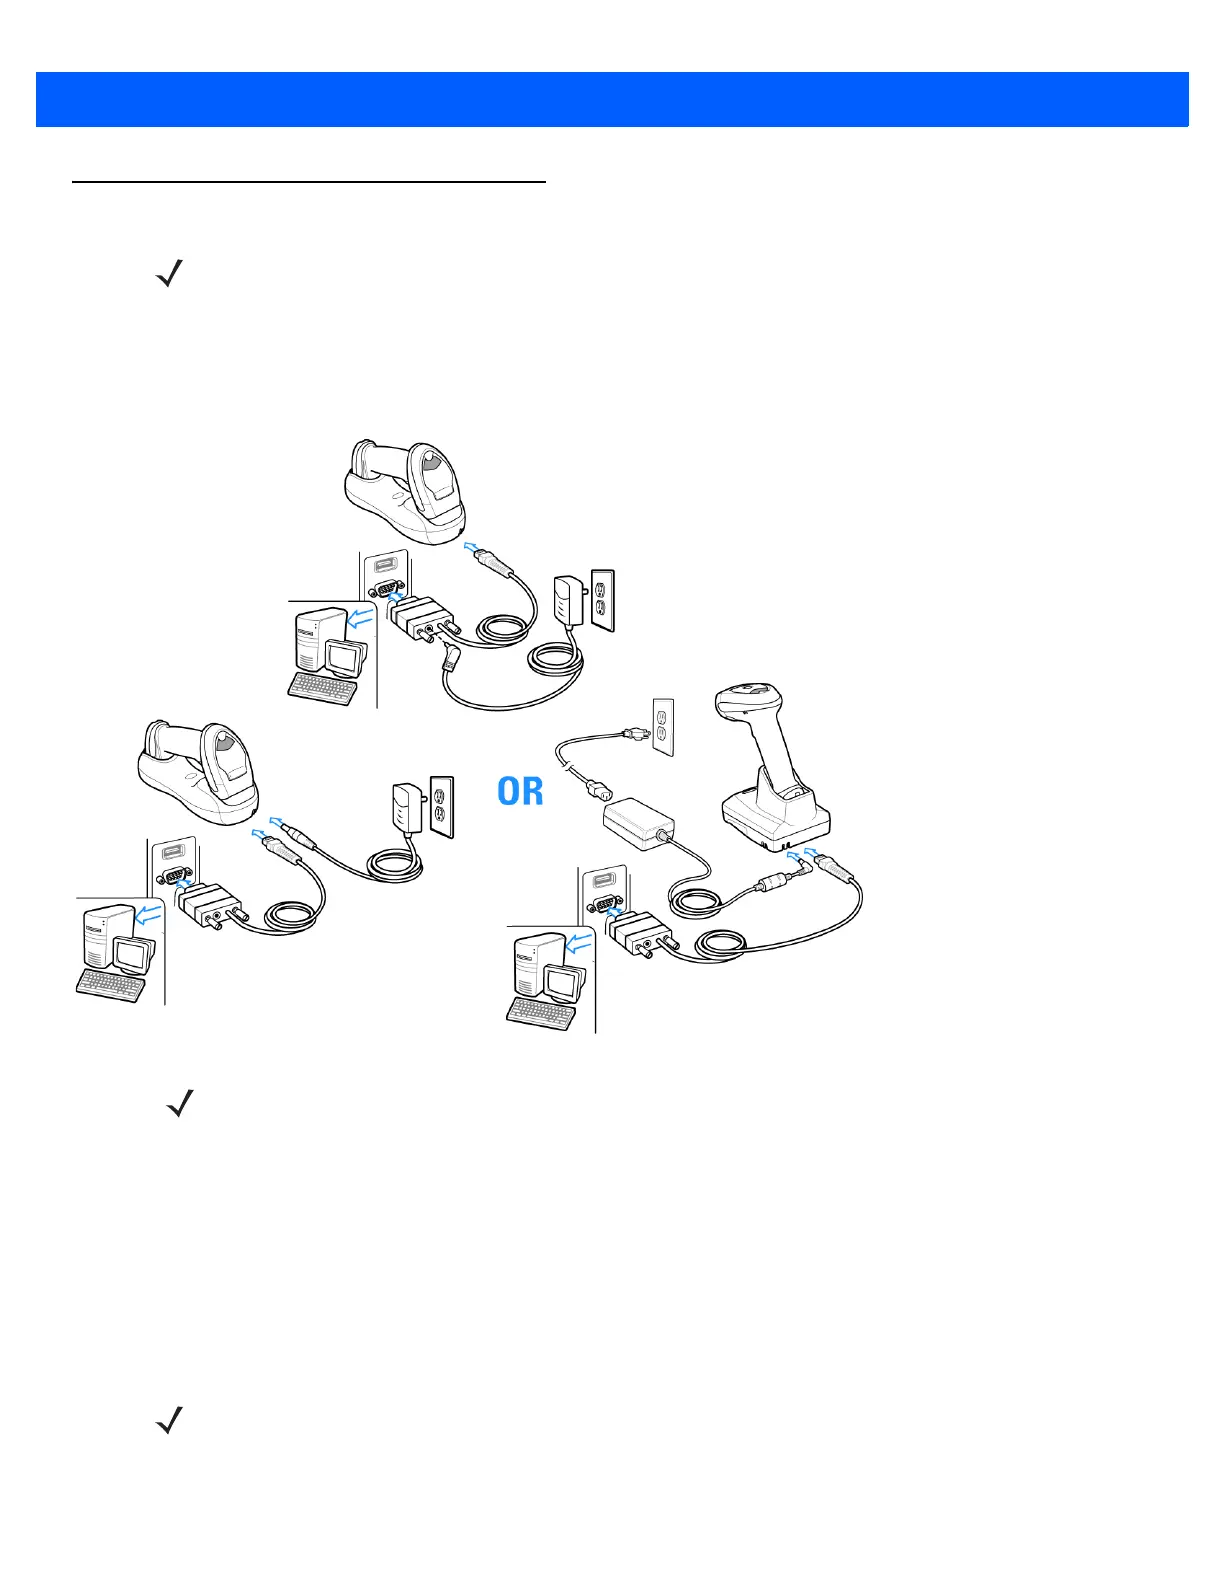
This connection is made directly from the cradle to the host computer.
Figure 7-1
RS-232 Direct Connection
To connect the RS-232 interface:
1. Attach the modular connector of the RS-232 interface cable to the host port on the bottom of the scanner
cradle (see Connecting the CR0078-S/CR0008-S Series Cradle on page 1-8 or Connecting the CR0078-P
Series Cradle on page 1-9).
2. Connect the other end of the RS-232 interface cable to the serial port on the host.
3. Connect the power supply to the serial connector end of the RS-232 interface cable. Plug the power supply
into an appropriate outlet.
4. Select the RS-232 host type by scanning the appropriate bar code from RS-232 Host Types on page 7-6.
5. To modify any other parameter options, scan the appropriate bar codes in this chapter.
If a power supply is used, disconnect the power supply before changing host cables or the cradle may not
recognize the new host.
NOTE See Chapter 4, RADIO COMMUNICATIONS for information about linear imager scanner/cradle pairing
and wireless communication.
The linear imager scanner must be connected to the cradle for the host parameter setting to take effect.
When the linear imager scanner is not connected to a cradle, and a host parameter bar code is scanned,
a long low/long high beep sequence sounds.
1
Interface Cable
2
Serial Port Connection to
Host
3
Power Supply
1
1
1
3
3
2
3
2
2
NOTE For faster charging time, connect the power supply to the cradle.
NOTE Interface cables vary depending on configuration. The connectors illustrated in Figure 7-1 are examples only.
The connectors may be different than those illustrated, but the steps to connect the cradle remain the same.
 Loading...
