GETTING STARTED 1 - 11
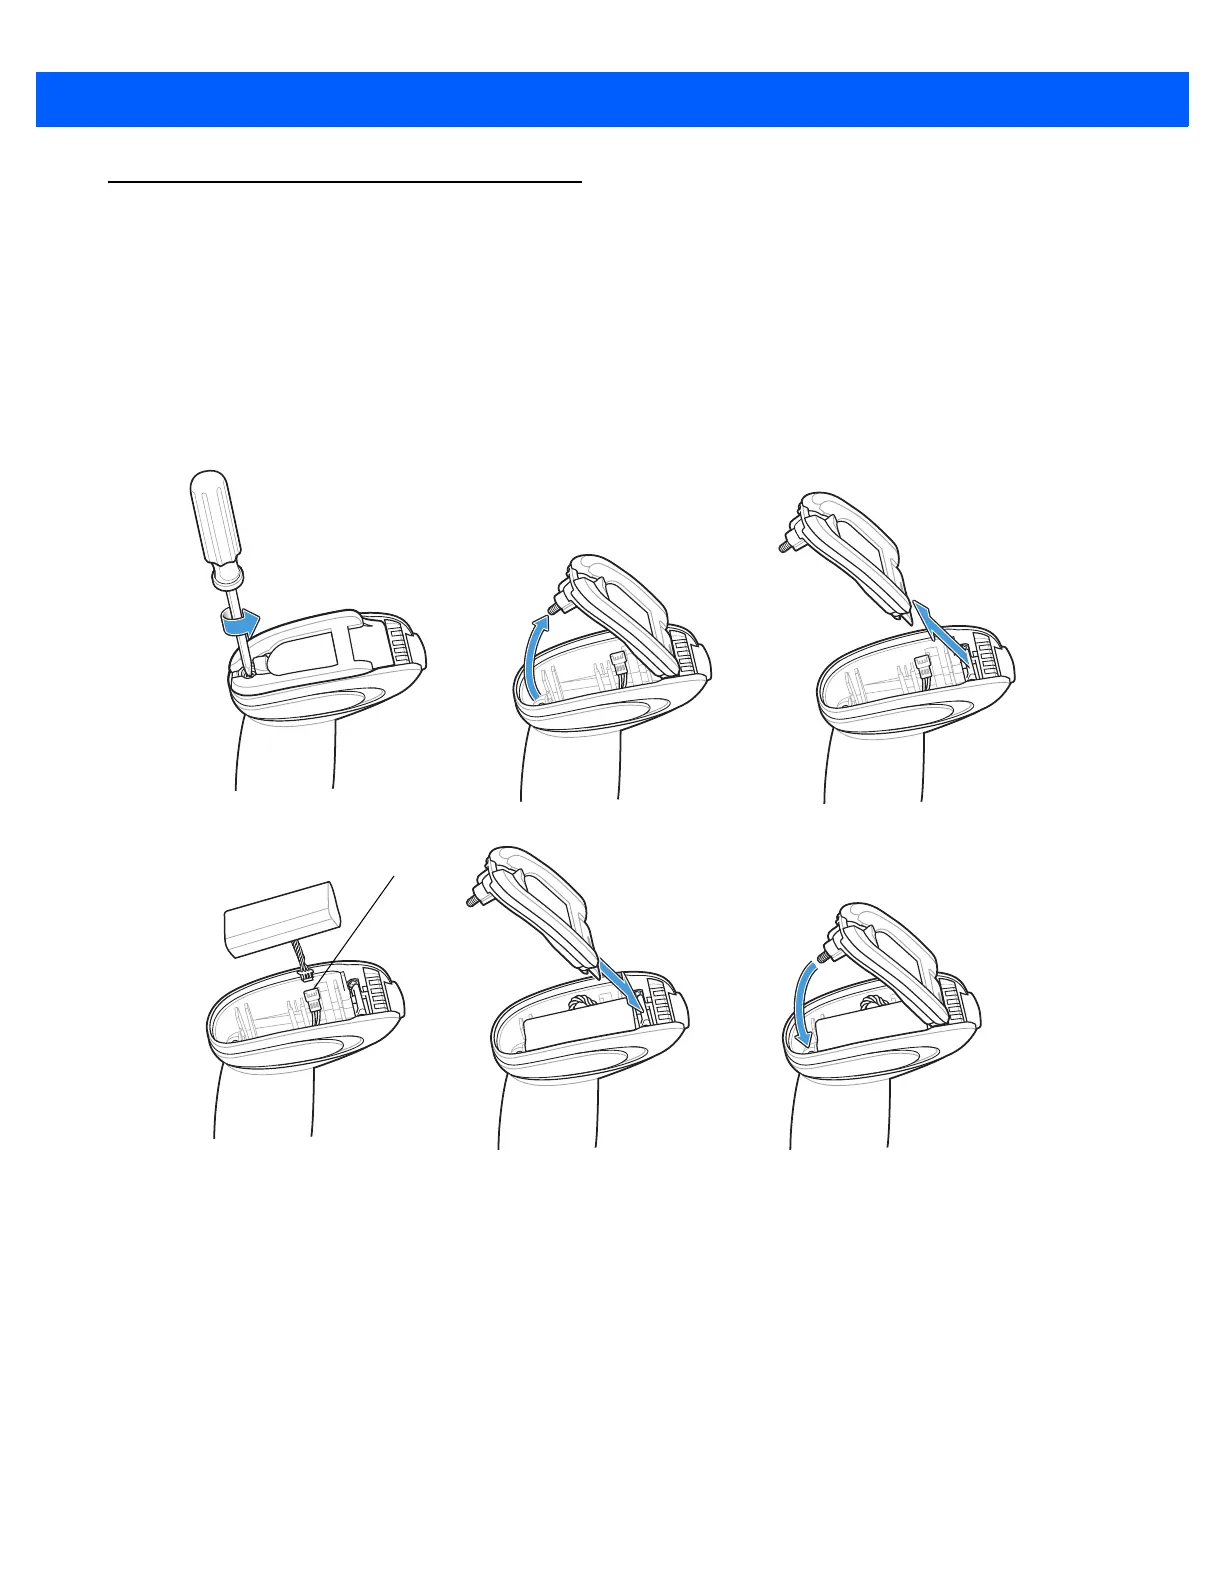
Replacing the Linear Imager Scanner Battery
The battery is installed in the cordless linear imager scanner by the factory and resides in a chamber in the
linear imager scanner handle. To replace the battery:
1. Insert a Phillips screwdriver in the screw at the base of the linear imager scanner, then turn the screw
counterclockwise to release the latch.
2. Remove the latch.
3. If a battery is already installed, turn the linear imager scanner upright to slide the battery out. Disconnect
the battery connector clip.
Figure 1-9
Inserting the Battery
4. With the contacts on the connector clips facing in the same direction, attach the new battery’s connector
clip to the connector clip in the base of the linear imager scanner.
5. Slide the new battery into the battery well and ensure the battery leads are visible. The battery should sit
securely in the well.
6. Attach and close the latch.
7. Insert a Phillips screwdriver in the screw at the base of the linear imager scanner, press down gently, and
turn the screw clockwise to lock the latch in place.
 Loading...
