3-54
Confidential
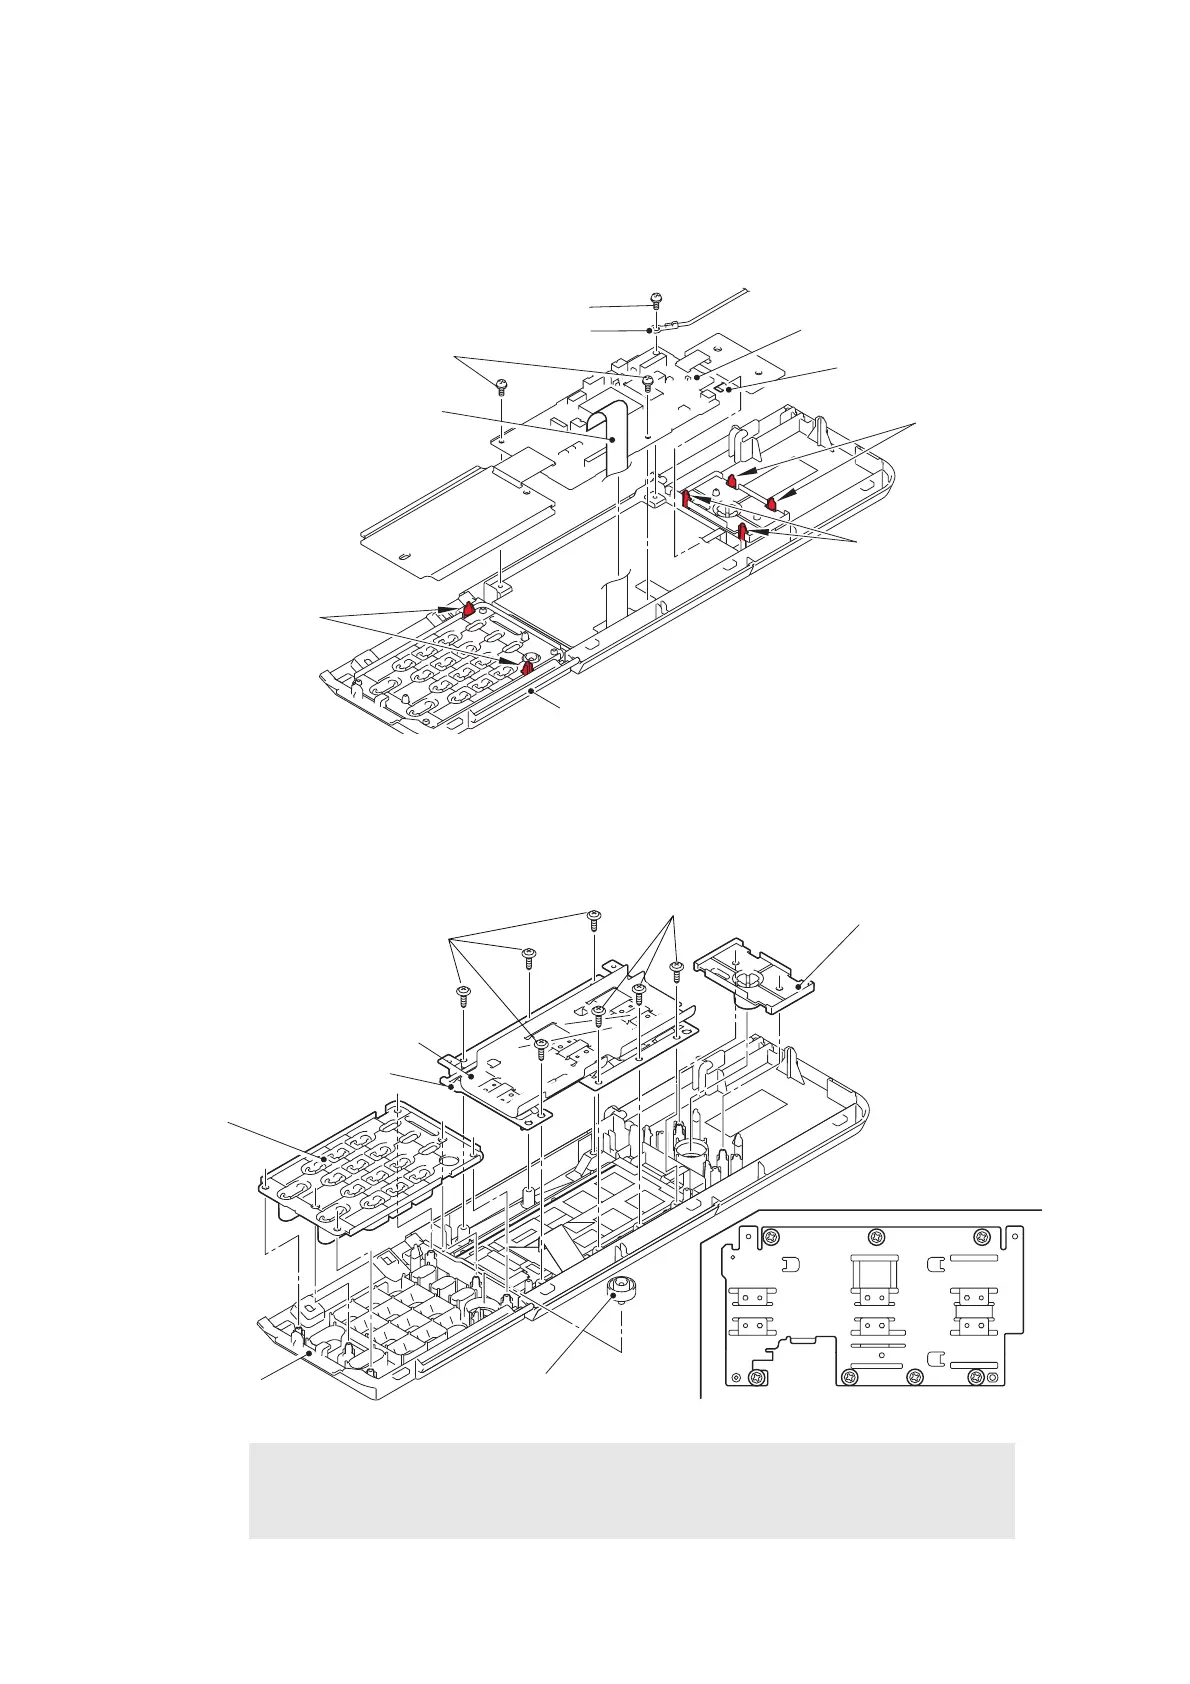
(6) Disconnect the touch panel harness and LCD flat cable from the panel PCB ASSY.
(7) Remove the screw pan (S/P washer) M3x6 DA screw to remove the touch panel PCB
harness.
(8) Remove the two screw pan (S/P washer) M3x6 DA screws from the panel PCB ASSY.
(9) Release the six hooks, and remove the panel PCB ASSY from the panel cover.
Fig. 3-68
(10) Remove the rubber keys L and R from the panel cover.
(11) Remove the panel light guide from the panel cover.
(12) Open the film to remove the seven taptite cup B M3x10 screws, and remove the touch
panel plate from the control panel ASSY.
Fig. 3-69
Assembling Note:
• When securing the touch panel plate with screws, tighten the screws in the
sequence of the numbers engraved on the touch panel plate.
Touch panel PCB harness
Hooks
Screw pan (S/P washer) M3x6 DA
Hooks
Panel cover
LCD flat cable
Panel PCB ASSY
Touch panel harness
Hooks
Screw pan (S/P washer) M3x6 DA
Rubber key L
Taptite cup B M3x10
Film
Touch panel plate
Taptite cup B M3x10
Panel cover
Panel light guide
Rubber key R
567
1234
 Loading...