Setup Flow
2-6
Before You Start Using the Machine
2
Setup Flow
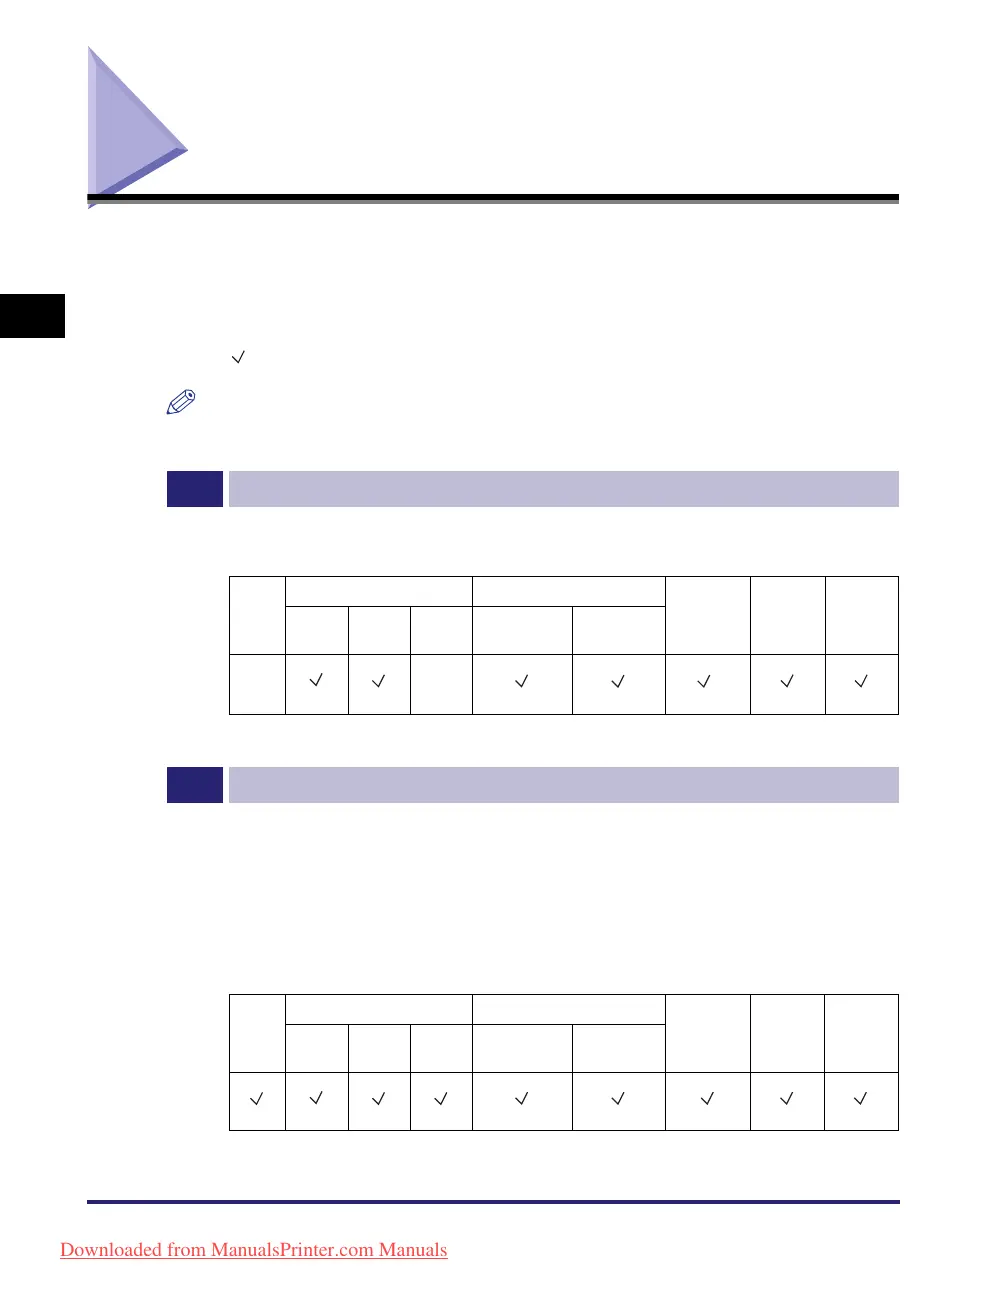
The machine is equipped with a wide variety of functions, some of which may
require optional equipment or specific setups to become fully functional. To identify
what functions require procedures be completed before using the machine, look at
the setup flow provided below. Use the tables (if included) to see which functions
require the corresponding procedure. (The procedure is required for the functions
with a “ ”.)
NOTE
For available functions on a product basis, see “Available Features,” on p. xii.
* Cable connection is not required for printing from a USB memory media device.
1
Cable Connection (See “Cable Connection,” on p. 2-9.)
Connect the machine to your computer or network using the USB or Ethernet cable. If the Fax
function is available, connect the telephone cable to the machine and the wall jack.
Copy
Send Fax
Print
Remote
Scan
Remote
UI
E-Mail/
I-Fax
to File
Server
to
USB
Media
Stand-alone
from
Computer
*
2
Initial Setup (See “Turning ON/OFF the Machine,” on p. 2-13.)
When the machine is turned ON for the first time, the initial setup screens appear on the touch
panel display. Perform the following setup items as required:
• Language and country/region
• Mixing the toner
• Date & Time Settings
• Fax settings (unit telephone number, unit name, and telephone line type)
• IP address settings
Copy
Send Fax
Print
Remote
Scan
Remote
UI
E-Mail/
I-Fax
to File
Server
to
USB
Media
Stand-alone
from
Computer
Downloaded from ManualsPrinter.com Manuals
 Loading...