Home
Canon
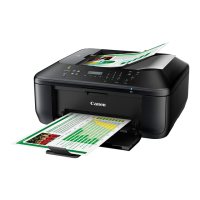
All in One Printer
MX475
Canon MX475 User Manual
5
of 1
of 1 rating
914 pages
Give review
Manual
Specs
To Next Page
To Next Page
To Previous Page
To Previous Page
Loading...
Item Is Placed Correctly, but the Scanned Image Is Slanted
Check
When Document or
Magazine
is selected for
Select Source
, deselect the
Correct slanted text document
checkbox and scan the item again.
Settings (Document Scan) Dialog Box
Settings (Custom Scan) Dialog Box
786
785
787
Table of Contents
Table of Contents
2
Read Me First
17
How to Use the Online Manual
18
Trademarks and Licenses
19
Search Tips
20
Notes on Operation Explanations
22
Useful Functions Available on the Machine
23
Useful Functions Available from Applications and the Main Unit
24
Helpful Functions Available through the Network
27
Online Storage Integration Function
29
Printing with Google Cloud Print
30
Preparations for Printing with Google Cloud Print
31
Printing from Computer or Smartphone with Google Cloud Print
34
Using Remote UI
36
Printing from Airprint Compliant Device
39
List of Function for each Model
44
Overview of the Machine
46
Safety Guide
47
Safety Precautions
48
Regulatory and Safety Information
49
Main Components and Basic Operations
55
Main Components
56
Front View
57
Rear View
59
Inside View
60
Operation Panel
62
About the Power Supply of the Machine
64
Confirming that the Power Is on
65
Turning the Machine on and off
66
Notice for the Power Plug/Power Cord
67
Notice for Unplugging the Power Cord
68
LCD and Operation Panel
69
Entering Numbers, Letters, and Symbols
70
Loading Paper / Originals
72
Loading Paper
73
Loading Plain Paper / Photo Paper
74
Loading Envelopes
78
Media Types You Can Use
82
Paper Load Limit
84
Media Type Settings on the Operation Panel
86
Media Types You Cannot Use
87
Printing Area
88
Printing Area
89
Other Sizes than Letter, Legal, Envelopes
90
Letter, Legal
91
Envelopes
92
Loading Originals
93
Position to Load Originals
94
Loading Originals on the Platen Glass
95
Loading Documents in the ADF (Auto Document Feeder)
97
How to Load Originals for each Function
99
Originals You Can Load
101
Replacing a FINE Cartridge
103
Replacing a FINE Cartridge
104
Checking the Ink Status
110
Checking the Ink Status with the LCD on the Machine
111
Maintenance
112
When Printing Becomes Faint or Colors Are Incorrect
113
Maintenance Procedure
114
Printing the Nozzle Check Pattern
116
Examining the Nozzle Check Pattern
117
Cleaning the Print Head
118
Cleaning the Print Head Deeply
119
Aligning the Print Head
120
Performing Maintenance from a Computer
123
Cleaning the Print Heads from Your Computer
124
Cleaning the Paper Feed Rollers from Your Computer
126
Aligning the Print Head
127
Aligning the Print Head Position from Your Computer
128
Aligning the Print Head Position Automatically from Your Computer
132
Use Your Computer to Print a Nozzle Check Pattern
133
Cleaning Inside the Machine
134
Cleaning the Machine
135
Cleaning the Exterior of the Machine
136
Cleaning the Platen Glass and Document Cover
137
Cleaning the ADF (Auto Document Feeder)
138
Cleaning the Paper Feed Roller
140
Cleaning the Inside of the Machine (Bottom Plate Cleaning)
141
Changing the Machine Settings
143
Changing Machine Settings from Your Computer
144
Changing the Print Options
145
Registering a Frequently Used Printing Profile
146
Setting the Ink Cartridge to be Used
148
Managing the Machine Power
149
Reducing the Machine Noise
150
Changing the Machine Operation Mode
152
Changing the Machine Settings on the LCD
154
Changing the Machine Settings on the LCD
155
Fax Settings
156
Output Settings
160
LAN Settings
161
Dev. User Settings
163
Firmware Update
165
Reset Setting
166
About Quiet Setting
167
Before Using the Machine with the Access Point Mode
168
Updating the Firmware of the Machine
170
Information about Network Connection
172
Useful Information about Network Connection
173
Initial Values Set at Factory (Network)
174
Connecting the Machine to the Computer Using a USB Cable
175
When Detecting the Printers Have the same Name During Setup
176
Connecting to Other Computer with Lan/Changing the Connection Method from USB to LAN
177
Printing out Network Setting Information
178
About Network Communication
180
Changing and Confirming Network Settings
181
IJ Network Tool
182
Changing the Settings in the Wireless LAN Sheet
183
Changing the WEP Detailed Settings
185
Changing the WPA or WPA2 Detailed Settings
187
Changing the Settings in the Wired LAN Sheet
190
Changing the Settings in the Admin Password Sheet
191
Monitoring Wireless Network Status
192
Initializing the Network Settings of the Machine
195
Viewing the Modified Settings
196
Screens for Network Connection of IJ Network Tool
197
Canon IJ Network Tool Screen
198
Configuration Screen
201
Wireless LAN Sheet
202
Search Screen
204
WEP Details Screen
206
WPA Details Screen
207
WPA2 Details Screen
208
Authentication Type Confirmation Screen
209
PSK: Passphrase and Dynamic Encryption Setup Screen
210
Setup Information Confirmation Screen
211
Wired LAN Sheet
212
Admin Password Sheet
213
Network Information Screen
214
Access Control Sheet
215
Edit Accessible MAC Address Screen/Add Accessible MAC Address Screen
219
Edit Accessible IP Address Screen/Add Accessible IP Address Screen
220
Other Screens of IJ Network Tool
221
Canon IJ Network Tool Screen
222
Status Screen
225
Connection Performance Measurement Screen
226
Maintenance Screen
228
Network Setup of the Card Slot Screen
229
Associate Port Screen
231
Network Information Screen
232
Appendix For Network Communication
233
Using the Card Slot over a Network
234
When the Printer Driver Is Not Associated with a Port
236
About Technical Terms
237
Restrictions
243
About Firewall
244
Tips for Ensuring Optimal Printing Quality
245
Useful Information about Ink
246
Key Points to Successful Printing
247
Be Sure to Make Paper Settings after Loading Paper
248
Canceling a Print Job
249
Key to Enjoying Consistent Printing Quality
250
Precautions for Safe Transport of the Machine
251
Legal Limitations on Use of Your Product and Use of Images
252
Specifications
253
Printing
258
Printing from a Computer
259
Printing with Application Software that You Are Using (Printer Driver)
260
Printing with Easy Setup
261
Setting the Media Type with the Printer Driver
263
Various Printing Methods
264
Setting a Page Size and Orientation
265
Setting the Number of Copies and Printing Order
266
Setting the Stapling Margin
268
Execute Borderless Printing
270
Fit-To-Page Printing
273
Scaled Printing
275
Page Layout Printing
278
Tiling/Poster Printing
280
Booklet Printing
283
Duplex Printing
285
Stamp/Background Printing
287
Registering a Stamp
290
Registering Image Data to be Used as a Background
293
Setting up Envelope Printing
296
Printing on Postcards
298
Displaying the Print Results before Printing
300
Setting Paper Dimensions (Custom Size)
301
Editing the Print Document or Reprinting from the Print History
303
Changing the Print Quality and Correcting Image Data
306
Setting the Print Quality Level (Custom)
307
Printing a Color Document in Monochrome
309
Specifying Color Correction
311
Optimal Photo Printing of Image Data
313
Adjusting Colors with the Printer Driver
314
Printing with ICC Profiles
316
Adjusting Color Balance
319
Adjusting Color Balance Using Sample Patterns (Printer Driver)
321
Adjusting Brightness
325
Adjusting Intensity
327
Adjusting Contrast
329
Adjusting Intensity/Contrast Using Sample Patterns (Printer Driver)
331
Overview of the Printer Driver
335
Canon IJ Printer Driver
336
How to Open the Printer Driver Setup Window
337
Canon IJ Status Monitor
338
Checking the Ink Status from Your Computer
339
Canon IJ Preview
340
Deleting the Undesired Print Job
341
Instructions for Use (Printer Driver)
342
Printer Driver Description
344
Quick Setup Tab Description
345
Main Tab Description
351
Page Setup Tab Description
357
Maintenance Tab Description
369
Canon IJ Preview Description
376
Canon IJ XPS Preview Description
379
Canon IJ Status Monitor Description
387
Updating the MP Drivers
390
Obtaining the Latest MP Drivers
391
Deleting the Unnecessary MP Drivers
392
Before Installing the MP Drivers
393
Installing the MP Drivers
394
Printing Using the Operation Panel of the Machine
395
Printing Template Forms such as Lined Paper or Graph Paper
396
Printing with the Access Point Mode
399
Copying
401
Making Copies
402
Setting Items for Copying
404
Reducing or Enlarging a Copy
406
About Special Copy Menu
407
Copying Two Pages to Fit Onto a Single Page
408
Copying Four Pages to Fit Onto a Single Page
410
Copying Thick Originals such as Books
412
Copying Without Borders
413
Collated Copying
415
Scanning
416
Scanning from a Computer
417
Scanning with IJ Scan Utility
418
What Is IJ Scan Utility (Scanner Software)
419
Starting IJ Scan Utility
421
Easy Scanning with Auto Scan
422
Scanning Photos
423
Scanning Documents
424
Scanning with Favorite Settings
425
Scanning Items Larger than the Platen (Image Stitch)
426
Scanning Multiple Items at One Time
430
Scanning Multiple Documents at One Time from the ADF (Auto Document Feeder)
433
Saving after Checking Scan Results
437
Sending Scanned Images Via E-Mail
440
Extracting Text from Scanned Images (OCR)
443
IJ Scan Utility Screens
446
IJ Scan Utility Main Screen
447
Settings Dialog Box
449
Data Format Settings Dialog Box
487
Save Settings Dialog Box
489
Image Stitch Window
491
Scanning with Application Software that You Are Using (Scangear)
496
What Is Scangear (Scanner Driver)
497
Scanning with Advanced Settings Using Scangear (Scanner Driver)
499
Starting Scangear (Scanner Driver)
500
Scanning in Basic Mode
501
Scanning in Advanced Mode
504
Scanning Multiple Documents from the ADF (Auto Document Feeder) in Advanced Mode
506
Scanning Multiple Documents at One Time with Scangear (Scanner Driver)
508
Correcting Images and Adjusting Colors with Scangear (Scanner Driver)
512
Correcting Images (Unsharp Mask, Reduce Dust and Scratches, Fading Correction, Etc.)
513
Adjusting Colors Using a Color Pattern
517
Adjusting Saturation and Color Balance
519
Adjusting Brightness and Contrast
521
Adjusting Histogram
523
Adjusting Tone Curve
527
Setting Threshold
530
Scangear (Scanner Driver) Screens
531
Basic Mode Tab
532
Advanced Mode Tab
539
Input Settings
545
Output Settings
547
Image Settings
550
Color Adjustment Buttons
555
Preferences Dialog Box
558
Scanner Tab
559
Preview Tab
562
Scan Tab
564
Color Settings Tab
565
Placing Items (When Scanning from a Computer)
567
Adjusting Cropping Frames (Scangear)
570
General Notes (Scanner Driver)
574
Useful Information on Scanning
576
Adjusting Cropping Frames in the Image Stitch Window
577
Resolution
578
Data Formats
580
Color Matching
581
IJ Network Scanner Selector EX Menu and Setting Screen
582
Uninstalling IJ Network Scanner Selector EX
585
Other Scanning Methods
586
Scanning with WIA Driver
587
Scanning Using the Control Panel (Windows XP Only)
591
Placing Items (When Scanning from a Computer)
593
Scanning from the Operation Panel of the Machine
596
Forwarding Scanned Data to the Computer Using the Operation Panel of the Machine
597
Setting Items for Scanning Using the Operation Panel of the Machine
601
Network Scan Settings
603
Selecting a Response to Commands from the Operation Panel Using IJ Scan Utility
607
Scanning with the Access Point Mode
610
Faxing
612
Preparing for Faxing
613
Connecting the Telephone Line
614
Setting the Telephone Line Type
617
Setting the Receive Mode
618
Setting the Sender Information
622
Sending Faxes Using the Operation Panel of the Machine
626
Sending Faxes with the Numeric Buttons
627
Resending Faxes (Redialing a Busy Number)
630
Sending Faxes Using Useful Functions
632
Sending a Fax after Speaking on Telephone
633
Sending a Fax Using the Memory Dialing Feature
635
Searching a Registered Recipient by Name
637
Sending the same Document to Several Recipients (Sequential Broadcasting)
639
Preventing Mistransmission of Faxes
641
Using the on Hook Dial Function
643
Registering Recipients
645
Registering Recipients Using the Operation Panel of the Machine
646
Registering Recipients to Coded Memory Dial
647
Registering Recipients for Group Dial
650
Changing Registered Information
652
Deleting Registered Information
654
Printing a List of the Registered Destinations
655
Registering Recipients Using Speed Dial Utility
656
Starting up Speed Dial Utility
657
Speed Dial Utility Dialog Box
658
Saving Registered Information on the Machine to Your Computer
660
Registering a Fax/Telephone Number Using Speed Dial Utility
661
Changing a Fax/Telephone Number Using Speed Dial Utility
663
Deleting a Fax/Telephone Number Using Speed Dial Utility
665
Changing Sender Information Using Speed Dial Utility
666
Registering/Changing Rejected Number Using Speed Dial Utility
667
Machine
668
Uninstalling Speed Dial Utility
669
Receiving Faxes
670
Receiving Faxes
671
Changing the Paper Settings
675
Memory Reception
677
Receiving Faxes Using Useful Functions
679
Remote Reception
680
Rejecting Fax Reception
681
Using the Caller ID Service to Reject Calls
684
Other Useful Fax Functions
685
Using the Information Services
686
Transmission/Reception of Faxes Using ECM
688
Document Stored in Machine's Memory
689
Printing a Document in Machine's Memory
690
Deleting a Document in Machine's Memory
692
Summary of Reports and Lists
694
Sending Faxes from a Computer
699
Sending a FAX (Fax Driver)
700
Creating an Address Book (Fax Driver)
704
Setup When Opening the Address Book for the First Time (Windows XP)
708
Edit or Remove a Recipient from an Address Book (Fax Driver)
709
Search for a Recipient in an Address Book (Fax Driver)
713
Troubleshooting Problems Sending Faxes (Fax Driver)
715
General Notes (Fax Driver)
717
Troubleshooting
719
Problems with Network Communication
720
Problems with the Machine While Using with Network
721
The Machine Stopped Working Suddenly
722
Ink Remaining Level Is Not Displayed on Printer Status Monitor of the Machine
724
Printing Speed Is Slow
725
Cannot Use the Machine on Replacing an Access Point or Changing Its Settings
726
Cannot Detect a Machine on a Network
727
Cannot Detect the Machine When Setting up Network Communication
728
Cannot Detect the Machine During Wireless LAN Setup: Check 1
729
Cannot Detect the Machine During Wireless LAN Setup: Check 2
730
Cannot Detect the Machine During Wireless LAN Setup: Check 3
731
The Machine Cannot be Detected in the Wireless LAN
732
Other Problems with Network
734
Forgot an Access Point Name, SSID, or a Network Key
735
The Message Is Displayed on the Computer Screen During Setup
736
The Admin Password Set to the Machine was Forgotten
737
Checking Information about the Network
738
Packets Are Sent Steadily
740
How to Restore the Machine's Network Settings to Factory Default
741
Problems with Printing
742
Printing Does Not Start
743
Paper Jams
745
Paper Does Not Feed Properly/"No Paper" Error Occurs
746
Copying/Printing Stops before It Is Completed
748
Problems with Printing Quality
749
Print Results Not Satisfactory
750
Cannot Print to End of Job
751
No Printing Results/Printing Is Blurred/Colors Are Wrong/White Streaks
752
Colors Are Unclear
755
Lines Are Misaligned
756
Line Does Not Print or Prints Partially
757
Image Does Not Print or Prints Partially
758
Printed Paper Curls or Has Ink Blots
759
Paper Is Smudged/Printed Surface Is Scratched
760
Back of the Paper Is Smudged
764
Vertical Lines Are Printed on the Sides of the Printout
765
Colors Are Uneven or Streaked
766
Ink Is Not Ejected
768
Problems with Scanning
769
Problems with Scanning
770
Scanner Does Not Work
771
Scangear (Scanner Driver) Does Not Start
772
Error Message Appears and the Scangear (Scanner Driver) Screen Does Not Appear
773
Cannot Scan Multiple Items at One Time
774
Cannot Scan Properly with Auto Scan
775
Slow Scanning Speed
776
There Is Not Enough Memory." Message Is Displayed
777
Computer Stops Operating During Scanning
778
Scanner Does Not Work after Upgrading Windows
779
Scanned Image Does Not Open
780
Scan Results Not Satisfactory
781
Scan Quality (Image Displayed on the Monitor) Is Poor
782
Scanned Image Is Surrounded by Extra White Areas
783
Cannot Scan at the Correct Size
784
Panel
785
Item Is Placed Correctly, but the Scanned Image Is Slanted
786
Scanned Image Is Enlarged (Reduced) on the Computer Monitor
787
Software Problems
788
Problems with Faxing
790
Problems Sending Faxes
791
Problems Receiving Faxes
794
Cannot Send a Fax Clearly
798
Telephone Problems
799
Problems with the Machine
800
The Machine Cannot be Powered on
801
Cannot Connect to Computer with a USB Cable Properly
802
Cannot Communicate with the Machine with USB Connection
803
LCD Cannot be Seen at All
804
An Unintended Language Is Displayed on the LCD
805
Printer Status Monitor Is Not Displayed
806
Problems with Installation/Downloading
807
Cannot Install the MP Drivers
808
Easy-Webprint EX Does Not Start up or Easy-Webprint EX Menu Does Not Appear
810
How to Update MP Drivers in Network Environment
811
Uninstalling IJ Network Tool
812
About Errors/Messages Displayed
813
If an Error Occurs
814
A Message for Faxing Is Displayed on the LCD
815
A Message Is Displayed
818
If You Cannot Resolve the Problem
823
Support Code List
824
Support Code List (When Paper Is Jammed)
826
5
Based on 1 rating
Ask a question
Give review
Questions and Answers:
Need help?
Do you have a question about the Canon MX475 and is the answer not in the manual?
Ask a question
Canon MX475 Specifications
General
Brand
Canon
Model
MX475
Category
All in One Printer
Language
English
Related product manuals
Canon MX470
913 pages
Canon PIXMA MX472
8 pages
Canon MX470 series
693 pages
Canon PIXMA MX452
4 pages
Canon PIXMA MX420
24 pages
Canon MX450 series
868 pages
Canon PIXMA MX410 Series
68 pages
Canon PIXMA MX420 Series
60 pages
Canon PIXMA MX495 Series
68 pages
Canon PIXMA MX455 Series
4 pages
Canon PIXMA MX452 Series
4 pages
Canon PIXMA MX922
22 pages