20021201
(4) Tap [Insert] and then [Geometry Link].
•This inserts a Geometry Link row in the next line.
10-3-13
Inserting Data into an eActivity
(5) Tap the Geometry window to make it active.
(6) Tap one side of the triangle to select it, and then drag it to the link symbol in the
eActivity window.
• This inputs the equation of the line that represents the side of the triangle into the link.
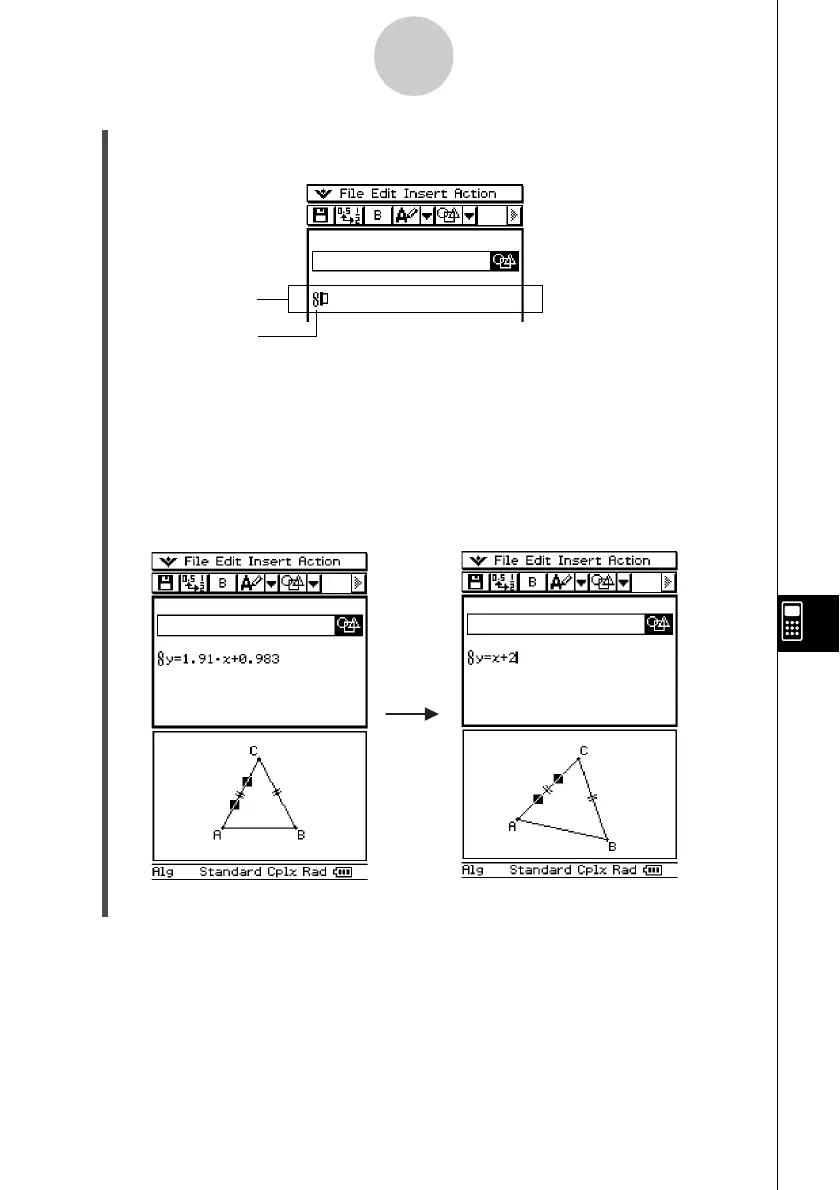
•Modifying the equation in the Geometry Link row and pressing E causes a corre-
sponding change in the Geometry window (lower right screenshot).
• The example below shows how the isosceles triangle ABC (CA = BC) changes when
the equation in the Geometry Link row is changed from y = 1.91x + 0.983 to y = x + 2.
Geometry Link row
Symbol
Tip
• Dragging a line or figure from the Geometry window to a text row or calculation row in an
eActivity also converts the figure to its value or equation. In this case, however, data in the text
row or calculation row is not interlinked with the Geometry window figure.
• Pressing E after changing data in a Geometry Link updates the corresponding figure in the
Geometry window.
• Changing the figure in the Geometry window will cause the linked data in an eActivity to update
accordingly.
• Drag the stylus across
1.91
x + 0.983.
• Input
x + 2.
• Press E.
20030201
 Loading...