20021201
Inserting a Geometry Link Row
A Geometry Link row dynamically links data in the Geometry window with the corresponding
data in an eActivity. You can display lines and figures drawn in Geometry as values and
mathematical expressions in a Geometry Link row.
Dragging a line or figure from the Geometry window to a Geometry Link row in an eActivity
converts the line or figure to its mathematical expression. This expression is interlinked with
its Geometry window figure, so modifying one causes a corresponding change in the other.
u To input a Geometry Link row
Example: To drag one side of a triangle drawn on the Geometry window and link it to an
eActivity
(1) Open the eActivity application. Next, tap [Insert] and then [Geometry] to insert a
Geometry strip.
(2) On the Geometry window that appears in the lower half of the screen, draw a triangle.
• For details about Geometry window operations, see Chapter 8.
(3) Tap the eActivity window just below the Geometry strip.
• This makes eActivity the active window.
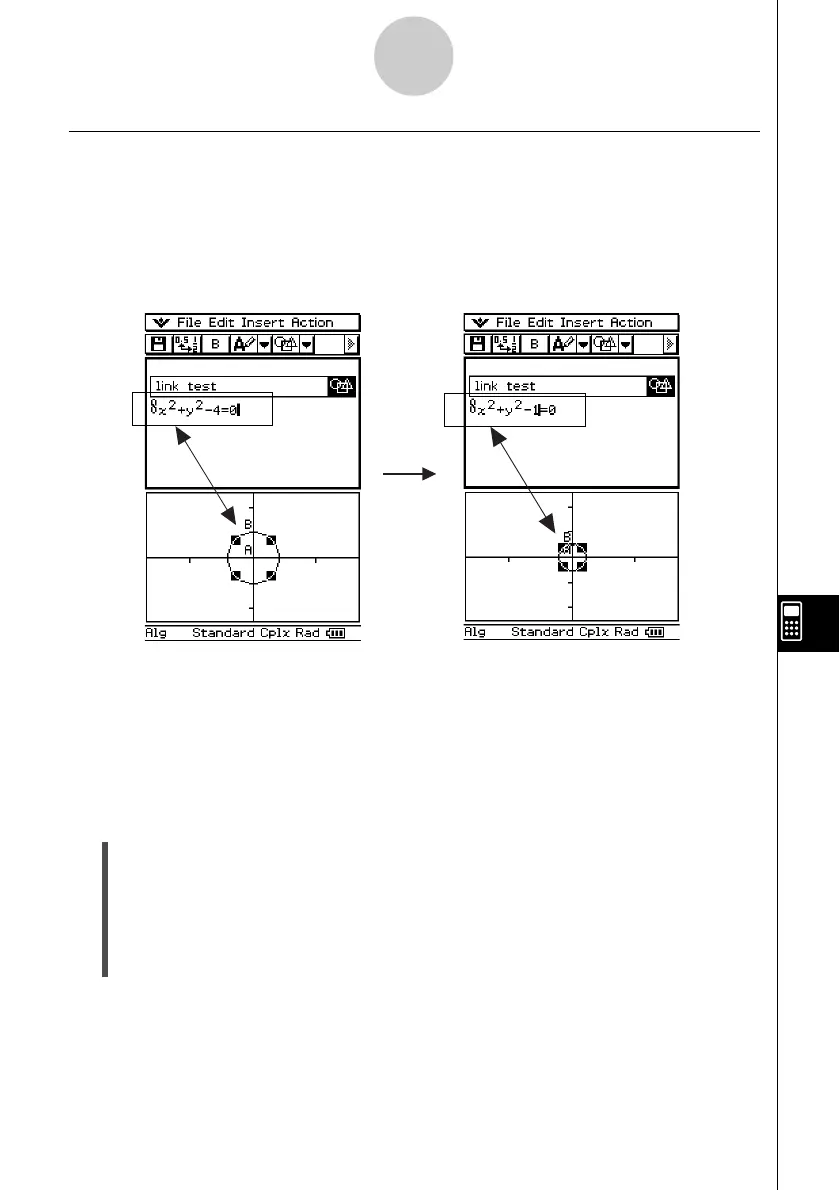
Example of inserting a Geometry Link row
Modifying the equation in a Geometry Link updates the figure in the Geometry window.
Conversely, changing the shape, position, or some other parameter of the figure on the
Geometry window updates the equation in the Geometry Link.
10-3-12
Inserting Data into an eActivity