Chapter 13: Spreadsheet Application 219
Chapter 13:
Spreadsheet Application
The Spreadsheet application provides you with powerful, take-along-anywhere spreadsheet capabilities
including graphing and statistical calculations on your ClassPad. A spreadsheet has 999 rows and 64 columns
(A1 to BL999).
The Spreadsheet window shows a screen of cells and their contents. Each cell can contain a value, expression,
text, or a formula. Formulas can contain a reference to a specific cell or a range of cells.
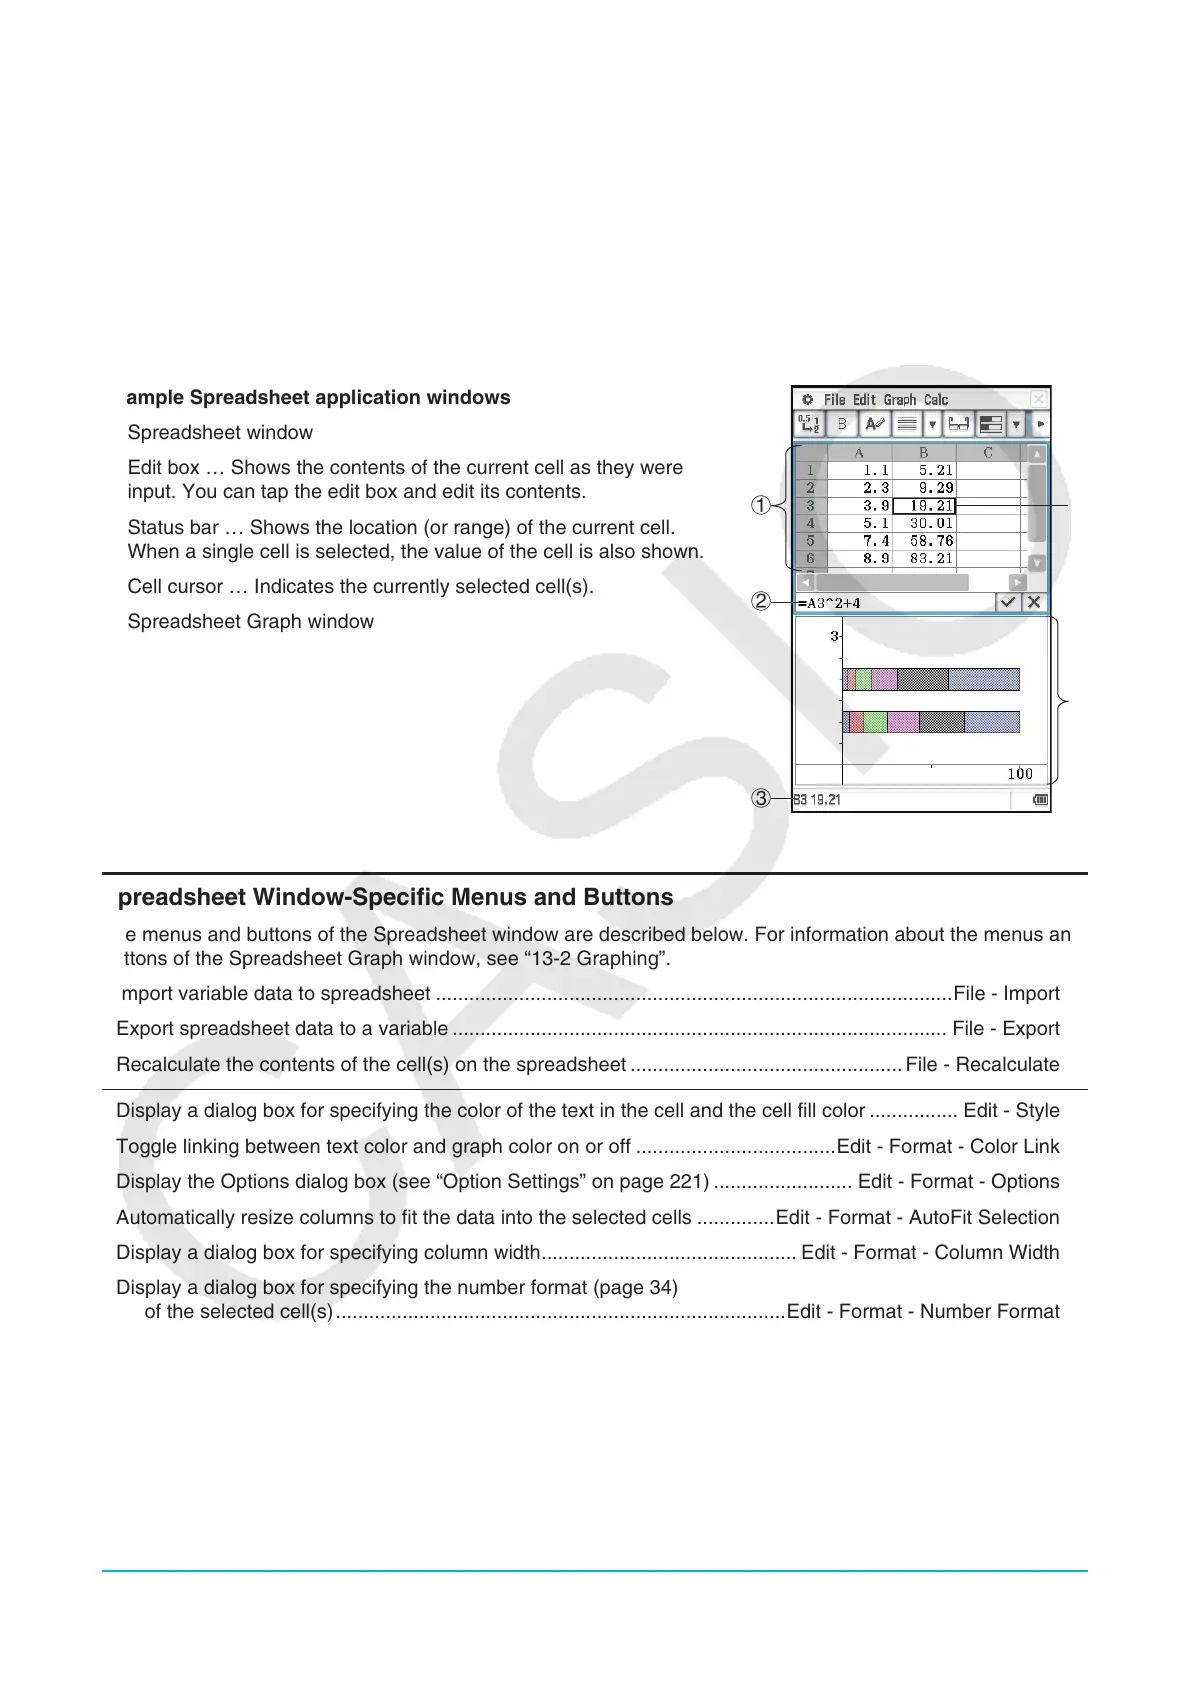
Example Spreadsheet application windows
1 Spreadsheet window
2 Edit box … Shows the contents of the current cell as they were
input. You can tap the edit box and edit its contents.
3 Status bar … Shows the location (or range) of the current cell.
When a single cell is selected, the value of the cell is also shown.
4 Cell cursor … Indicates the currently selected cell(s).
5 Spreadsheet Graph window
1
2
5
3
4
Spreadsheet Window-Specific Menus and Buttons
The menus and buttons of the Spreadsheet window are described below. For information about the menus and
buttons of the Spreadsheet Graph window, see “13-2 Graphing”.
• Import variable data to spreadsheet .............................................................................................File - Import
• Export spreadsheet data to a variable ......................................................................................... File - Export
• Recalculate the contents of the cell(s) on the spreadsheet ................................................. File - Recalculate
• Display a dialog box for specifying the color of the text in the cell and the cell fill color ................ Edit - Style
• Toggle linking between text color and graph color on or off ....................................Edit - Format - Color Link
• Display the Options dialog box (see “Option Settings” on page 221) ......................... Edit - Format - Options
• Automatically resize columns to fit the data into the selected cells ..............Edit - Format - AutoFit Selection
• Display a dialog box for specifying column width .............................................. Edit - Format - Column Width
• Display a dialog box for specifying the number format (page 34)
of the selected cell(s) .................................................................................Edit - Format - Number Format
• Display or hide the Cell Viewer window ...................................................... Edit - Format - Cell Viewer or A
• Display a dialog box for specifying a cell to jump to .................................................. Edit - Select - Goto Cell
• Display a dialog box for specifying a range of cells to select ...............................Edit - Select - Select Range
• Insert row(s)/column(s) .......................................... Edit - Insert - Rows or K / Edit - Insert - Columns or a
• Delete the currently selected row(s)/column(s) .. Edit - Delete - Rows or H / Edit - Delete - Columns or J
• Delete the contents of the currently selected cells ............................................................Edit - Delete - Cells
 Loading...