Display bezel
Removing the display bezel
Prerequisites
1. Follow the procedure in Before working inside your computer.
2. Remove the base cover.
3. Remove the display assembly.
About this task
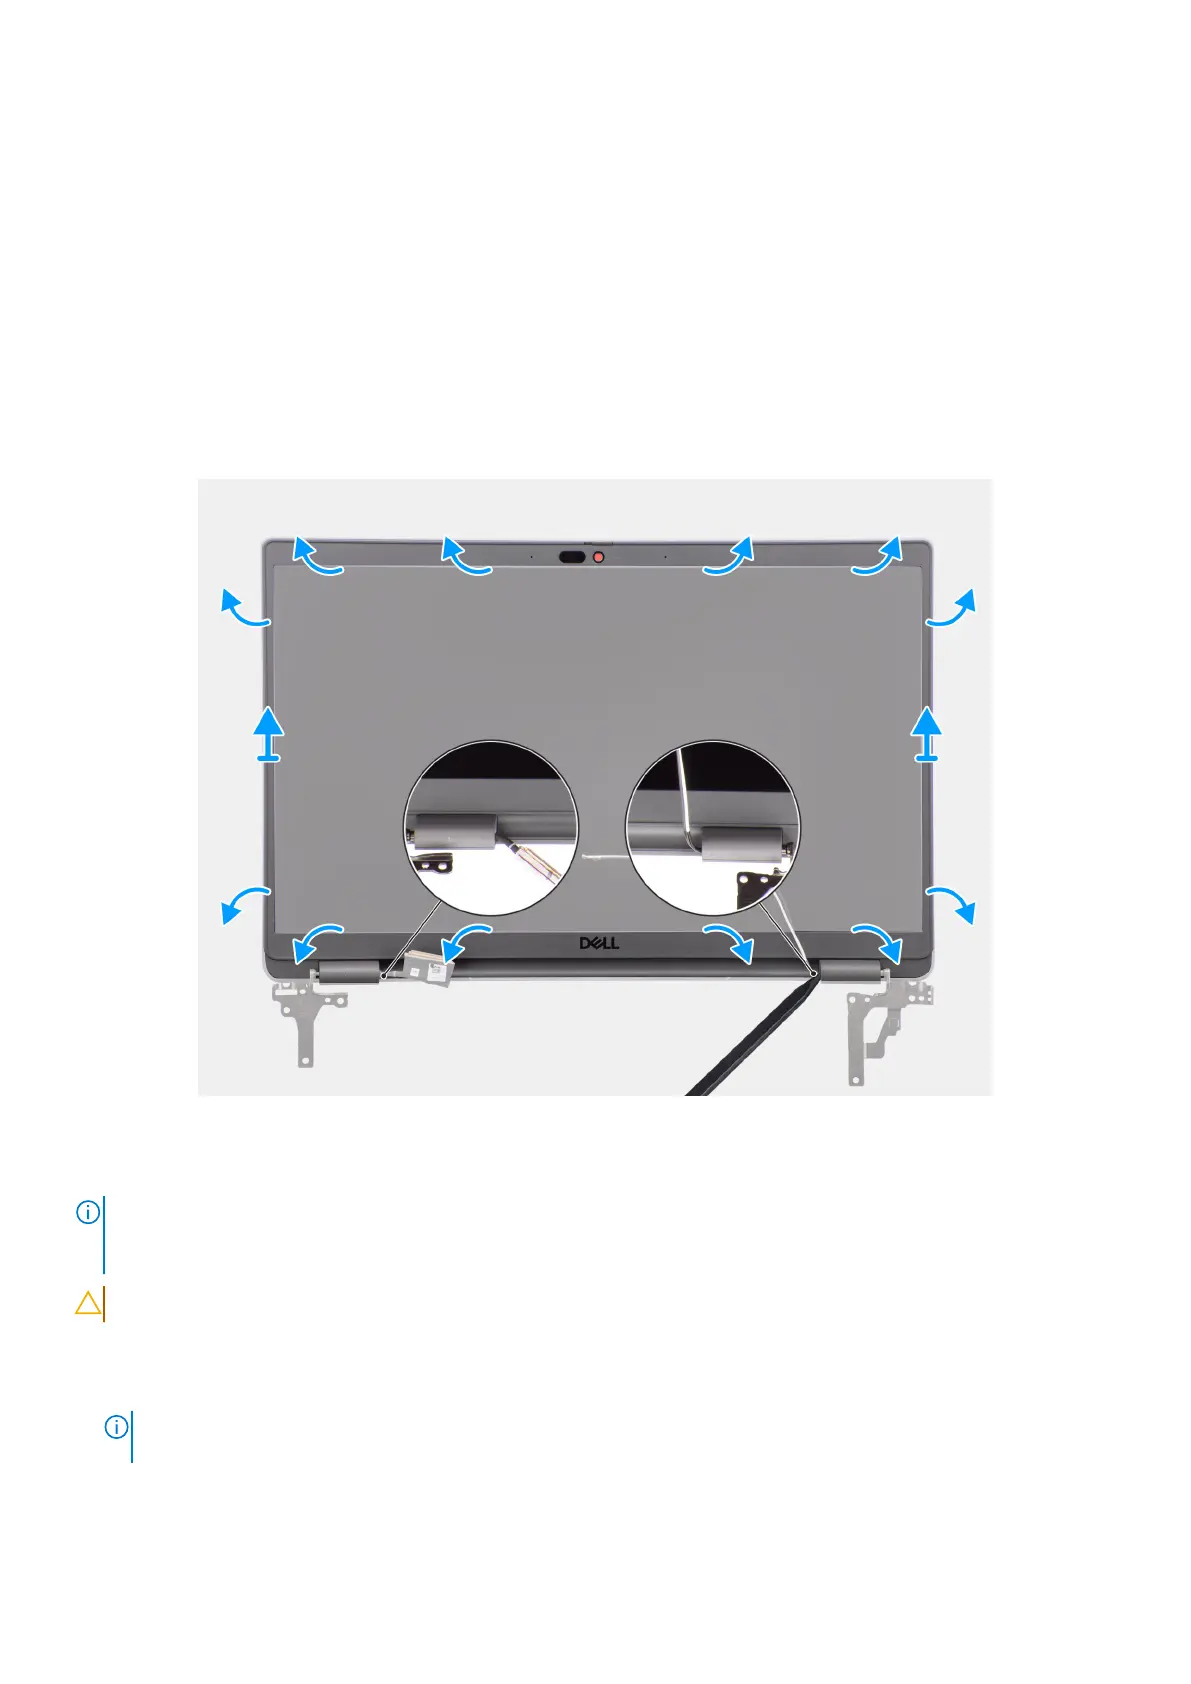
The following image shows the display bezel and provide a visual representation of the removal procedure.
Figure 53. Removing the display bezel
Steps
NOTE:
The display bezel is adhered to the display panel with adhesive. Insert a plastic scribe into the recesses near both
hinge caps to start the prying process to release the display bezel. Pry along the outside edge of the display bezel and work
your way around the entire display bezel until the display bezel is separated from the display cover.
CAUTION: Carefully pry and remove the display bezel to minimize the risk of display panel damages.
1. Using a plastic scribe, pry open the recesses near the left and right hinges on the bottom edge of the display bezel.
2. Carefully work your way around the edges of the display bezel to release it from the display back cover.
3. Lift the display bezel from the display assembly.
NOTE:
The display bezel is a consumable part and should be replaced with a new display bezel anytime it is removed
from the system.
84 Removing and installing Field Replaceable Units (FRUs)
 Loading...


