CHAPTER 2, INSTALLATION AND OPERATION
98307600 Rev. C-1 2-1
2.0 Installation and Operation
2.1 Mechanical Installation
Note
Before installation, the unit should be checked to
ensure that the instrument arrived undamaged. The
EC9830 Service Manual contains initial installation
inspection instructions.
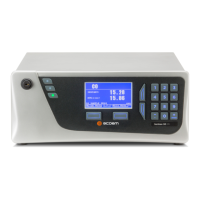
2.1.1 Selecting a Location
Select a location for the analyzer where temperature variation, dust, and moisture
are minimal. The location should be well ventilated and should allow convenient
access to the operator controls and front panel display.
2.1.1.1 Rack Mount or Enclosed Location
The analyzer is supplied as a bench-top version with rubber feet or with the
chassis slides to convert it to a rack-mount version. The optional rack-mount
version is 24 inches deep and fits into a 19 inch (48.3 cm) RETMA
instrumentation rack. The front panel will protrude slightly. Refer to the
instructions provided with the rack-mount kit for assembly into a rack.
Caution
The rack-mount version requires a properly
ventilated rack enclosure. The temperature
inside enclosures that are not properly ventilated
may rise as much as 15° C above the ambient air
temperature in the control room. The actual rack
temperature can rise above the specified limits
and cause the analyzer to operate outside of
specifications. Optimum operation is obtained at
an operating temperature of 20° to 30° C inside
the rack enclosure. The analyzer can operate in a
range of 5° to 40° C without risk of damage. For
ventilation calculations, use a heat dissipation
rating of 150 watts or 512 Btu per hour.
After the analyzer has been mounted, make the pneumatic and electrical
connections.
2.1.2 Connections
All pneumatic connections must be secure to ensure accurate operation of the
analyzer. The following information describes connection techniques for
 Loading...