EC 9830
Quick Start Guide.
Step 1 – Installation:
• Inspect analyzer for damage before turning on. Service Manual:- 1.1.
• Select an appropriate location. Operation Manual:- 2.1.1.
• Connect Gas lines. Operation Manual:- 2.1.2.2.
• Connect Analog Output Cables. Operation Manual:- 2.1.2.1.
• Connect RS232 Cables. Operation Manual:- 4.2.1.
• Check the mains power selection switch (115 or 230 VAC). Operation Manual:- 2.2.
• Connect AC Mains Power. Operation Manual:- 2.2.
Step 2 – Start-up:
• Set Service Switches. Service Manual:- 1.1.2.
• Turn On power. Operation Manual:- 2.2.
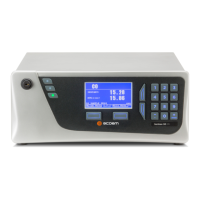
• The Display should read “9830 CO Analyzer”.
• Adjust the Display Contrast if required. Operation Manual:- 2.2.1.
• Verify that the software is running by observing the Ecotech Globe rotating in the bottom left
hand corner of the display.
Step 3. – Operation:
• Verify Instrument warm up and operation mode. Service Manual:- 2.2.
• Set the correct time and date. Operation Manual:- 2.3.3.
• If using RS232, configure the Interface menu. Operation Manual:- 2.5.12.
• Check SYSTEM FAULTS menu. All PASS. Operation Manual:- 2.5.21.
• Verify other menu settings. Service Manual:- 4.2.
Step 4. – Calibration:
• Perform a quick (single point) calibration. Operation Manual:- 2.4.
• Setup and Calibrate the Analog Outputs (if applicable). Operation Manual:- 2.6.3.
• If necessary, perform a leak check. Service Manual:- 3.3.10.
• If necessary, perform a flow calibration. Service Manual:- 3.5
• If necessary, perform a Multipoint calibration. Operation Manual:- 3.2.
Step 5. – Data Validation:
• Verify the results from your data acquisition system agree with the readings of the EC9830
CO analyzer.
• Verify that the analyzer responds to automatic calibration sequences.
The analyzer is now operating correctly.
 Loading...