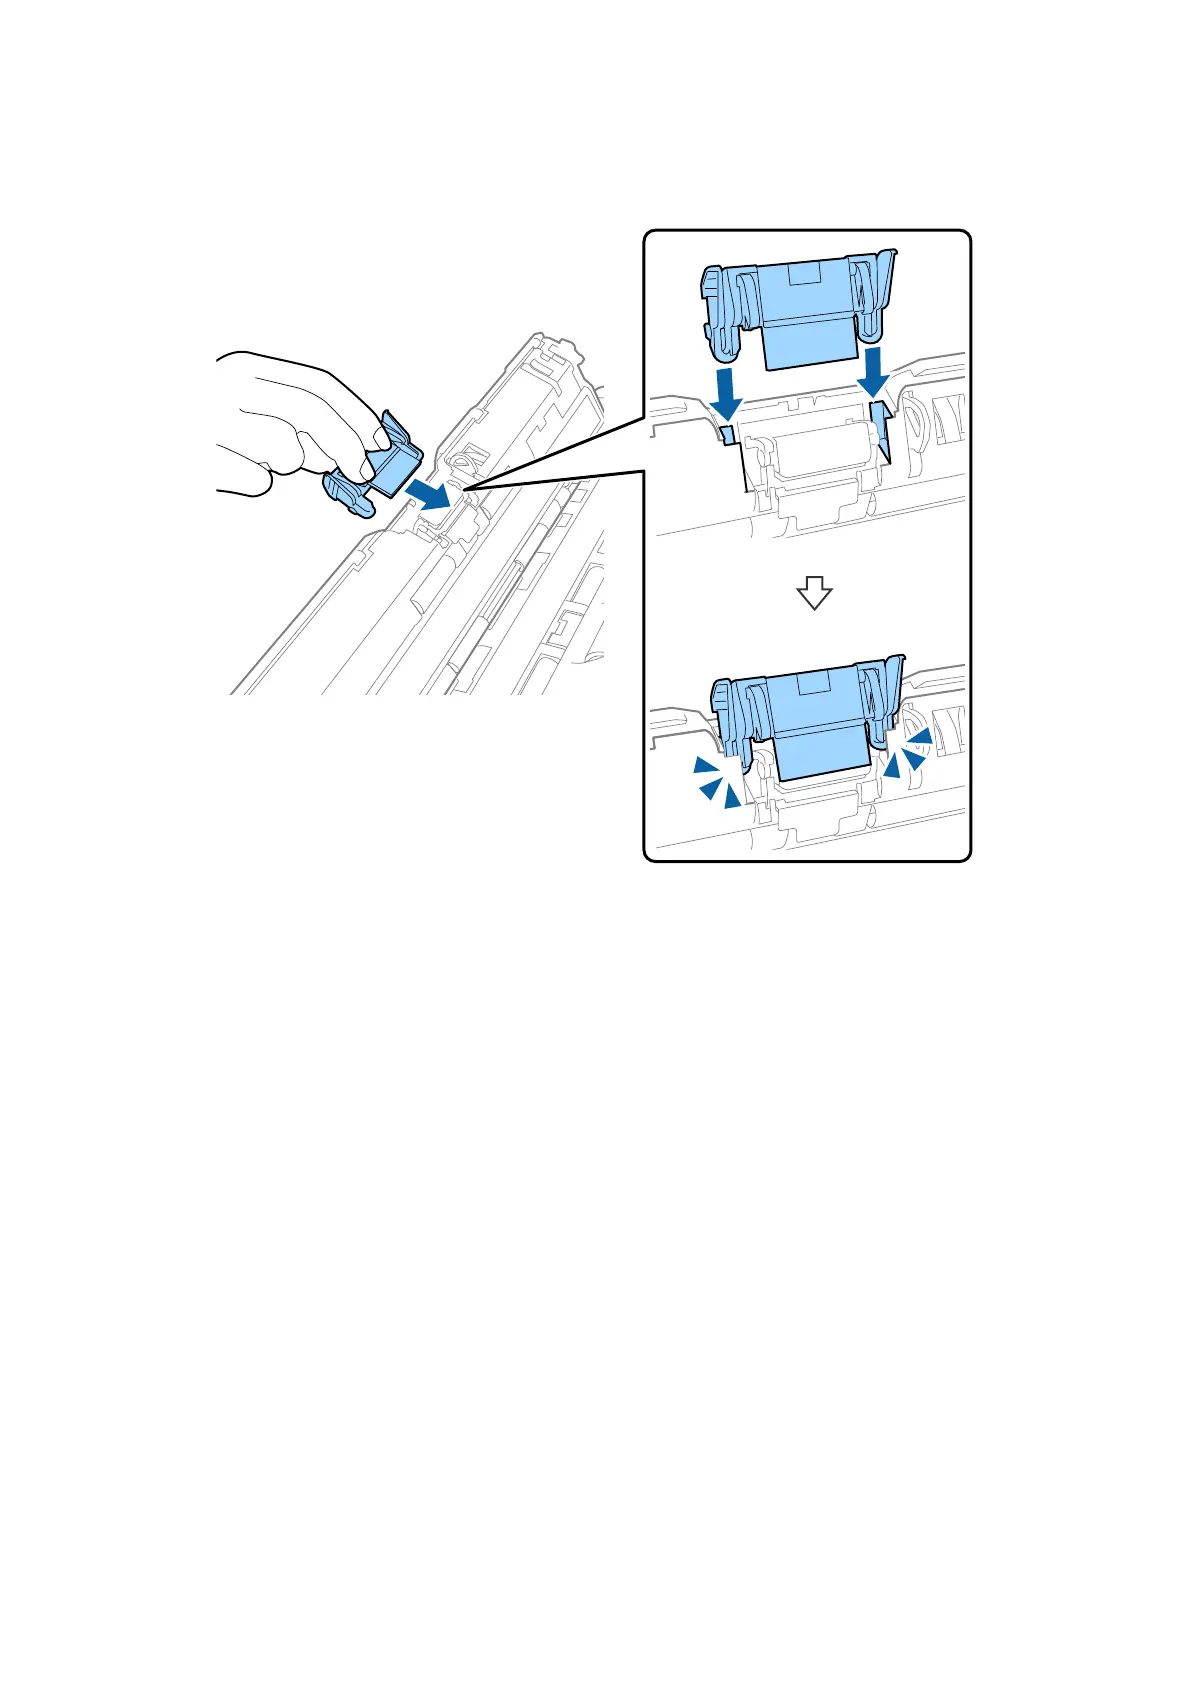
5. Put the new separation pad into the groove in the body to install it.
6. Press the edge of the scanner cover rmly at the
d
mark to close it.
7. Plug in the AC adapter, and then turn on the scanner.
8. Reset the scan number using Epson Scan 2 Utility.
Resetting the Number of Scans
Reset the number of scans using the Epson Scan 2 Utility aer replacing the pickup roller or the separation pad.
1. Turn on the scanner.
2.
Start Epson Scan 2 Utility.
❏ Wind ows 10
Click the start button, and then select All apps > EPSON > Epson Scan 2 > Epson Scan 2 Utility.
❏ Windows 8.1/Windows 8/Windows Server 2012 R2/Windows Server 2012
Start screen > Apps > Epson > Epson Scan 2 Utility.
❏ Windows 7/Windows Vista/Windows XP/Windows Server 2008 R2/Windows Server 2008/Windows Server
2003 R2/Windows Server 2003
Click the start button, and then select All Programs (or Programs) > EPSON > Epson Scan 2 > Epson
Scan 2 Utility.
User's Guide
Maintenance
111
 Loading...