Installation 4. First Step
T-B series Rev.1 13
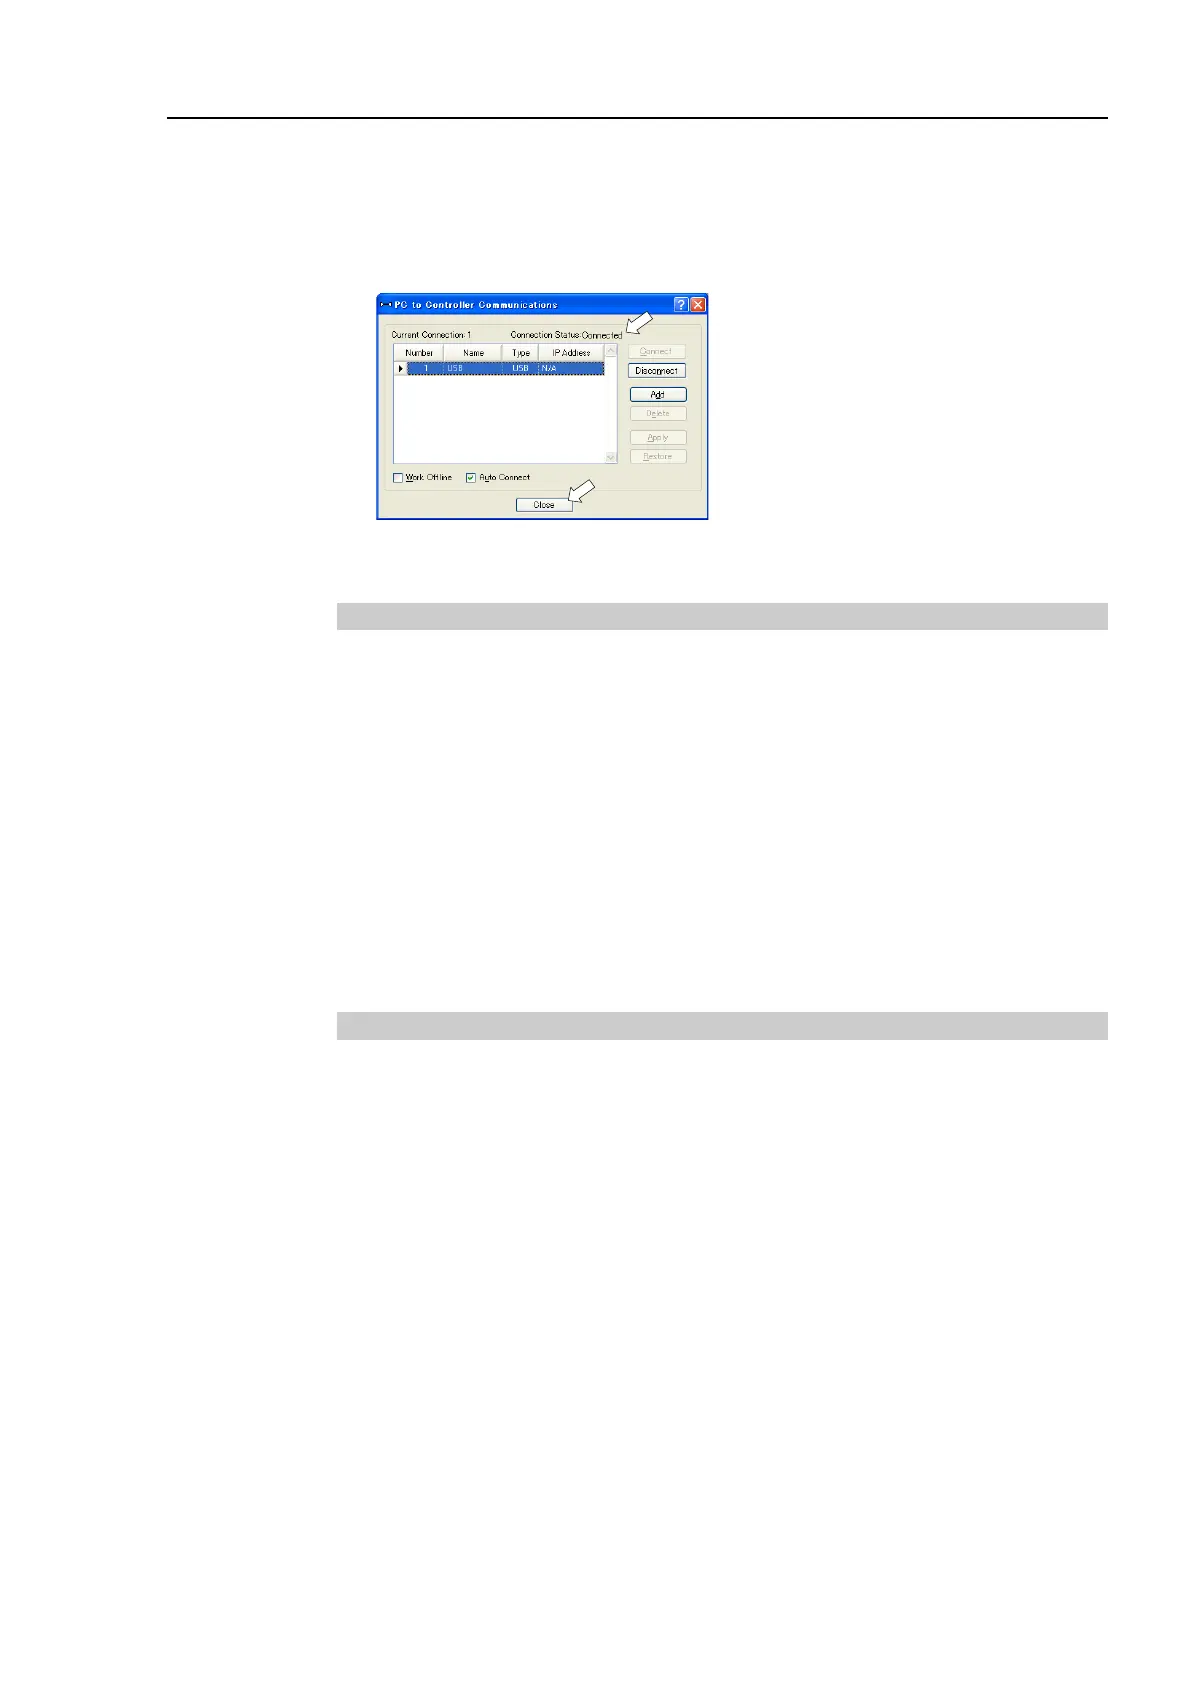
(6) Select the “No.1 USB” and click the <Connect> button.
(7) After development PC and the Manipulator connection is completed, “Connected” is
displayed in the [Connection status:]. Make sure that “Connected” is displayed and
click the <Close> button to close the [PC to Controller Communications] dialog.
Connection of the development PC and the Manipulator is completed. Now robot system
can be used from EPSON RC+ 7.0.
4.2.4 Backup the Initial Condition of the Manipulator
Backup the Manipulator data configured before shipment.
Project and system configuration backup procedure:
(1) From the [Project] menu, select [Copy].
(2) Change the [Destination Drive] to an arbitrary drive.
(3) Click <OK>. The project will be copied to the external media.
(4) From the [Tools] menu, select [Controller].
(5) Click on the <Backup Controller> button.
(6) Select the arbitrary drive.
(7) Click <OK>. The system configuration will be backed up on the external media.
4.2.5 Disconnection of Development PC and Manipulator
Disconnection of the development PC and the Manipulator is indicated.
(1) Select the EPSON RC+ 7.0 menu-[Setup]-[PC to Controller Communications] to
display the [PC to Controller Communications] dialog.
(2) Click the <Disconnect> button.
Manipulator and the development PC is disconnected and USB cable can be removed.
If the USB cable is removed while the Manipulator and the development PC are connected,
the Manipulator stops. Be sure to click the <Disconnect> button in the [PC to Controller
Communications] dialog before removing the USB cable.
NOTE
 Loading...


