3-2. Piping to outdoor unit
¢ Knocking out procedure in piping
CAUTION
• Be careful not to deform or scratch the panel while opening the knock out holes.
• To protect the piping insulation after opening a knock out hole, remove any burrs from the
edge of the hole. It is recommended to apply rust prevention paint to the edge of the hole.
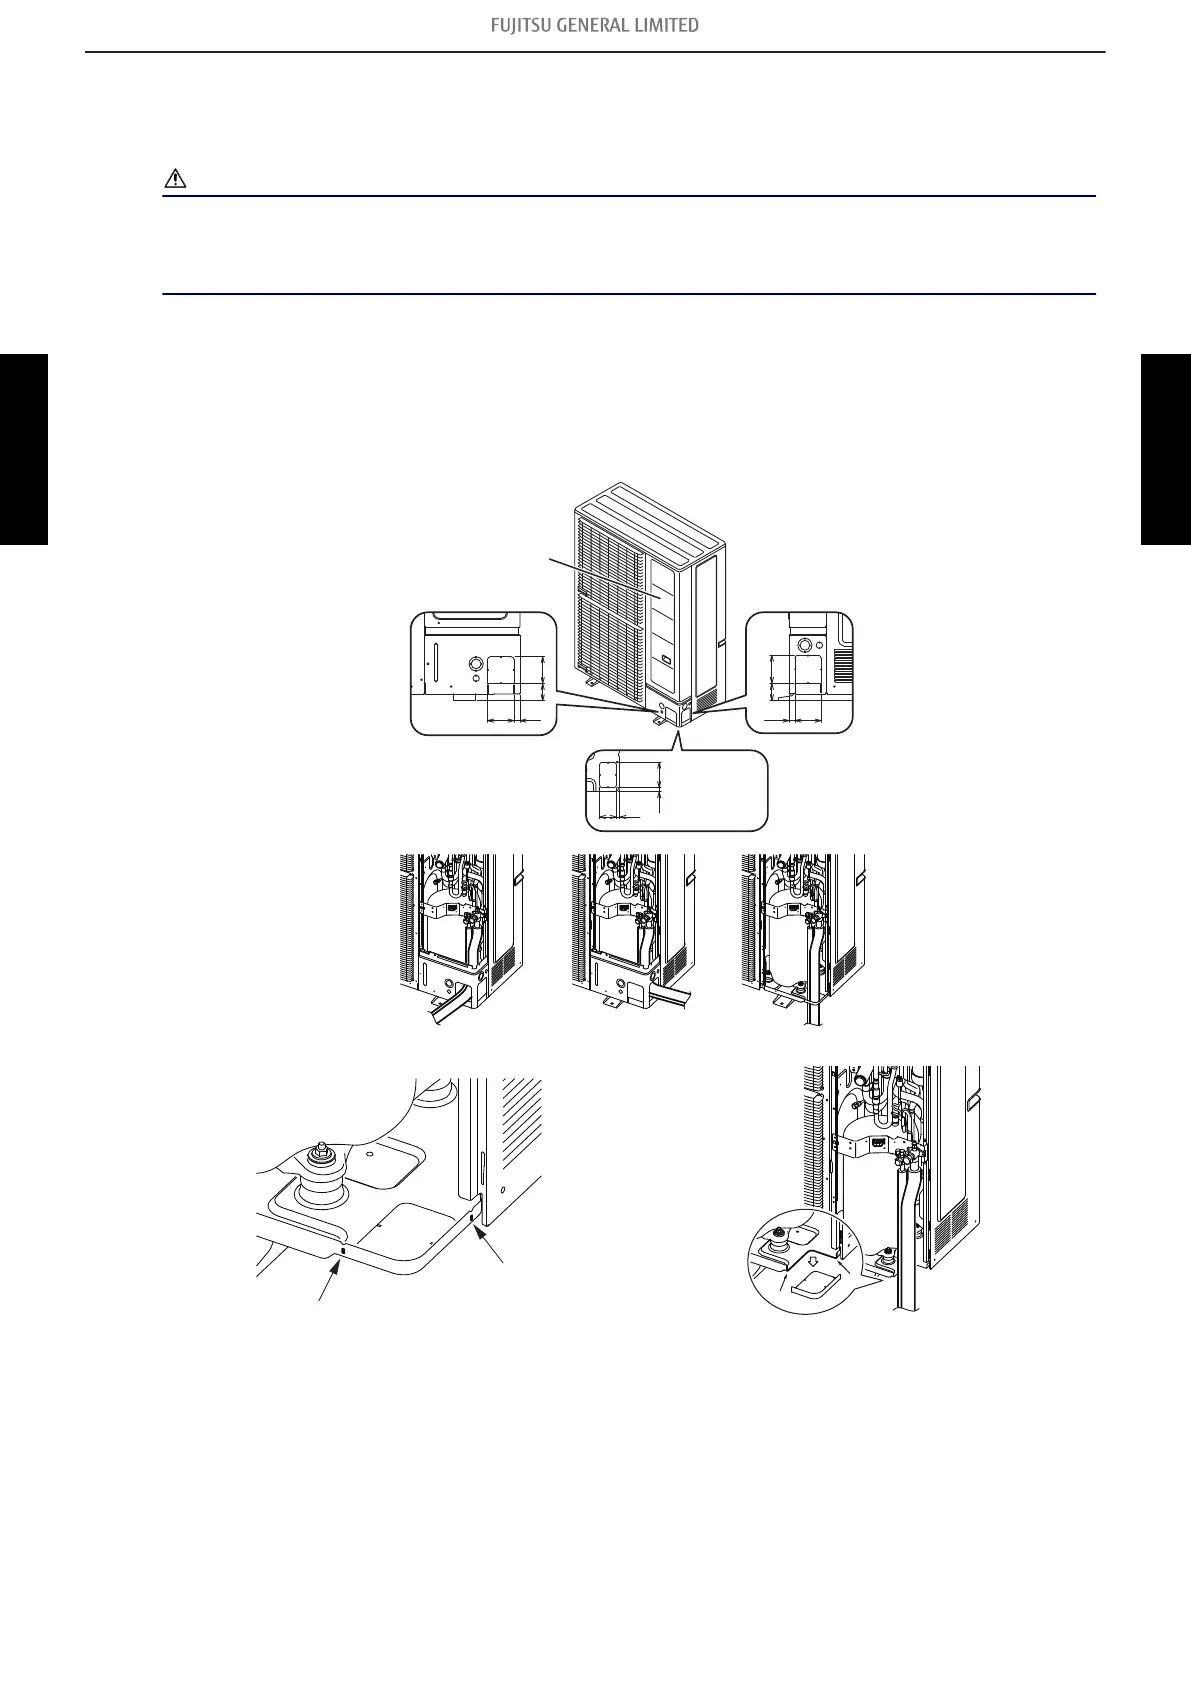
• Pipes can be connected from 3 directions, front, lateral side, and bottom. (Fig. A)
• When connecting at the bottom, remove the service panel and piping cover on the front of the
outdoor unit, and open the knock out hole provided at the bottom corner of the piping outlet.
• It can be installed as shown as on “Fig. B” cutting out the 2 slits as indicated on “Fig. C”.
(When cutting slits, use a steel saw.)
9221
61 100
94 21
61 94
60 12
14 90
Unit: mm
Fig. A
Service panel
Top view of
the base
Front connection Lateral connection Bottom connection
- 197 -
3-2. Piping to outdoor unit 3. Pipe installation
SYSTEM
DESIGN
SYSTEM
DESIGN
 Loading...