Do you have a question about the GE P50 Agile P253 and is the answer not in the manual?
Technical manual for the GE P50 Agile motor protection relay.
Overview of the P253 motor protection relay and its features.
Detailed list of the P253 relay's protection and control functions.
Specific protection and control functions offered by the P253 relay.
Functions for monitoring motor performance and analyzing faults.
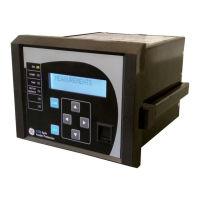
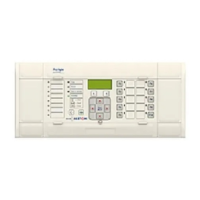
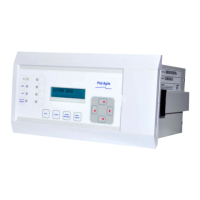
Description of the relay's front panel controls and display.
Details on the relay's communication ports and protocols.
Summary of the relay's functional capabilities and features.
Information and options for ordering the P253 relay.
Essential safety information for personnel working with the equipment.
Explanation of symbols used in the manual and on the equipment.
Procedures for installing, commissioning, and servicing the device.
Safety precautions related to lifting and moving the equipment.
Critical electrical safety warnings and precautions for the equipment.
Compliance requirements for UL, CSA, and CUL certifications.
Specifications and requirements for protective fuses.
Instructions and guidelines for making electrical connections to the equipment.
Requirements for equipment classified under Protection Class 1.
A checklist of steps to perform before energizing the equipment.
Information regarding the peripheral circuitry connected to the device.
Procedures for upgrading components and servicing the equipment.
Procedures for safely decommissioning and disposing of the equipment.
Details on the standards and directives the device complies with.
Overview of the P253 relay's internal hardware components and architecture.
Detailed explanation of the P253 hardware design and its components.
Description of the microcontroller and DSP module used in the P253.
Details on the microcontroller's analog input processing capabilities.
Specifications for the digital input and output modules.
Information on the power supply unit and its specifications.
Details about the communication module and its interfaces.
Description of the HMI module including LCD, keys, and LEDs.
Overview of the P253 relay's front panel components and layout.
Explanation of the user interface elements: LCD, Touch Keys.
Details about the 16x2 character backlit LCD display.
Description of the functions of the touch keys on the front panel.
Information on the relay's LEDs for status indication.
Details about the rear RS485 port for SCADA communication.
Description of the front USB port for PC connection.
Overview of the common methodology for setting device parameters.
Step-by-step guide on how to change settings using the HMI.
Procedure for entering and managing the device password.
Description of the menu structure and main menu contents.
Information displayed immediately after power-on or reset.
Details of the options available in the main menu.
Menu for viewing and editing system-related data.
Menu for accessing fault, event, maintenance, and alarm records.
Menu for displaying measured parameters of the relay.
Menu for configuring circuit breaker control settings.
Menu for setting and adjusting the relay's date and time.
Menu for configuring various device settings and options.
Menu for setting transformer ratios for CTs.
Menu for controlling the recording of events and faults.
Menu for configuring communication settings.
Menu for configuring the relay's input/output assignments.
Menu for configuring the relay's output contact functions.
Menu for configuring disturbance record settings.
Menu for performing commissioning tests on the relay.
Menu for configuring protection settings in Group 1.
Diagrams illustrating the relay's configuration menu flow.
Overview of the main menu structure and navigation.
Procedure for viewing and editing relay settings.
How to view system data settings via the menu.
Navigation through the different types of records stored by the relay.
Accessing and viewing the relay's measured parameters.
Settings related to circuit breaker control.
Settings for configuring the relay's date and time.
Menu for overall device configuration settings.
Menu for setting transformer and CT ratios.
Controls for managing stored records like events and faults.
Settings for configuring communication interfaces and protocols.
Configuration of digital and analog inputs/outputs.
Configuration of output relay functions and assignments.
Settings for configuring disturbance recording parameters.
Menu for performing various commissioning tests on the relay.
Configuration settings for Protection Group 1.
Configuration settings for Protection Group 2.
Detailed description of the protection functions implemented in the P253 relay.
Protection functions for motor starting, stall protection, and related parameters.
Explanation of how stall protection is detected and implemented.
Description of the prolonged start detection criteria.
Protection against locked rotor conditions during motor starting.
Protection against stall conditions occurring while the motor is running.
Limitation of motor starts to prevent overheating.
Mechanism for inhibiting motor starts based on thermal state or time.
Setting for the minimum time interval between consecutive motor starts.
Protection against motor overheating due to sustained overloads.
Description of the thermal model used for overload protection.
Calculation of trip time based on thermal state and current.
How thermal overload protection is implemented in the relay.
Function to prevent restart after a trip until the motor cools down.
Inhibiting thermal trips during critical motor start-up conditions.
Enabling emergency restart functionality for the motor.
Fundamental principles of overcurrent protection in power systems.
Explanation of Inverse Definite Minimum Time (IDMT) characteristics.
How protection functions are implemented using system quantities.
Protection against phase faults and motor short circuits.
Implementation details for phase overcurrent protection.
Protection against negative sequence currents in the motor.
Protection against damage caused by loss of phase.
Implementation of negative sequence overcurrent protection.
The logic behind negative sequence overcurrent protection.
Protection against earth faults in the motor system.
Details of the elements used for earth fault protection.
The logic used for earth fault protection.
Protection for detecting low-level earth faults.
Specific settings for sensitive earth fault protection.
Protection against earth faults within a specific zone, like windings.
Implementation details for restricted earth fault protection.
Guidance on applying restricted earth fault protection.
Protection against loss of load conditions.
Protection to detect and react to circuit breaker failure.
Implementation details for circuit breaker fail protection.
The logic diagram and operation of circuit breaker fail protection.
Function to block tripping during motor inrush current using harmonic analysis.
Implementation details for the second harmonic blocking function.
Detailed table of protection parameters, default settings, and ranges.
Configuration of system data like language, model, and software version.
Settings related to circuit breaker control functions.
Configuration for the relay's date, time, and daylight saving settings.
Settings for device configuration, including groups and system settings.
Configuration of transformer and current transformer ratios.
Settings for managing and clearing stored records.
Configuration parameters for communication interfaces.
Configuration of digital inputs, outputs, LEDs, and logic equations.
Configuration settings for output relays and their functions.
Settings for configuring disturbance recording parameters.
Settings for commissioning tests and procedures.
Configuration settings applicable to protection groups.
System configuration parameters within protection groups.
Detailed settings for overcurrent protection stages.
Settings for measured earth fault protection (IN1).
Settings for derived earth fault protection (IN2).
Configuration parameters for thermal overload protection.
Configuration parameters for loss of load protection.
Configuration parameters for negative sequence overcurrent protection.
Configuration parameters for circuit breaker fail protection.
Configuration parameters for stall detection protection.
Configuration parameters for limiting the number of motor starts.
Instructions on how to view stored records.
Overview of monitoring and control functions for the P253 relay.
Details on logging and viewing event, fault, disturbance, and start-up records.
Explanation of how event records are generated and stored.
Information on alarm conditions and how they are logged.
Details about fault records, including measurements and time stamps.
Information on maintenance records for hardware and software issues.
Details on recording and extracting disturbance waveforms.
Recording motor starting current for performance monitoring.
Functions for clearing stored records and resetting thermal state.
How to view measured system quantities on the LCD.
Display of primary and secondary current measurements.
Display of motor thermal state, load current, and start-up parameters.
Configuration and status monitoring of opto-isolated inputs.
Information on the relay's output contacts and their functions.
Assigning functions to output relays RL1 to RL6.
Configuration of output relay contacts as self-reset or latching.
Setting the open time for output relay contacts.
Configuration of the unit's programmable LEDs.
Configuration of logic equations for advanced functions.
Monitoring the status and condition of the circuit breaker.
Supervising the circuit breaker's open operation time.
Generating alarms for circuit breaker open operation counts.
Functions for controlling the circuit breaker locally or remotely.
Controlling the circuit breaker via the IED menu.
Controlling the circuit breaker remotely via SCADA.
Supervision of the trip circuit for correct operation.
Calculations for external resistors used in trip circuit supervision.
Features for monitoring the relay's internal hardware and software health.
The watchdog feature for continuous hardware monitoring.
Overview of SCADA communication protocols supported by the P253.
Description of Modbus protocol application on the Px50 platform.
Details on physical connection and link layer for Modbus.
Supported Modbus function codes and protocol mapping.
Mapping of Modbus function codes to device operations.
Description of the IEC 60870-5-103 protocol implementation.
General overview of the IEC 60870-5-103 protocol.
Details on physical connection for IEC 60870-5-103 via RS485.
Procedure for initializing the IEC 60870-5-103 communication.
Setting the time and date using IEC 60870-5-103 time synchronization.
Categorization and information for spontaneous events.
Requesting device status and information using General Interrogation.
Procedure for obtaining cyclic measurements from the device.
List of commands supported by the P253 relay.
Enabling and using test mode for relay verification.
Methods for extracting disturbance records via IEC 60870-5-103.
Instructions for configuring the IED for the IEC 60870-5-103 protocol.
Mapping of IEC 60870-5-103 objects, functions, and qualifiers.
Description of the DNP3.0 protocol implementation for the P253 relay.
General overview of the Distributed Network Protocol (DNP 3.0).
The DNP3.0 device profile document and its components.
Table identifying variations, function codes, and qualifiers for DNP3.0.
Identification of data points for DNP 3.0 application.
List and details of binary input points in DNP 3.0.
List of binary output status points and control output blocks.
List of binary counters and their associated data.
List of analog input points and their data.
General procedures for installing the P253 relay.
Guidelines for receiving, unpacking, storing, and dismantling the product.
Steps for inspecting the product upon receipt.
Instructions for carefully unpacking the relay and its components.
Recommendations for storing the relay before installation.
Precautions to observe when dismantling the device.
Instructions for mounting the P253 relay, typically flush panel mounting.
Detailed steps for flush panel mounting the relay.
Procedures and warnings for connecting the relay's terminals and wiring.
Checklist of items to verify before energizing the relay.
Ensuring the relay operates within specified limits.
Safety precautions for connecting and working with CT circuits.
Guidelines for performing insulation and dielectric strength tests.
Description of wiring types and connectors used for installation.
Details on the types of terminal blocks used for connections.
Specific terminal connections for CTs, power, inputs, and outputs.
Instructions for connecting the rear serial port for SCADA.
Guidelines for wiring the auxiliary power supply connections.
Instructions for establishing the protective earth connection.
Wiring guidelines for current transformers.
Specifications for EIA (RS) 485 serial communication connections.
Wiring instructions for the relay output contacts.
Instructions for connecting to the relay via USB.
Physical dimensions and cutout details for the P253 relay.
Overview of the commissioning process and tests for the P253 relay.
Description of the tests available in the commissioning test menu.
Procedure for enabling test modes for secondary injection and output testing.
Selecting test patterns for relay output contact testing.
Performing tests on relay output contacts by applying test patterns.
Procedure for testing the relay's programmable LEDs.
Checking the status of the opto-inputs under various conditions.
Checking the status of the relay's opto-outputs.
List of essential test equipment needed for commissioning.
Procedure for checking the relay's internal battery and replacing it.
Verifying the integrity of external wiring and connections.
Ensuring that all application-specific settings are correctly applied.
Verifying the operating time accuracy of protection functions.
Testing the operating time of the overcurrent protection stage 1.
Procedure for connecting the test circuit for overcurrent checks.
Steps for performing the overcurrent protection test.
Verifying the operating time of the overcurrent function.
Testing the thermal overload protection function.
Procedure for connecting the test circuit for thermal overload checks.
Steps for performing the thermal overload protection test.
Verifying the operating time of the thermal overload function.
Performing checks on the relay while the plant is energized.
Final verification steps after commissioning is complete.
Procedures for routine maintenance of the P253 relay.
Periodic checks to ensure correct operation and integrity of the relay.
Checking the status and function of opto-isolators.
Verifying the correct operation of the relay's output contacts.
Checking the accuracy of measured values against known sources.
Procedure for replacing the internal lithium coin battery.
Step-by-step instructions for replacing the battery.
Procedure for replacing the entire device if a fault occurs.
Instructions for cleaning the relay equipment safely.
Guidance for identifying and resolving common faults and errors.
Detailed technical specifications for the P253 relay.
Specifications related to the current input terminals and transformers.
Specifications for the relay's auxiliary power supply.
Specifications for the opto-isolated input circuits.
Specifications for the relay's output contacts.
Accuracy details for various protection functions.
Operating and reset time specifications for overcurrent protection.
Specifications for earth fault protection using standard CTs.
Specifications for earth fault protection using derived residual current.
Specifications for negative phase sequence overcurrent protection.
Specifications for the 2nd harmonic blocking function.
Specification for the Full Load Current setting.
Specifications for the thermal overload protection function.
Specifications for the loss of load protection function.
Specifications for the circuit breaker fail protection.
Specifications for stall detection protection.
Specifications for the number of starts limitation.
Environmental and operating conditions for the device.
Details on terminal types and connection specifications.
Mechanical design and environmental ratings of the P253 relay.
Details of standards and test methods for compliance.
Test procedures for verifying the auxiliary power supply.
Specifications for electromagnetic emission tests.
Specifications for electromagnetic immunity tests.
Specifications for mechanical endurance, shock, and vibration tests.
Specifications for environmental and climatic tests.
Schematic diagram illustrating the electrical connections for the P253 relay.