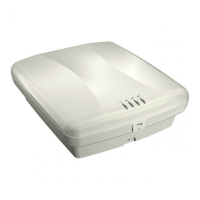
MSM310
Initial configuration (autonomous mode)
4-8
Step 3: Switch the MSM310 to autonomous mode
Note A factory-default MSM310 is assumed.
1. In a Web browser, enter the address: https://192.168.1.1.
2. A security certificate warning is displayed the first time you connect to the management
tool. This is normal. Select whatever option is needed in your Web browser to continue to
the management tool. The security warning will not appear again unless you change the
IP address of the MSM310.
3. On the Login page, specify admin for both Username and Password and then select
Login. The MSM310 management tool home page opens.
4. Select Switch to Autonomous Mode and confirm the change. The MSM310 restarts in
autonomous mode.
Note To avoid a delay after switching modes, clear the ARP (address resolution protocol) cache on
your computer. In Windows for example, from the Windows Start menu, select Run and
enter “arp -d” (without the quotes). Select OK.
Step 4: Log in
1. Wait until the Power light stops blinking and remains on.
2. On the Login page, specify admin for both Username and Password, and then select
Login.
3. On the License Agreement page, read the agreement and select Accept License
Agreement.
4. The registration page appears. It is recommended that you register later by selecting
Maintenance > Registration.
5. If a Country prompt appears, select the country in which the MSM422 will operate. The
correct country must be selected. See Country of use on page 4-5.
6. At the password prompt it is recommended that you change the default password and
select Save. Passwords must be at least six characters long and include four different
characters.
The management tool is organized with menus and sub-menus. Instructions for making menu
selections, such as “select Wireless > Local mesh” instruct you to select the Wireless menu
and then the Local mesh sub-menu, as follows:

 Loading...