MSM310-R
Installation
5-7
Step 2: Install cabling
According to your needs and local electrical codes and regulations, run grounding wires and
Ethernet cable to where the MSM310-R will be installed. For the Ethernet cable, allow for an
extra 0.6 meters (two feet) for connector attachment and drip loops. In addition, allow for an
extra 1.2 meters (four feet) of cable for the Ethernet surge suppressor.
Step 3: Prepare the weatherproof Ethernet cable
To provide a weatherproof seal, the Ethernet port on the MSM310-R uses a custom
weatherproof cable connector (supplied). You must terminate your Ethernet cable with this
connector as described in the following procedure. Cable length should not exceed 91 meters
(300 feet).
Caution Ruggedized Ethernet cables must be used for outdoor cable runs.
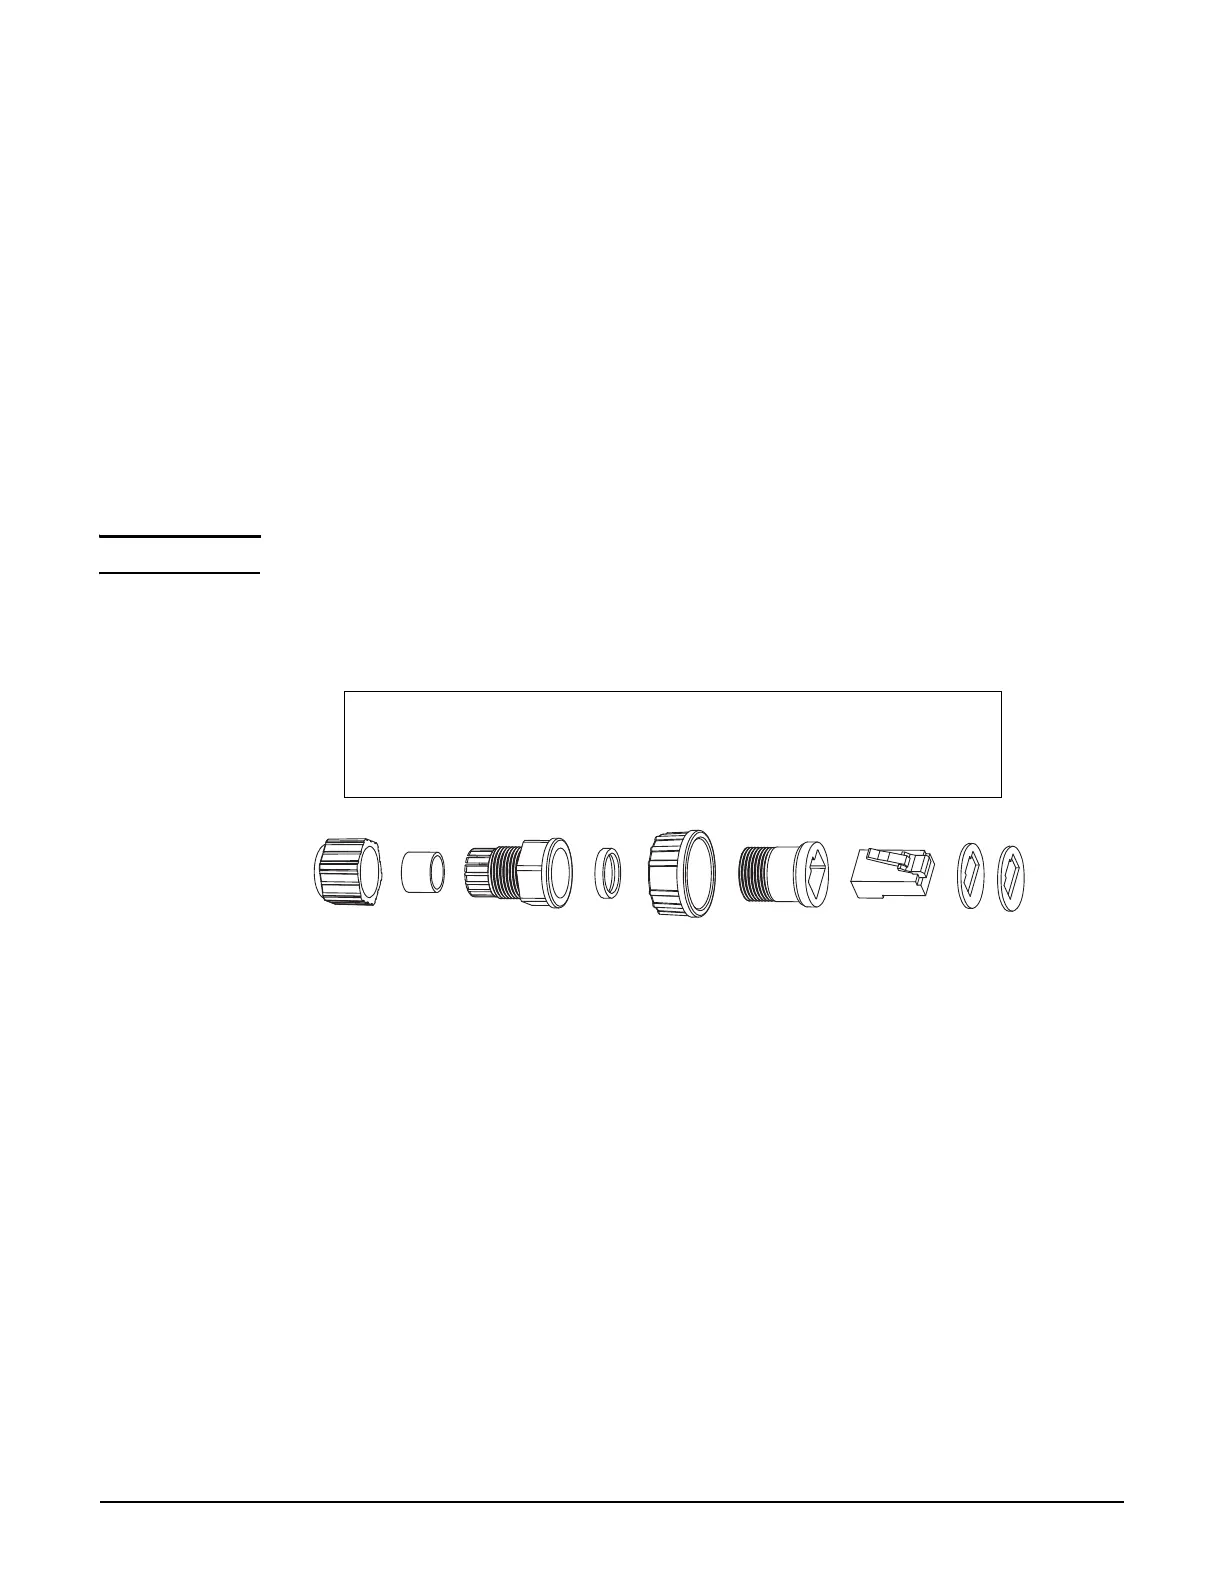
1. Carefully unpack the nine quick-disconnect items from the plastic bag, identifying all
parts as illustrated. If any parts are missing, DO NOT proceed until you get a replacement
parts kit.
2. If your Ethernet cable already has an RJ-45 connector on the end that will connect to the
HP equipment, remove the RJ-45 connector by cutting the cable at least 1.2 cm (.5 inch)
before the RJ-45 connector. Be sure to make a clean cut with a pair of sharp angle cutters.
The complete cut (through both the cable sheath and all wires) must occur in a single
cutting motion.
3. Hold Clamp Ring (3) horizontally, with its fingers to the left. Insert the Seal (2) into the
fingers on the left end so that it is flush with the end of the fingers. Insert the Gasket (4)
into the right end, pushing it against the ridge at the end of the threads. The Gasket is
beveled on one side. The beveled side should face inwards away from the Screw Nut.
4. Thread the Sealing Nut (1) onto the left end of the Clamp Ring (3). Tighten it only enough
for it to stay attached.
5. Hold the Screw Nut (5) vertically, with the open threads facing up, and drop the Body (6)
into it, with the RJ-45 connector opening facing up.
6. Hold the Clamp Ring (3) vertically below the Screw Nut/Body items and screw the Body
into the threads on the Clamp Ring (3). Tighten it only enough to stay attached. Note that
the Screw Nut (5) remains loose on the Body (6).
Weatherproof connector parts
1: Sealing nut
2: Seal
3: Clamp ring
4: Gasket
5: Screw nut
6: Body
7: RJ-45 plug
8: RJ-45 Gaskets
➀➁ ➂ ➃➄ ➅ ➆ ➇

 Loading...