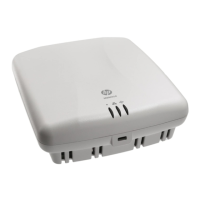
MSM320-R
Initial configuration (autonomous mode)
7-11
The Ethernet cable will typically need to be cut and have the cable end coming from the
PoE injector connected to the Ethernet surge suppressor input (Line) and have the cable
end coming from the MSM320-R connected to the Ethernet surge suppressor output
(Equipment). Follow the instructions included with the Ethernet surge suppressor.
Include a drip loop for both the input and output cables. Connect a grounding wire to the
Ethernet surge suppressor.
Step 5: Power the MSM320-R
The MSM320-R can be powered by:
A PoE-enabled switch. PoE-enabled switches are available from HP.
An HP 1-Port Power Injector (J9407A).
Initial configuration (autonomous mode)
This procedure describes how to switch a factory-default MSM320-R to autonomous mode
and then perform its initial configuration that enables you to establish a wireless connection
through the MSM320-R to the Internet.
In autonomous mode, the MSM320-R is managed via its Web-based management tool as
described in this section. This requires at least Microsoft Internet Explorer 7/8 or Mozilla
Firefox 3.x.
For controlled mode configuration, see Working with controlled APs in the MSM7xx
Controllers Management and Configuration Guide.
Caution Wireless security
For initial configuration convenience, a factory-default MSM320-R that has been switched to
autonomous mode has all wireless security options disabled. It is strongly recommended that
after performing this procedure, you enable a wireless security option to properly safeguard
the wireless network from intruders. See Wireless protection in the MSM3xx / MSM4xx
Access Points Management and Configuration Guide.
Note Do not power on the MSM320-R until directed.
Step 1: Configure your computer
1. Disconnect your computer LAN port and configure it to use a static IP address in the
range 192.168.1.2 to 192.168.1.254, and a subnet mask of 255.255.255.0. Set the
default gateway to 192.168.1.1, and DNS server to 192.168.1.1. For example to do this
in Windows Vista, use Control Panel > Network and Sharing Center > Manage
Network Connections > Local Area Connection, right-click Properties then select
Internet Protocol Version 4 (TCP/IPv4) > Properties.

 Loading...