11 TUNING THE CHASSIS 37
11.9 Adjusting the spring preload of the shock absorber x
Caution
Danger of accidents Disassembly of pressurized parts can lead to injury.
– The shock absorber is filled with high density nitrogen. Adhere to the description provided. (Your authorized Husqvarna work-
shop will be glad to help.)
Info
Before changing the spring preload, make a note of the present setting, e.g., by measuring the length of the spring.
Preparatory work
– Raise the motorcycle with a lift stand. ( p. 41)
– Remove the right side cover. ( p. 55)
– Remove the main silencer. ( p. 54)
– Remove the seat. ( p. 49)
– Remove the manifold. x ( p. 52)
– Remove shock absorber. x ( p. 49)
– After removing the shock absorber, clean it thoroughly.
401025-10
Main work
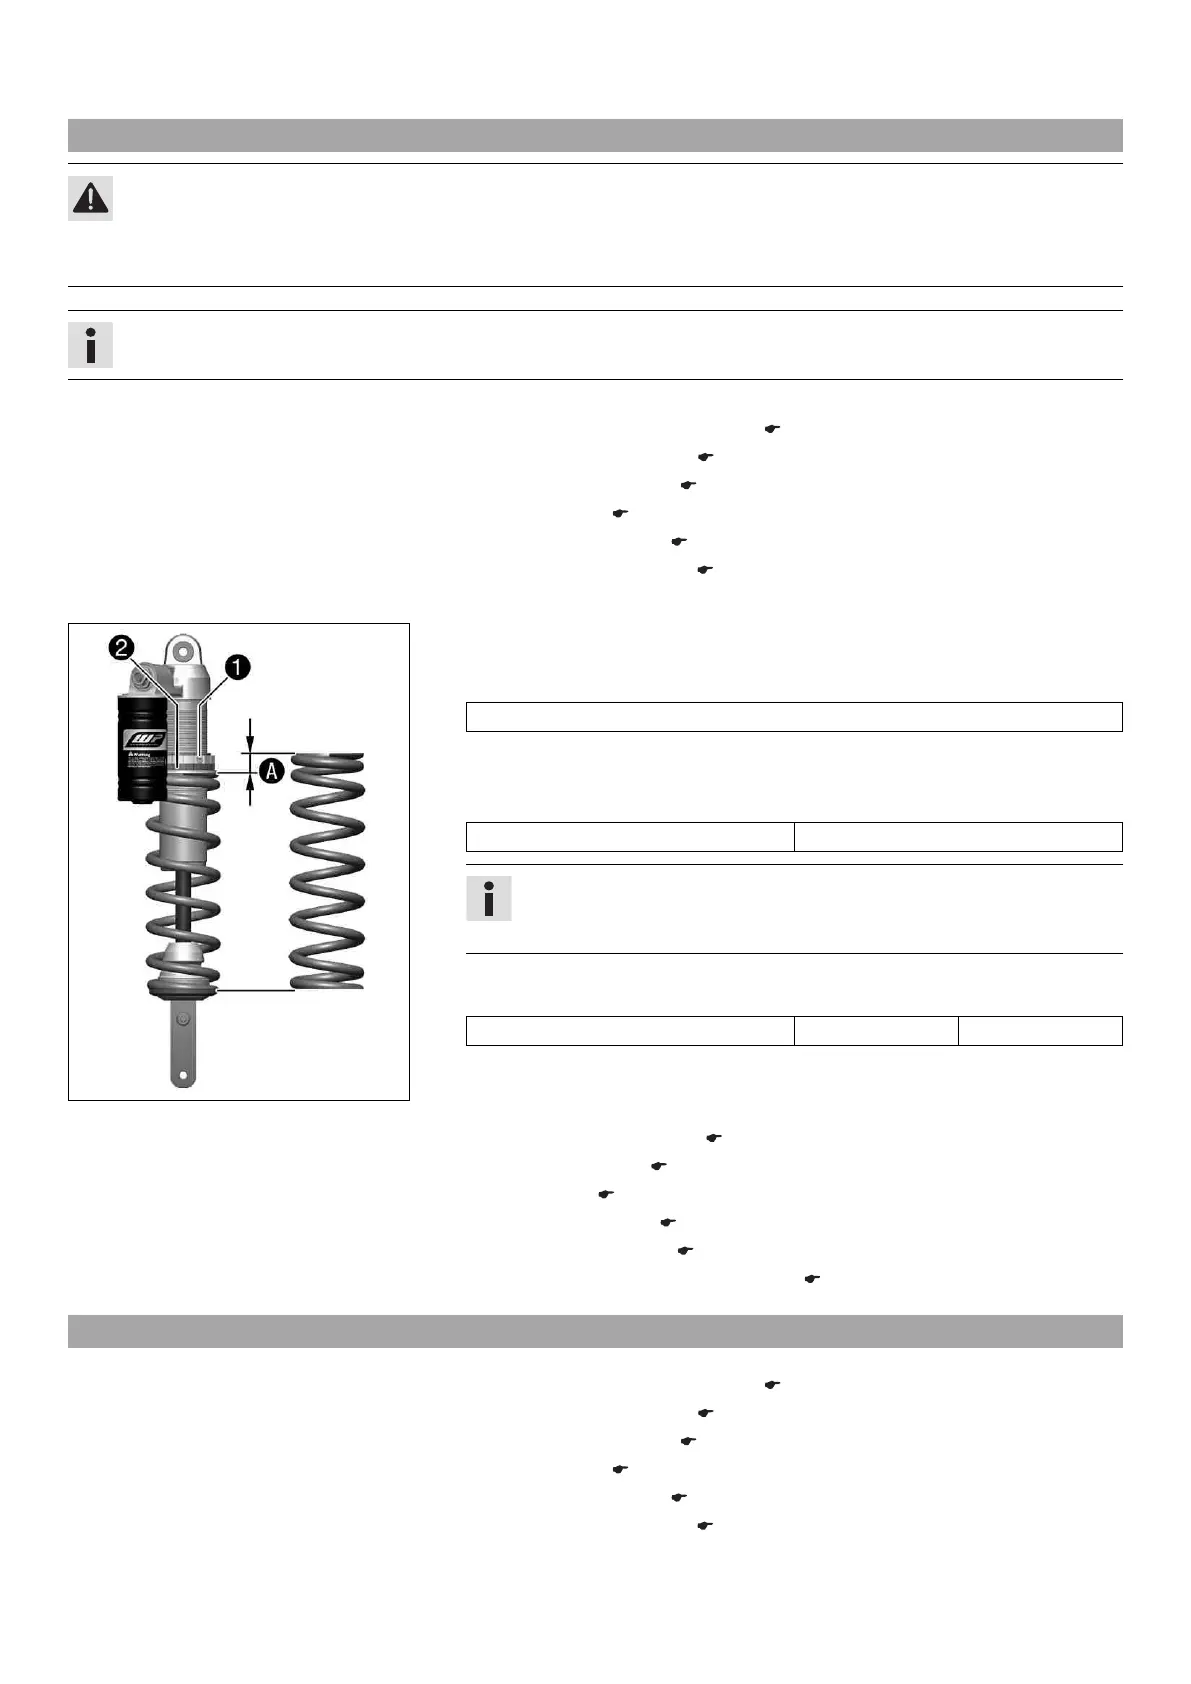
– Loosen screw
1
.
– Turn adjusting ring
2
until the spring is no longer under tension.
Hook wrench (T106S)
– Measure the overall spring length while the spring is not under tension.
– Tighten the spring by turning adjusting ring
2
to measurement
A
.
Guideline
Spring preload 13 mm (0.51 in)
Info
Depending on the static sag and/or the riding sag, it may be necessary to
increase or decrease the spring preload.
– Tighten screw
1
.
Guideline
Screw, shock absorber adjusting ring M5 5 Nm (3.7 lbf ft)
Finishing work
– Install the shock absorber. x ( p. 49)
– Install the manifold. x ( p. 53)
– Mount the seat. ( p. 49)
– Install the main silencer. ( p. 54)
– Install the right side cover. ( p. 56)
– Remove the motorcycle from the lift stand. ( p. 41)
11.10 Adjusting the riding sag x
Preparatory work
– Raise the motorcycle with a lift stand. ( p. 41)
– Remove the right side cover. ( p. 55)
– Remove the main silencer. ( p. 54)
– Remove the seat. ( p. 49)
– Remove the manifold. x ( p. 52)
– Remove shock absorber. x ( p. 49)
– After removing the shock absorber, clean it thoroughly.
 Loading...