12 SERVICE WORK ON THE CHASSIS 43
C00579-10
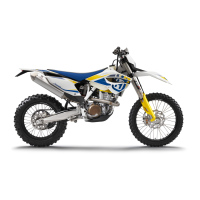
– Release screws
4
. Take out the left fork leg.
– Release screws
5
. Take out the right fork leg.
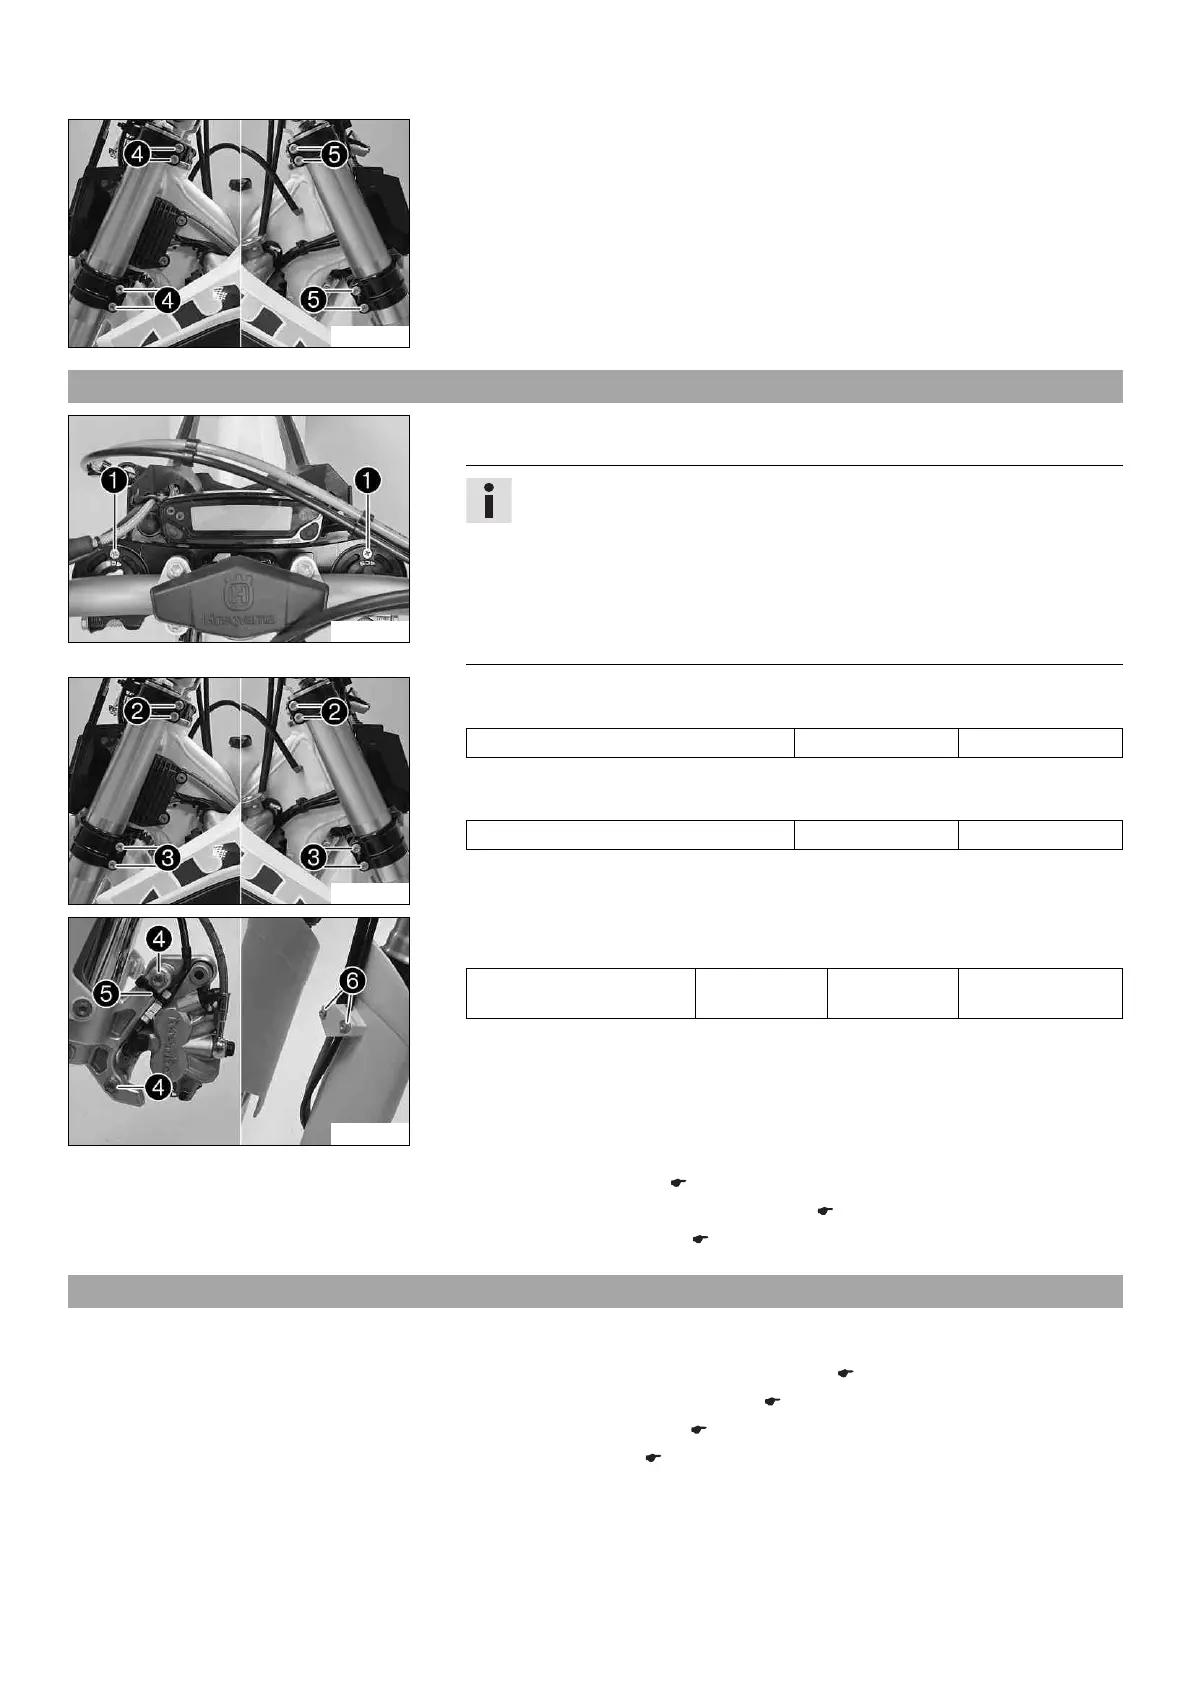
12.8 Installing the fork legs x
C00580-10
Main work
– Position the fork legs.
Info
The compression damping is located in the left fork leg COMP (white adjust-
ing screw). The rebound damping is located in the right fork leg REB (red
adjusting screw).
Grooves are milled into the side of the upper end of the fork legs. The sec-
ond milled groove (from the top) must be flush with the top edge of the upper
triple clamp.
Position bleeder screws
1
toward the front.
C00579-11
– Tighten screws
2
.
Guideline
Screw, top triple clamp M8 17 Nm (12.5 lbf ft)
– Tighten screws
3
.
Guideline
Screw, bottom triple clamp M8 15 Nm (11.1 lbf ft)
C00578-10
– Position the brake caliper and mount and tighten screws
4
.
Guideline
Screw, front brake caliper M8 25 Nm
(18.4 lbf ft)
Loctite
®
243™
– Mount cable binder
5
.
– Position the brake line, wiring harness, and clamp. Mount and tighten screws
6
.
Finishing work
– Install the front wheel. x ( p. 74)
– Install the headlight mask with the headlight. ( p. 82)
– Check the headlight setting. ( p. 84)
12.9 Removing the fork protector x
Preparatory work
– Switch off all power consumers and switch off the engine.
– Remove the headlight mask with the headlight. ( p. 82)
– Raise the motorcycle with a lift stand. ( p. 41)
– Remove the front wheel. x ( p. 74)
– Remove the fork legs. ( p. 42)
 Loading...