83
11. OTHER FUNCTIONS
D Capturing a screen
1. Display the screen that you want to capture.
2. Push
.
• “SCREEN CAPTURE Completed” is displayed.
L If the “Screen Capture Keyboard [Print Screen]” is
set to ON, push [Print Screen] on the keyboard.
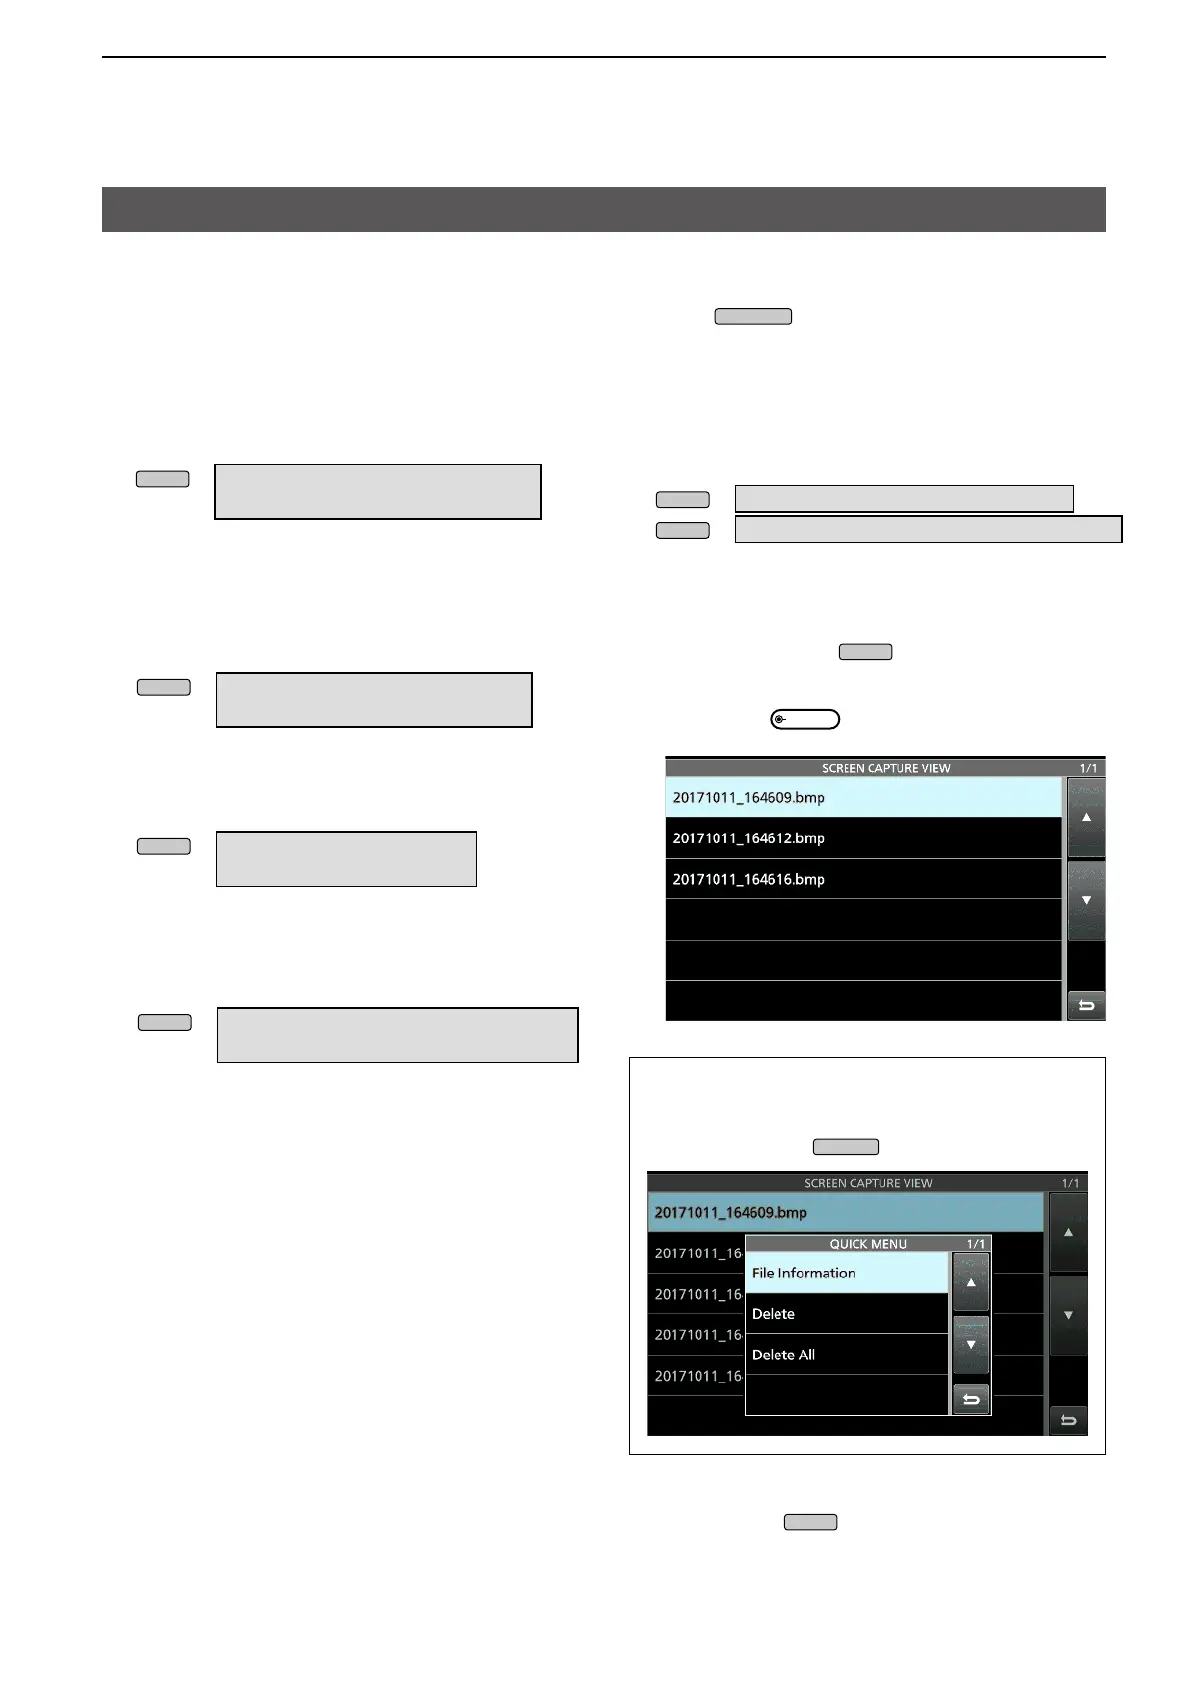
D Viewing a captured screen
1. Display the SCREEN CAPTURE VIEW screen.
»
SET > SD Card > Screen Capture View
»
SET > USB Flash Drive > Screen Capture View
• The capture screen list is displayed.
• The latest screen capture is at the top of the list.
2. Touch the screen capture to view.
• The indicator on the
key blinks while viewing a
screen capture.
L
by rotating
.
screens,
VIEW screen, push
.
3. To close the SD CARD or USB FLASH DRIVE
screen, push
several times.
Screen Capture function
You can capture the transceiver display onto an
used in this manual are captured using this function.
However, some screens cannot be captured.
D Setting the Screen Capture function
1. Display the “Screen Capture [POWER] Switch”
screen.
» SET > Function >
Screen Capture [POWER] Switch
2. Touch “ON” to turn ON the Screen Capture
function.
3. Touch “Screen Capture Storage Media” to select
“SD Card” or “USB Flash Drive” to save the
captured screens.
» SET > Function >
Screen Capture Storage Media
4. Touch “Screen Capture File Type” to set the
screen capture file type to “PNG” or “BMP.”
» SET > Function >
Screen Capture File Type
TIP: You can also assign the Screen Capture
function to the [Print Screen] key on the USB
keyboard.
»
SET > Function >
Screen Capture Keyboard [Print Screen]

 Loading...