Chapter 6: Software
292 Advisor Advanced ATSx500A(-IP) Installation and Programming Manual
Upgrading bootloader
Particular panels with older bootloader firmware cannot be upgraded to a new
firmware. In this case an upgrade of bootloader firmware to a newer version is
required. Upgrade bootloader firmware as described below.
Caution: Bootloader is a crucial part of the Advisor Advanced panel. Make sure
that the procedure is performed in the right order (steps 5 to 7), and the power
supply is not removed while step 7 is in progress, otherwise the system can be
damaged.
To upgrade bootloader firmware:
1. Install AAFlash version 2.3.0 or higher.
See “Installing AAFlash on the PC” on page 290.
2. Run the panel in DFU mode.
a. Disconnect the mains power and batteries from the panel.
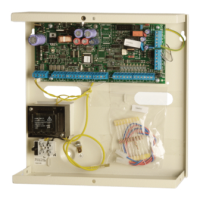
b. Put in the T2 jumper and plug a mini-B USB cable into the panel PCB.
c. Reconnect mains power supply.
The panel is running in DFU mode now, RX LED is blinking.
If RX and TX LEDs are blinking alternately, the connected PC does not have
the required driver installed. In this case, the system prompts you to find
Advisor Advanced USB DFU drivers to install. Choose the driver located in
the AAFlash program directory ("C:\Program Files(x86)\AAFlash\driver" by
default).
3. Run AAFlash (version 2.3.0 or higher), click "..." (Browse), and open *.dfu file
with bootloader provided.
4. Click Upgrade Bootloader.
5. The program prompts to create backup of the existing application firmware
and the database. Click Yes and create a new file for the backup, or No to
skip this step.
If you click Yes, you are prompted to enter a name for a dfu file for the
backup. Enter a file name and wait for the instructions to display.
6. Remove T2 jumper and unplug the USB cable.
7. Ensure that both mains power supply and the battery are connected.
The image version is compared with the current bootloader version. If it is the
same or older, the upgrade does not perform.
Sectors of internal flash allocated for bootloader are erased and checked.
New bootloader is flashed.
After the operation is completed, the heartbeat LED starts blinking.
8. Insert T2 jumper and plug USB cable.

 Loading...


