Do you have a question about the ITech IT8000 Series and is the answer not in the manual?
| Brand | ITech |
|---|---|
| Model | IT8000 Series |
| Category | Test Equipment |
| Language | English |
Details warranty terms, technology licenses, and U.S. government rights.
Defines CAUTION, WARNING, and NOTE symbols for hazard identification.
Covers product warranty period and conditions that may invalidate it.
Illustrates and explains standard safety symbols used in the manual.
Essential safety measures for instrument operation and compliance.
Important warnings for safe operation, including handling damage, grounding, and modifications.
Crucial grounding instructions to prevent electrical shock hazards.
Warning about dangerous voltages and protecting against electric shock.
Specifies altitude, installation category, and pollution degree for operation.
Lists EMC and safety standards the product conforms to.
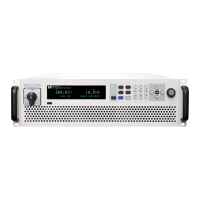
Overview of IT8000 series features, capabilities, and innovations.
Schematic and description of the IT8000 series front panel controls.
Explanation of front panel keys and their functions for operation.
Details functions accessed by combining Shift with other keys.
Description of the front panel knob's functions for value adjustment and menu selection.
Schematic and description of the IT8000 series rear panel connectors and ports.
Detailed descriptions of rear panel interfaces like LAN, USB, and optical fiber.
Explanation of the Vacuum Fluorescent Display (VFD) indicator lamps.
Overview of the configuration menu and procedures to access it.
Overview of system menus and procedures for accessing and setting system parameters.
Details on setting communication parameters for USB, LAN, and other interfaces.
Configuration steps and parameters for CAN, RS232, and GPIB interfaces.
Details on optional accessories like communication interface cards.
Instructions for unpacking and checking instrument contents against the package list.
Dimensional drawings and specifications for the 3U models of the IT8000 series.
Dimensional drawings and specifications for the 27U models of the IT8000 series.
Essential warnings and precautions for connecting the power cord safely.
Precautions to prevent electric shock and damage when connecting the DUT.
Procedure for connecting the DUT using local measurement wiring.
Procedure for connecting the DUT using remote sensing for accurate measurements.
Details on the USB interface, its connection, and available interface types (TMC, VCP, LAN).
Instructions for connecting the instrument to a LAN, including private and site LANs.
How to use the instrument's built-in Web server for monitoring and control.
Description of the CAN interface connection and pin requirements.
Details on the GPIB interface, connection via IEEE488 bus, and configuration.
Description of the RS-232 interface, sharing card with analog function.
Procedure for performing the initial power-on self-test and understanding its results.
Crucial precautions to observe before connecting power and operating the instrument.
Troubleshooting steps if the instrument fails to start normally.
How to navigate menus, select items, and confirm settings using keys and knob.
Controls the input status of the load using the [On/Off] key.
Guides on setting input parameters like voltage, current, power, and resistance.
Procedures for selecting the operation mode (CC, CV, CW, CR, CVCC, etc.).
Description of basic operation modes: Constant Current (CC), Voltage (CV), Power (CW), Resistance (CR).
Description of complex modes like CVCC, CVCR, CRCC, and AUTO operation.
Setting input-on/input-off delay times from 0 to 60 seconds.
Setting the rate of current change (I-Rise/I-Fall Slope) for dynamic response.
How to simulate a short circuit at the input terminal using the dedicated key.
Setting voltage level (Von) to control load on/off status (Living/Latch modes).
Explores advanced functions like LIST, Battery Test, and Protection.
Overview of the LIST function, supporting up to 10 files with 200 steps each.
Step-by-step guide to editing a List program, including setting steps and parameters.
Procedure to import List programs from a USB flash drive into the instrument.
Steps to execute a selected List file for waveform sequence playback.
Function for battery discharging tests with user-settable cut-off conditions.
Enabling and setting OCP limit and delay time for protection.
Enabling UVP with warm-up time, limit, and delay settings.
How to enable OCP, set limit (Level), and delay time.
How to enable UVP, set warm-up, limit (Level), and delay.
Details on OTP activation and causes, with instructions for cooling down.
Instrument's sense reverse protection feature and how it functions.
Switching between local (front panel) and remote (PC) operation modes.
Function to prevent panel key misoperation by locking the front panel keys.
Saving and recalling up to 10 sets of instrument parameters.
Function for recording and saving test data, including sources and types.
Configuring data logging parameters: Sample Period, Duration, Source, and Data Type.
Setting trigger methods (Manual, Bus, External) for data logging and List functions.
Procedure to start data logging, ensuring USB memory device is connected.
Turning the instrument beeper sound on or off based on personal requirements.
Controlling instrument settings and input state when powered on (Reset, Last, Last+Off).
Switching the load between local measurement and remote sensing.
Selecting trigger sources for List and data logging functions.
Setting communication information (USB, LAN, CAN, VCP, GPIB, RS-232) between instrument and PC.
Controlling instrument operation in single or parallel modes.
Steps for setting up parallel operation with master and slaves.
Using digital I/O for logic control and custom needs via pin wiring.
Parameter description for IO-1, covering Not-Invert, Invert, and Ps-Clear functions.
Parameter description for IO-2, covering Ps function for protection status indication.
Parameter description for IO-3, indicating instrument's [On/Off] state.
Parameter description for IO-4, handling external triggers for various functions.
Parameter description for IO-5, controlling instrument input state via external signals.
Parameter description for IO-6, enabling synchronous control over turn-on.
Parameter description for IO-7, enabling synchronous control over instrument turn-off.
Using external analog signals for remote setting of input values.
Introduction to the main technical parameters of the load.
Detailed technical specifications for the IT8006-500-30 model.
Detailed technical specifications for the IT8012-500-60 model.
Detailed technical specifications for the IT8018-500-90 model.
Detailed technical specifications for the IT8018-1500-30 model.
Specifications for optional red and black test lines, including current values.
General guidance on fuse replacement for different instrument models.
Steps for replacing fuses in a specific fuse box type.
Steps for replacing fuses located in the power cord jack.