− 19 −
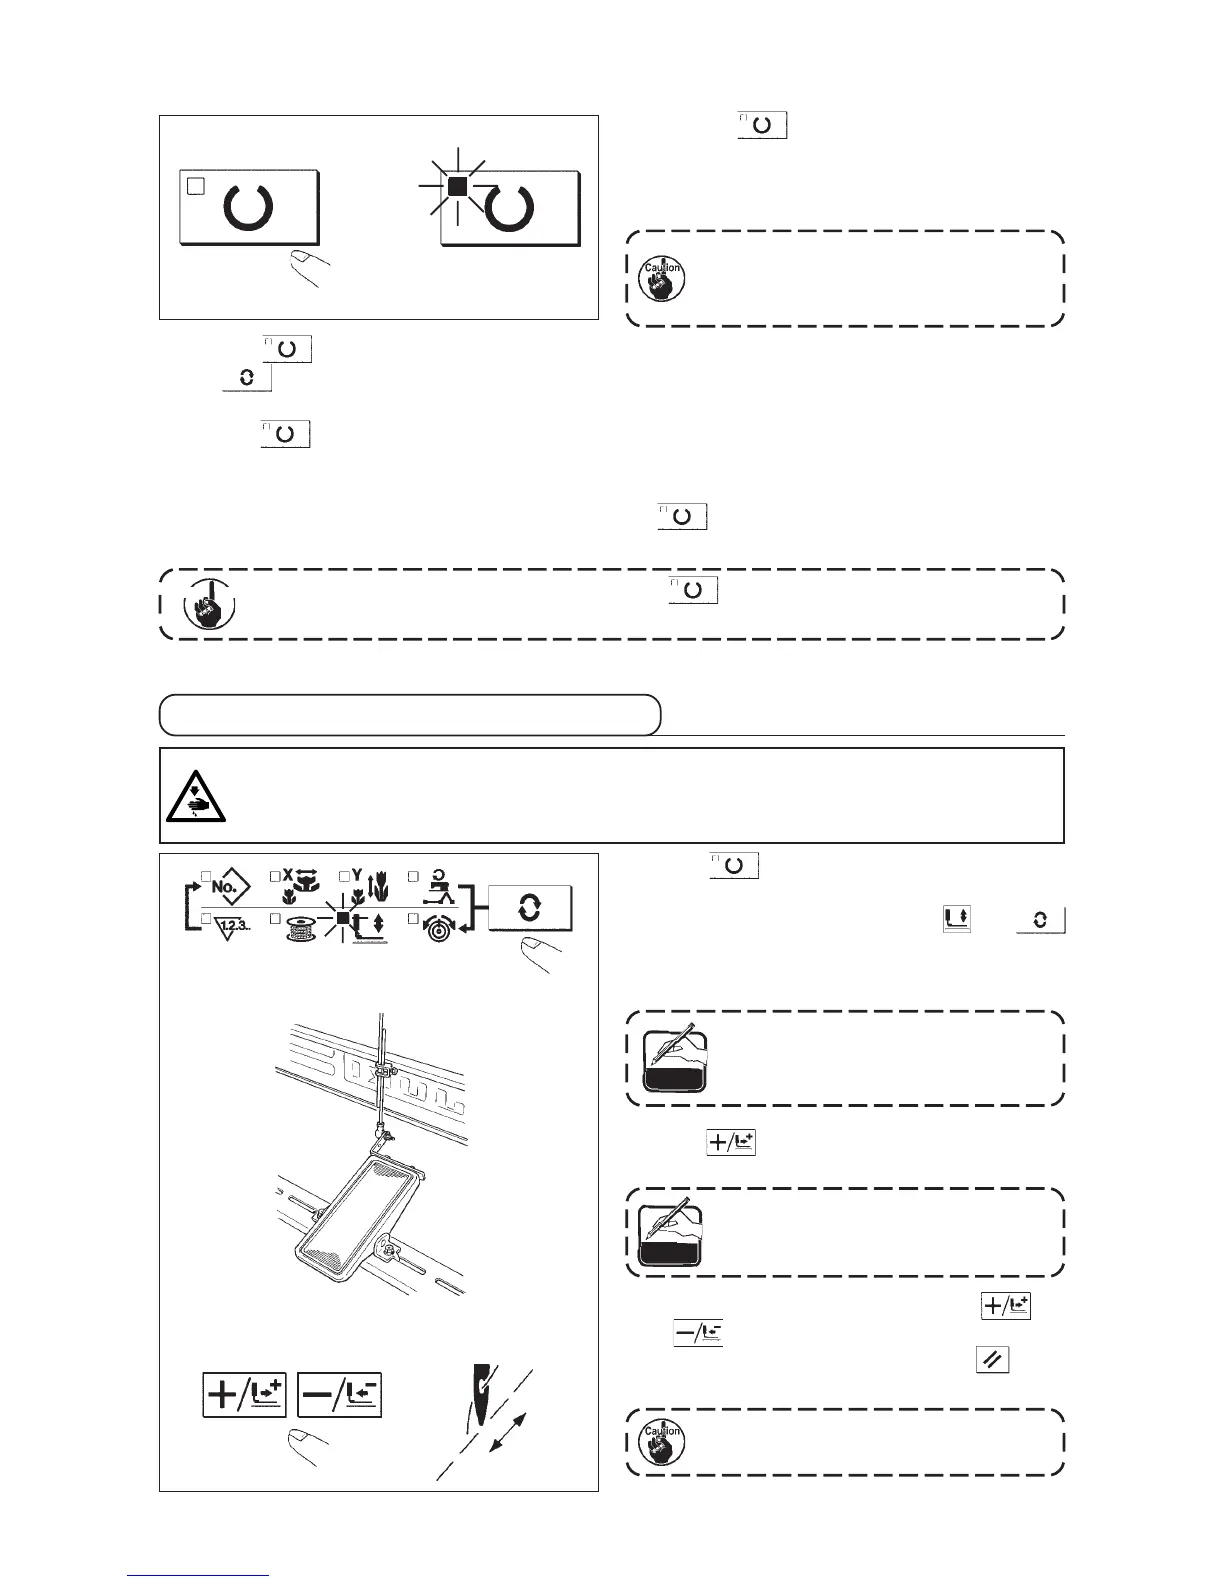
2. Checking the contour of a sewing pattern
1) Press key to make the READY LED light
up.
2) Select the work clamp foot lowering with
key.
3) Lower the work clamp feet with the foot switch.
The sewing machine does not start
even when the foot switch is
depressed under this mode.
4) Press key in the state that the work clamp
feet are lowered.
The work clamp feet do not go up even
when the foot switch is detached.
5) Confirm the contour of the pattern with key
or key.
6) The work clamp feet will go up when key is
pressed.
The presser does not come down
immediately after turning ON the power.
WARNING :
Make sure without fail of the contour of the sewing pattern after selection of the sewing pattern.
If the sewing pattern extends outside the work clamp feet, the needle will interfere with the work clamp
feet during sewing, causing dangerous troubles including needle breakage.
Reference
Reference
(7) Finish of setting
1) Press the key.
2) After the work clamp feet have moved and gone
up, the sewing LED lights up, and the sewing is
ready.
When the presser is raised, be careful that
fingers are not caught in the presser since
the presser moves after having lowered.
* When key is pressed, the set values of pattern No., X/Y scale, etc. are memorized.
* If key is pressed, you can make sure of the respective setting items again. However, the items can
not be changed in the state that the SEWING LED is lit up.
* When key is pressed, the READY LED goes off. Set values of the respective items can be changed.
* Thread tension can be changed even when the sewing LED lights up. Thread tension can be momorized
with the start switch as well.
* Use the machine after confirming the pattern No. When key is pressed while pattern No. is indicated
"0" (state at the time of delivery), error display E-10 appears. At this time, re-set the pattern No.
When turning OFF the power without pressing key, the set values of pattern No., X/Y
scale, number of max. rotation, and thread tension are not memorized.
e
d
h
h
Impor tant
 Loading...


