− 31 −
6. Cautions in operation
(1) When the error indicator lamp lights up, be sure to check the cause of trouble and take a proper corrective
measure.
(2) Do not draw, by hand, the material being sewn during sewing. Doing so will cause the needle shift from
the correct position. If the needle moves from the correct position, press the key two times. This
will return the needle to the normal origin.
(3) Do not turn OFF the power in a state that the needle is lowered. The presser comes down and the wiper
interferes with needle. As a result, there is a danger of needle breakage or the like.
Reference for the sewing speed to be applied
* To prevent the thread breakage due to the needle heat, set the sewing speed referring to the above table
in accordance with the sewing conditions.
* For sewing the foundation or the like, lower the height of the needle bar to prevent the stitch skipping.
(Refer to the item “Adjusting the height of the needle bar”)
Sewn product / thread / needle Head type / Sewing speed
8-layered denim / Cotton thread #50 / DPx5 #16 S (Standard) / 3,000 rpm
8-layered woolen gabardine / Polyester filament #50 / DPx5 #14 S (Standard) / 2,300 rpm
8-layered denim / Cotton thread #20 / DPx17 #19 H (Heavy-weight material)/3,000 rpm,
W (Double-capacity hook)/2,700 rpm
Overlapped sewing of 6 x 12-layered denim / Cotton thread #20 / DPx17 #19 H (Heavy-weight material) / 2,500 rpm
Tricot + shoulder strap (3 + 1) layered section / Polyester spun #60 / DPx5 #11 F (Foundation) / 2,000 rpm
[7] MAINTENANCE
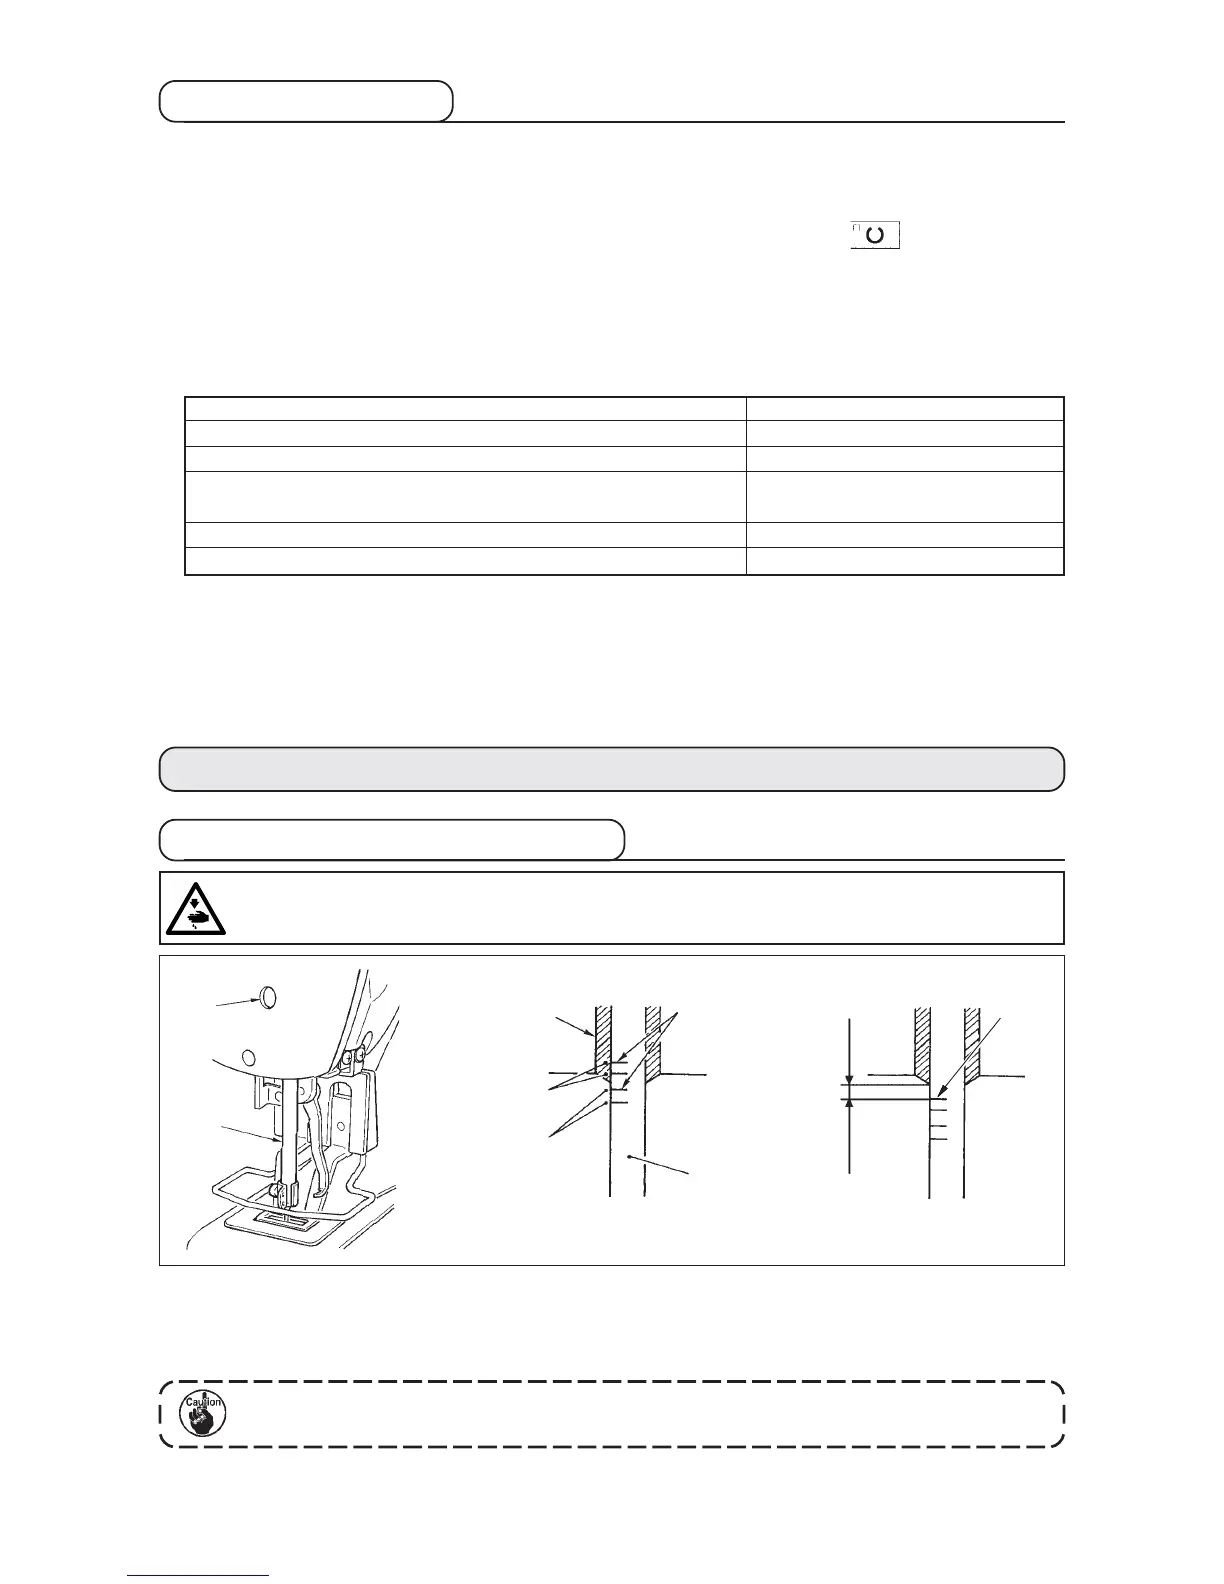
1. Adjusting the height of the needle bar
綏 : Engraved line
for DP x 5
絽 is for H and W types only
絽 : Engraved line
for DP x 17
笊
笘 : Upper
engraved line
笳
笊
笆
Bring needle bar 笊 to the lowest position of its stroke. Loosen needle bar connection screw 笆 and adjust so
that upper marker line 笘 engraved on the needle bar aligns with the bottom end of needle bar bushing,
lower 笳. For F type only, adjust the needle bar to the position where it is lowered by 0.8 mm to 1 mm from
the center of upper marker line 笘 engraved on the needle bar.
After the adjustment, make sure that there is no uneven torque.
* When stitch skipping occurs in accordance with the sewing conditions, adjust the height of the needle
bar so as to lower it by 0.5 to 1 mm from the needle bar engraved line 笘 .
WARNING :
Turn OFF the power before starting the work so as to prevent accidents caused by abrupt start of the
sewing machine.
0.8 to 1mm
笘
F type only.
 Loading...


