SHOP MANUAL
Paragraphs 1-3
FRONT SYSTEM
(TWO-WHEEL DRIVE)
FRONT AXLE
All Models So Equipped
1.
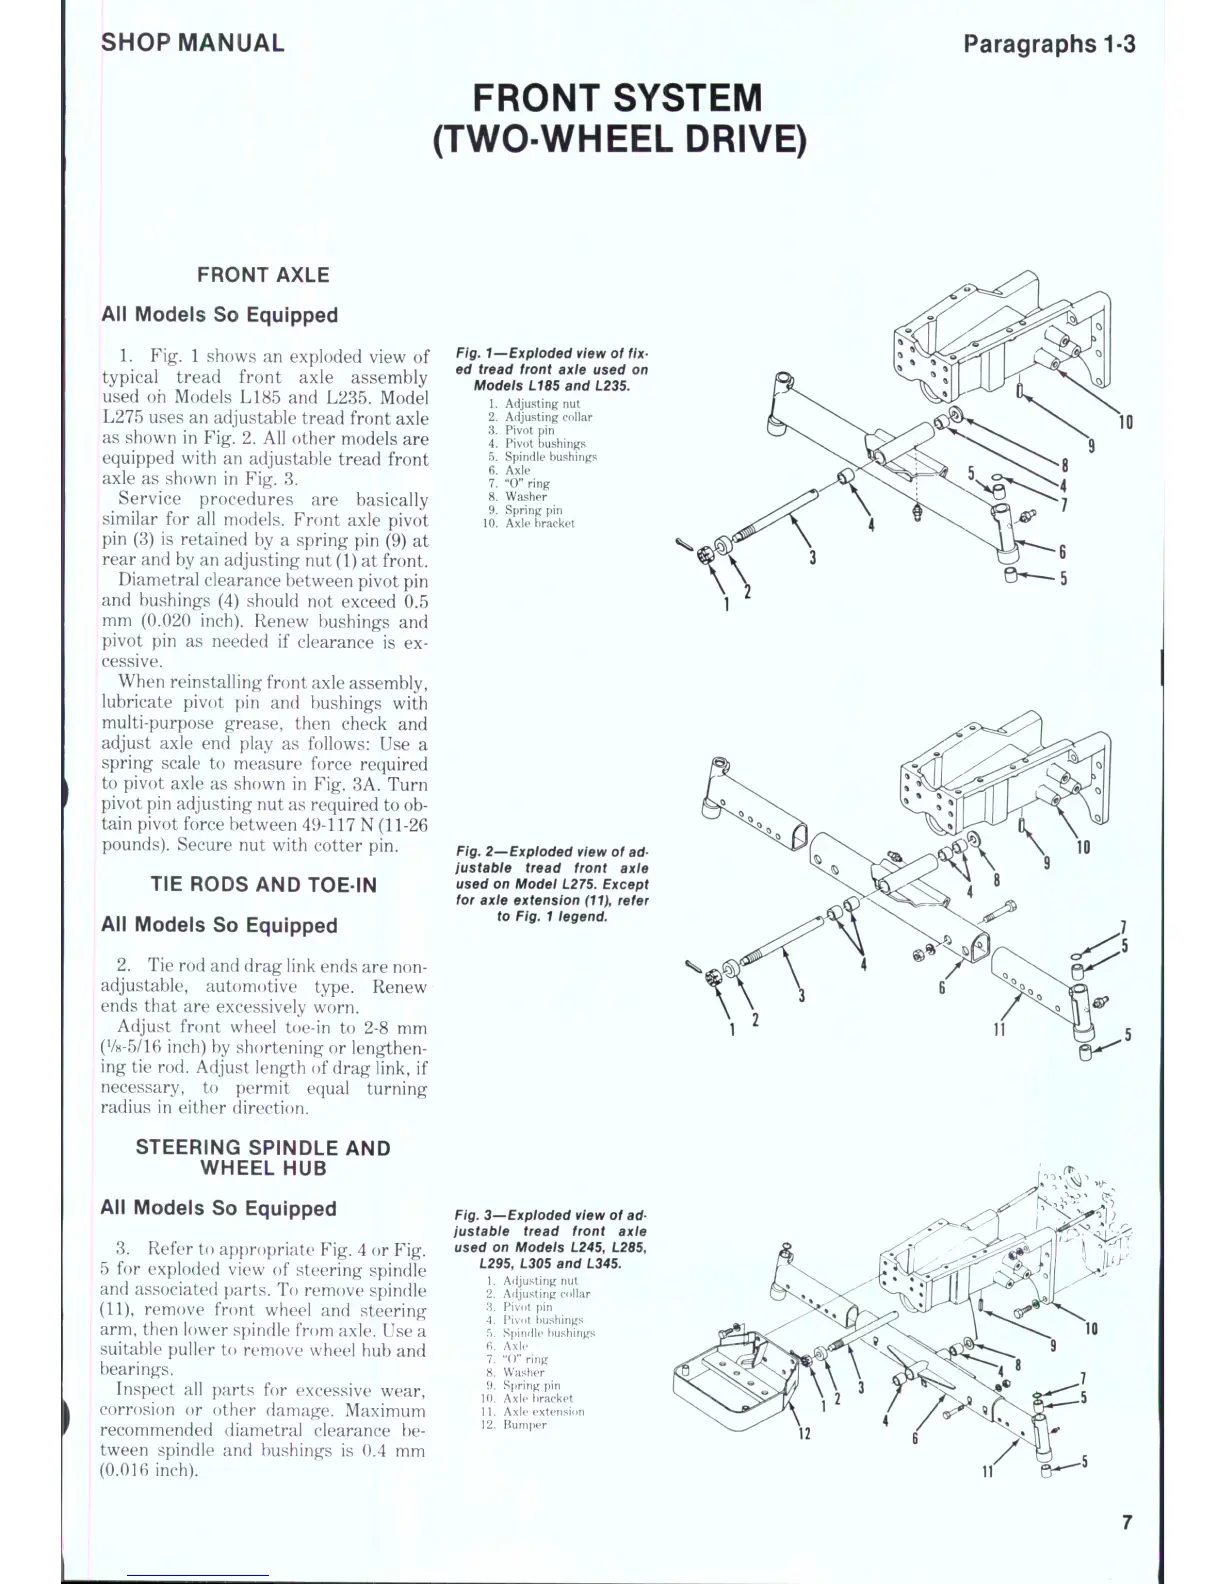
Fig. 1 shows an exploded view of
typical tread front axle assembly
used oh Models L185 and L285. Model
L275 uses an adjustable tread front axle
as shown in Fig. 2. All other models are
equipped with an adjustable tread front
axle as shown in Fig. 8.
Service procedures are basically
similar for all models. Front axle pivot
pin (8) is retained by a spring pin (9) at
rear and by an adjusting nut (1) at front.
Diametral clearance between pivot pin
and bushings (4) should not exceed 0.5
mm (0.020 inch). Renew bushings and
pivot pin as needed if clearance is ex-
cessive.
When reinstalling front axle assembly,
lubricate pivot pin and bushings with
multi-purpose grease, then check and
adjust axle end play as follows: Use a
spring scale to measure force required
to pivot axle as shown in Fig. 8A. Turn
pivot pin adjusting nut as required to ob-
tain pivot force between 49-117 N (11-26
pounds). Secure nut with cotter pin.
TIE RODS AND TOE-IN
All Models So Equipped
2.
Tie rod and drag link ends are non-
adjustabie, automotive type. Renew
ends that are excessively worn.
Adjust front wheel toe-in to 2-8 mm
(V8-5/16 inch) by shortening or lengthen-
ing tie rod. Adjust length of drag link, if
necessary, to permit equal turning
radius in either direction.
STEERING SPINDLE AND
WHEEL HUB
All Models So Equipped
8. Refer to appropriate Fig. 4 or Fig.
5 for exploded view of steering spindle
and associated parts. To remove spindle
(11),
remove front wheel and steering
arm, then lower spindle from axle. Use a
suitable puller to remove wheel hub and
bearings.
Inspect al! parts for excessive wear,
corrosion or other damage. Maximum
recommended diametral clearance be-
tween spindle and bushings is 0.4 mm
(0.016 inch).
Fig. 1—Expioded view of
fix-
ed tread front axle used on
Motfe/s L185 and L235.
1.
Adjusting nut
2.
Adjusting collar
3.
Pivot pin
4.
Pivot bushings
5.
Spindle bushings
6. Axle
7.
"0" ring
8. Washer
9. Spring pin
10.
Axle bracket
en—5
Fig.
2—Expioded view of ad-
justabie tread front axie
used on Modei
L275.
Except
for axle extension
(11),
refer
to Fig. 1 legend.
Fig.
3—Expioded view of ad-
justabie tread front axle
used on Modeis L245, L285,
L295, L305 and L345.
1.
Afljusting nut
2.
Adjusting collar
3.
Pivot i)in
4.
Pivot bushings
f).
Spindle bushings
fi. Axle
7.
"()" ring
8. Washer
9. Spring pin
10.
Axle bracket
11.
Axk* extension
12.
[^um[)er
 Loading...