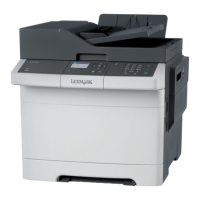
Controller board/control panel replacement
This procedure should be followed only if both the controller board and the operator panel fail. If you need to replace
only one of the FRUs, follow the startup procedure described in the FRU’s removal procedure.
CAUTION—POTENTIAL INJURY
The lithium battery in this product is not intended to be replaced. There is a danger of explosion if a lithium
battery is incorrectly replaced. Do not recharge, disassemble, or incinerate a lithium battery. Discard used
lithium batteries according to the manufacturer's instructions and local regulations.
Warning—Potential Damage: If the operator panel and the controller board are being replaced at the same time,
replace the parts in this order to avoid damage to the machine.
1 Replace the controller board first.
Note: Do not replace the new operator panel and controller board in the machine at the same time.
2 After installing the new controller board, and before installing the new operator panel, start the printer into
diagnostics mode.
3 After the printer has completed startup, turn off the printer and replace the operator panel.
Note: If the operator panel display has failed, the printers’ startup cycle is complete when the driver motor and
fans shut down, and the machine is quiet.
4 After installing the new operator panel, start the printer into diagnostics mode, and allow the printer to go through
a complete startup cycle and the display to go to Ready.
5 If the problems persist, leave the new operator panel in the machine, place the old controller board back in the
machine, and start it up. After the machine startup, shut down the machine, and install the new controller board.
After installing the new controller board, restart the machine, and let it go through the startup cycle.
After this procedure is completed successfully, there is no need to adjust any settings.
If the above procedure fails, you must contact the technical support center for further instructions.
eSF solutions backup
If a technician needs to replace the RIP board, the steps below should be taken to backup the eSF solutions and settings:
1 POR the printer into invalid engine code mode.
2 Open a Web browser, and navigate to the printer Web page.
3 Navigate to Settings, and click the link.
4 Navigate to Solutions, and click the link.
5 Navigate to Embedded Solutions, and click the link.
6 On the Embedded Solutions page, select the apps to be exported by clicking the selection box next to the app.
7 Choose Export.
If the Web page cannot be accessed, or an error persists despite trying to boot in Invalid Engine code mode, then there
is no way to back up the eSF apps. The technician needs to make the customer aware that the applications and their
settings could not be saved.
7527
Repair information
200

 Loading...