EasyManua.ls Logo

Lightware UMX-TPS-TX140 User Manual

Lightware UMX-TPS-TX140
183 pages
To Next Page IconTo Next Page
To Previous Page IconTo Previous Page
Page #71 background imageLoading...
Page #71 background image
 UMX-TPS-TX100 series – User's Manual 71

Macros
DIFFERENCE:            
package v1.5.0b4.
DEFINITION:  #macro

macros depends on the device type, UMX-TPS transmitters can handle up to 50 macros.
Important Notes about Macros
The macros are stored in the internal device preses.
The commands of a macro are executed sequentially (even if error happens at a command).
Macros allow long commands that is suitable for e.g. infra code sending.
Macros cannot be edited in the device.
Macros are not saved when backup is created. See the Saving the Macros section.
Macro File Structure
<preset_name>
<macro_name>: each Macro must have a unique name.
<LW3_commands>
ATTENTION! If you use the same name for a new macro, the existing one will be deleted.


The uploading steps are the following:
Step 1. Create the le 
Step 2. Navigate to the Settings/Backup submenu.
Step 3. preset at the bottom of the page.
Step 4. Press the Upload Open.
ATTENTION! The preset and the macros of the selected slot will be erased. If there is a macro with the
same name already in the device, it will be removed and the new one will be available.
;myDeviceMacros
;Begin myMacro1
CALL /MEDIA/VIDEO/XP:unmuteSource(I3)
CALL /MEDIA/VIDEO/XP:switch(I3:O1;I3:O2)
;End myMacro1
;Begin myMacro2
CALL /MEDIA/VIDEO/XP:unmuteSource(I4)
CALL /MEDIA/VIDEO/XP:switch(I4:O1;I4:O2)
;End myMacro2
;<preset_name>
;Begin <macro1_name>
<LW3_commands>
;End <macro1_name>
;Begin <macro2_name>
<LW3_commands>
;End <macro2_name>
Format: Example:
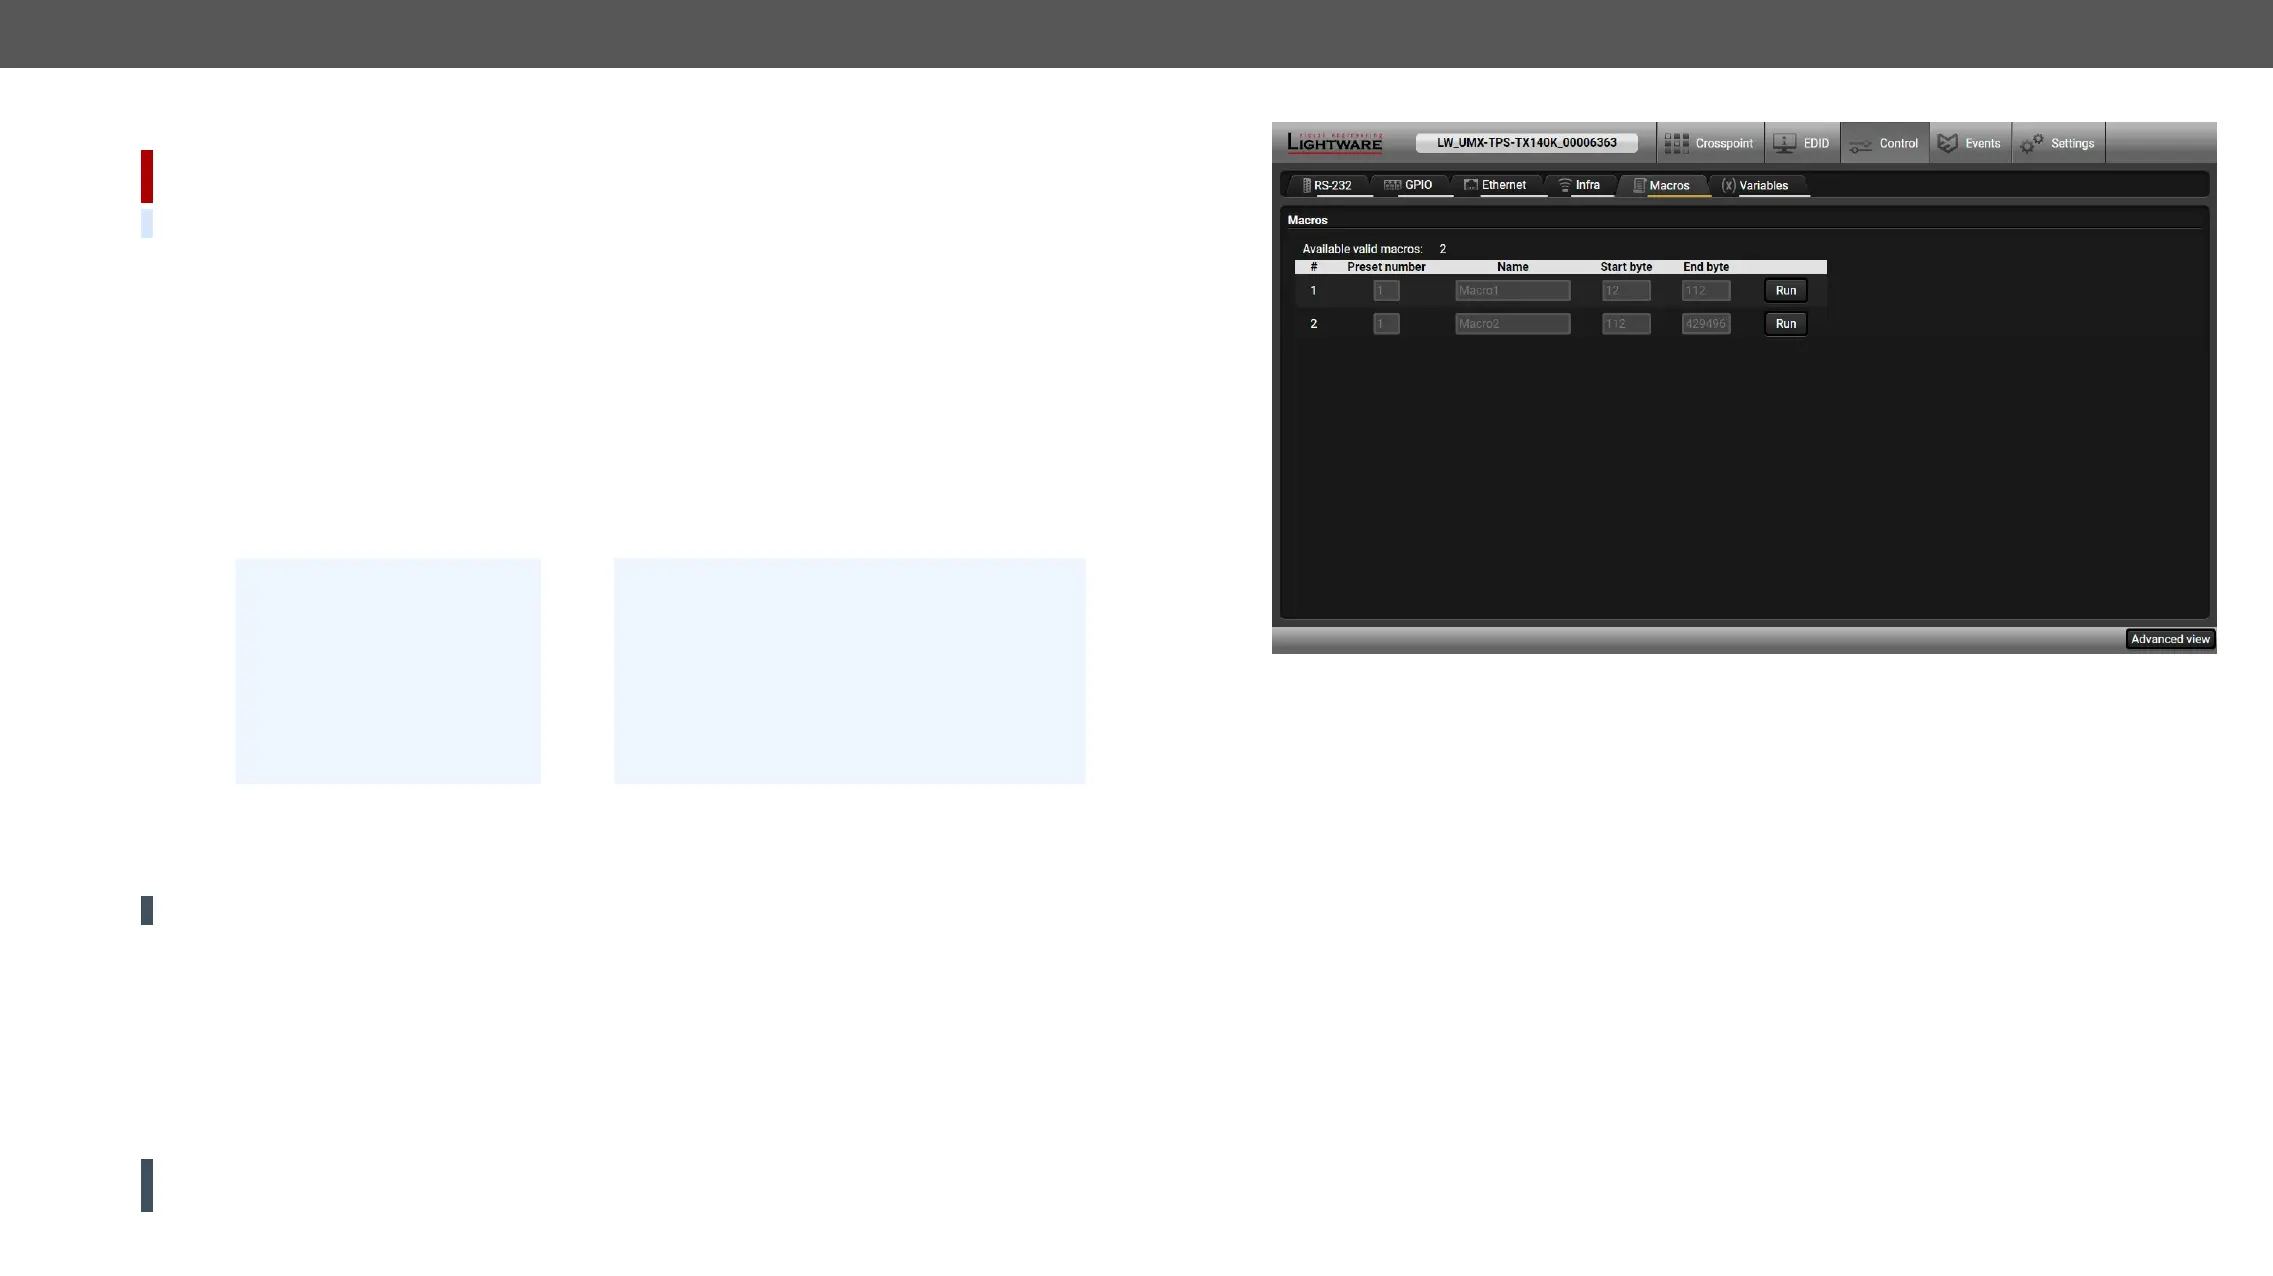
Discovered Macros in the device shown under Control/Macros submenu
Adding Macros by Preserving the Current Preset and Macros
If you follow the steps below, the existing macros of the selected preset will be preserved. But if there is a
macro with the same name already in the device, it will be removed and the new will be available.
Step 1. Navigate to the Settings/Backup submenu.
Step 2. preset at the bottom of the page.
Step 3. Press the Download button and click Save in the pop-up window.
Step 4. Open the le with a simple text editor and add the desired macros to the bottom of the commands
between the ;Begin <macro_name> and ;End <macro_name> labels.
Step 5. Settings/Backup submenu.
Step 6. preset.
Step 7. Press the Upload Open.
Saving the Macros


Step 1. Navigate to the Settings/Backup submenu.
Step 2. preset at the bottom of the page.
Step 3. Press the Download button and click Save in the pop-up window.

Table of Contents

Other manuals for Lightware UMX-TPS-TX140

Questions and Answers:

Lightware UMX-TPS-TX140 Specifications

General IconGeneral
BrandLightware
ModelUMX-TPS-TX140
CategoryTransmitter
LanguageEnglish

Summary

Important Safety Instructions

Class II Apparatus Construction and Ventilation

Details on apparatus construction, power connection, safe disconnection, and ventilation requirements for optimal performance.

1. Introduction

Product Description and Features

Overview of the UMX-TPS-TX100 series, its capabilities, and key features like 4K support and autoselect.

Box Contents and Model Comparison

Details on supplied accessories, optional accessories, and a comparison table of different product models.

Model Comparison and Typical Application

Highlights key differences between models and provides diagrams for typical application scenarios.

3. Installation

Mounting Options for Transmitters

Guides for mounting standalone transmitters using rack shelves or under-desk kits.

Electrical Connections

Details on power connectors (12V DC, 48V DC) and various video/audio/data port connectors.

5. Software Control - Lightware Device Controller

Install, Run, and Connect LDC

Guides on installing LDC software, running it, and connecting to devices via Ethernet, Serial, or USB.

Event Manager and Settings Menu

Guides on creating events, managing settings like status, network, and front panel.

6. LW2 Programmer's Reference

Network and RS-232 Configuration Settings

Covers network IP settings, RS-232 modes, baud rates, databits, parity, and stopbits.

7. LW3 Programmers’ Reference

Video and Audio Port Settings

Covers video/audio port status, crosspoint, autoselect, input priorities, and mute/lock functions.

Analog Audio Input Level Settings and Event Manager Basics

Explains analog audio volume/balance settings and the fundamental concepts of Event Manager.

Event Manager Tool Kit and Variable Management

Details setting delays, naming events, linking conditions/actions, and managing custom variables.

Ethernet Port Configuration and Tool Kit

Covers DHCP, static IP settings, MAC filtering, and Ethernet tool kit functionalities.

TCP Message Recognizer and RS-232 Port Configuration

Explains TCP message recognition, RS-232 settings, and message sending via RS-232.

8. Firmware Update

Running LDU2 Software and Updating via GUI

Instructions on launching LDU2, discovering devices, and performing firmware updates using the graphical interface.

Troubleshooting Firmware Update Issues

Steps to take if the firmware update is not successful, including restarting and checking logs.

9. Troubleshooting

Troubleshooting Use Cases by Symptom

A table mapping symptoms (no video, no audio, HDCP issues) to root causes, actions, and relevant sections.

Related product manuals