Doc# 0296-0018 • REV R (July 2017) Page 27 of 61
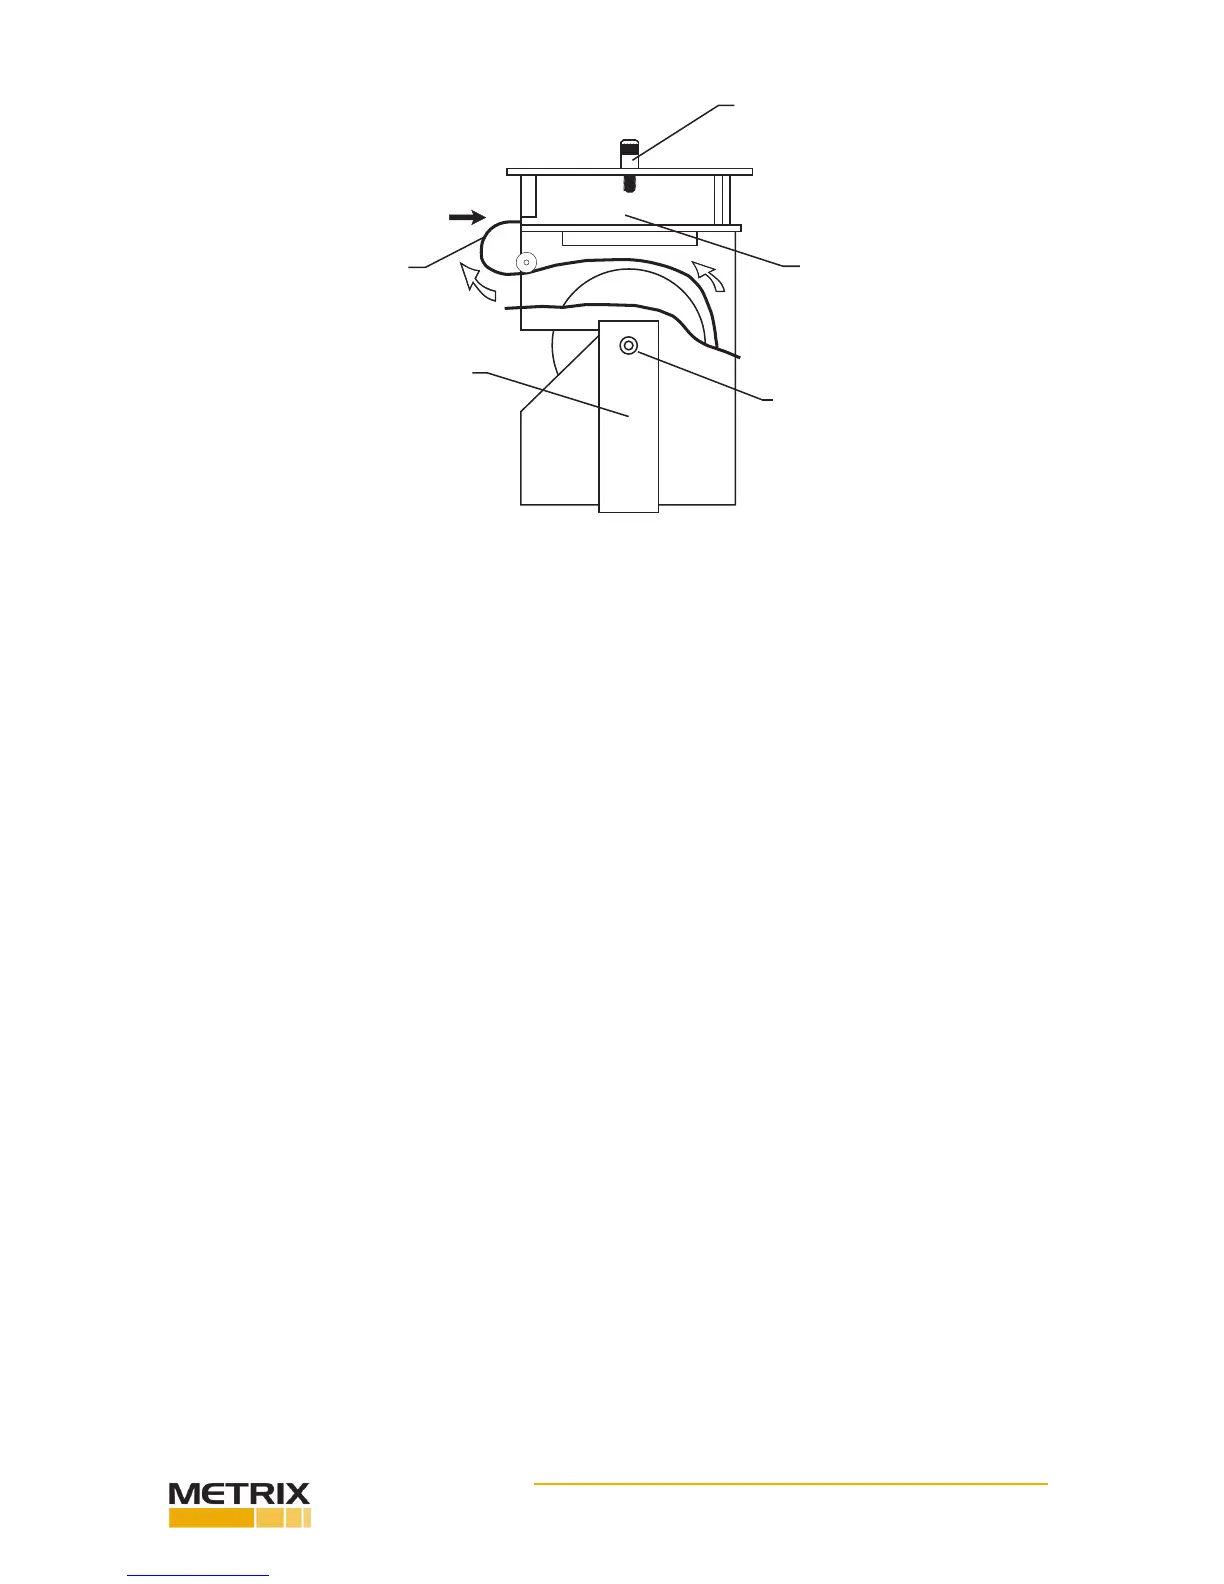
Captive
Screw (2)
Printer
Paper Shaft
(Tapered End)
Elastic Strap
Glossy Side
Out
FIG. 3-20 PRINTER PAPER INSTALLATION
Step 3. Cut paper in two, fairly close to the printer.
Step 4. Turn on the TTS. Press the Paper Advance (Paper ADV) but- ton to remove the paper from the
printer. DO NOT PULL THE PAPER OUT OF THE PRINTER!!!!!
Step 5. From the tapered end of the paper sha, remove the Elasc Strap that holds the paper roll in
the roll carriage. (See Fig. 3- 20)
Step 6. Pull the paper sha out of the paper carriage and o the paper roll.
Step 7. Discard the old paper roll.
Step 8. Get a new roll of paper (Prt. # 1901-0057). You can purchase replacement rolls from METRIX
Instruments Inc. An alternate source for the paper rolls is the Seiko Corporaon (Prt. #TP201-211-25C).
Step 9. Cut the end of the paper so that it straight.
Step 10. Make sure that the paper orientaon is correct. (See Fig. 3-20) Slide the cut end of the paper
roll into the printer unl it stops. (See Fig. 3-18) Don’t force it.
Step 11. Press the Paper Advance (Paper ADV) buon to feed the paper into the printer.
NOTE: In the event you have a problem feeding the paper into the printer, cut the paper again so that
the edge is straight. Use a straight edge if you have to.
Step 12. Slide the paper sha into the paper carriage and through the paper roll.
Step 13. Replace the Elasc Strap onto the tapered end of the paper sha.
Step 14. Place the printer back into the TTS chassis. Step 15. Tighten the capve screws.
Step 15. Tighten the capve screws.
 Loading...