Doc# 0296-0018 • REV R (July 2017) Page 49 of 61
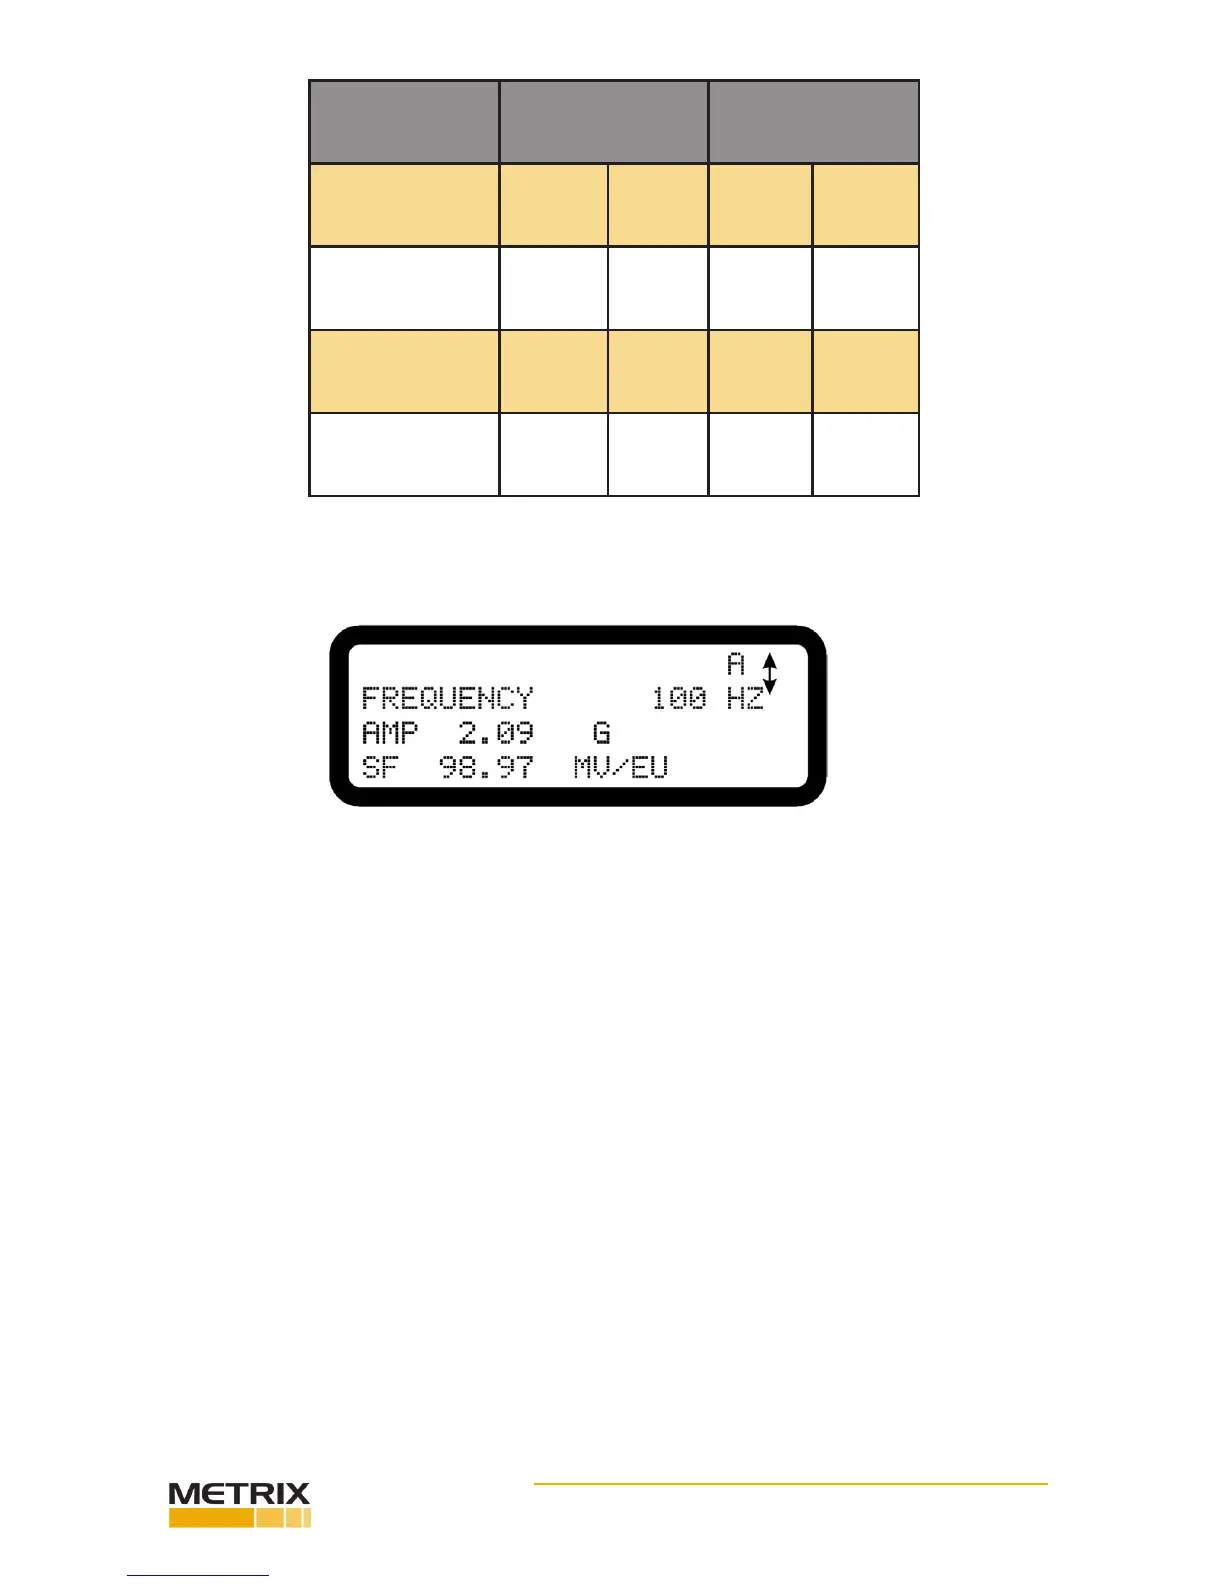
Step 5. Now that the Sensivity is set up for the TUT, press the down arrow. Frequency Screen A ap-
pears. (See Fig. 5-8)
FIG. 5-8 SENSITIVITY TEST 1 SCREEN A
TUT TYPE
FREQUENCY
LOW HIGH
AMPLITUDE
LOW HIGH
Triaxial 70 Hz 130 Hz 1 g 5 g’s
Velocity 70 Hz 130 Hz 0.2 in/sec 1.0 in/sec
Single Axis Voltage 30 Hz 2000 Hz 1 g 5 g’s
Displacement 70 Hz 130 Hz 2 mils 20 mils
TABLE 5-3: TEST FREQUENCY AND AMPLITUDE PARAMETERS
NOTE: The screens A-Y are the 25 tests menoned before that can be performed per Test Number.
Each leer screen (A,B,C,D,ETC.) can be used to do a separate test with separate parameters. For
example if you wanted to test a transducer at frequencies from 30 to 130 you can perform the test up
to 25 dierent frequencies.
Step 6. Press one of the Frequency Range buons to select a range from 3-100 Hz, 100-1000 Hz, or
1000-10,000 Hz test ranges.
Step 7. Press the Run/Store buon to turn on the shaker.
Step 8. Unlock the Frequency Knob and adjust to the frequency you want to test.
Step 9. Unlock the Amplitude Knob and adjust to the amplitude you want to test.
Step 10. Press the Run/Store buon once.
Step 11. Press the Print buon to print the results.
Step 12. Press the down buon to move to screen B.
Step 13. Repeat steps 6-11 for each screen through Y.
Step 14. If you want to clear all the setup informaon, press the up arrow. A message appears as fol-
lows:
 Loading...