REASSEMBLY OF BASIC ENGINE
7-6
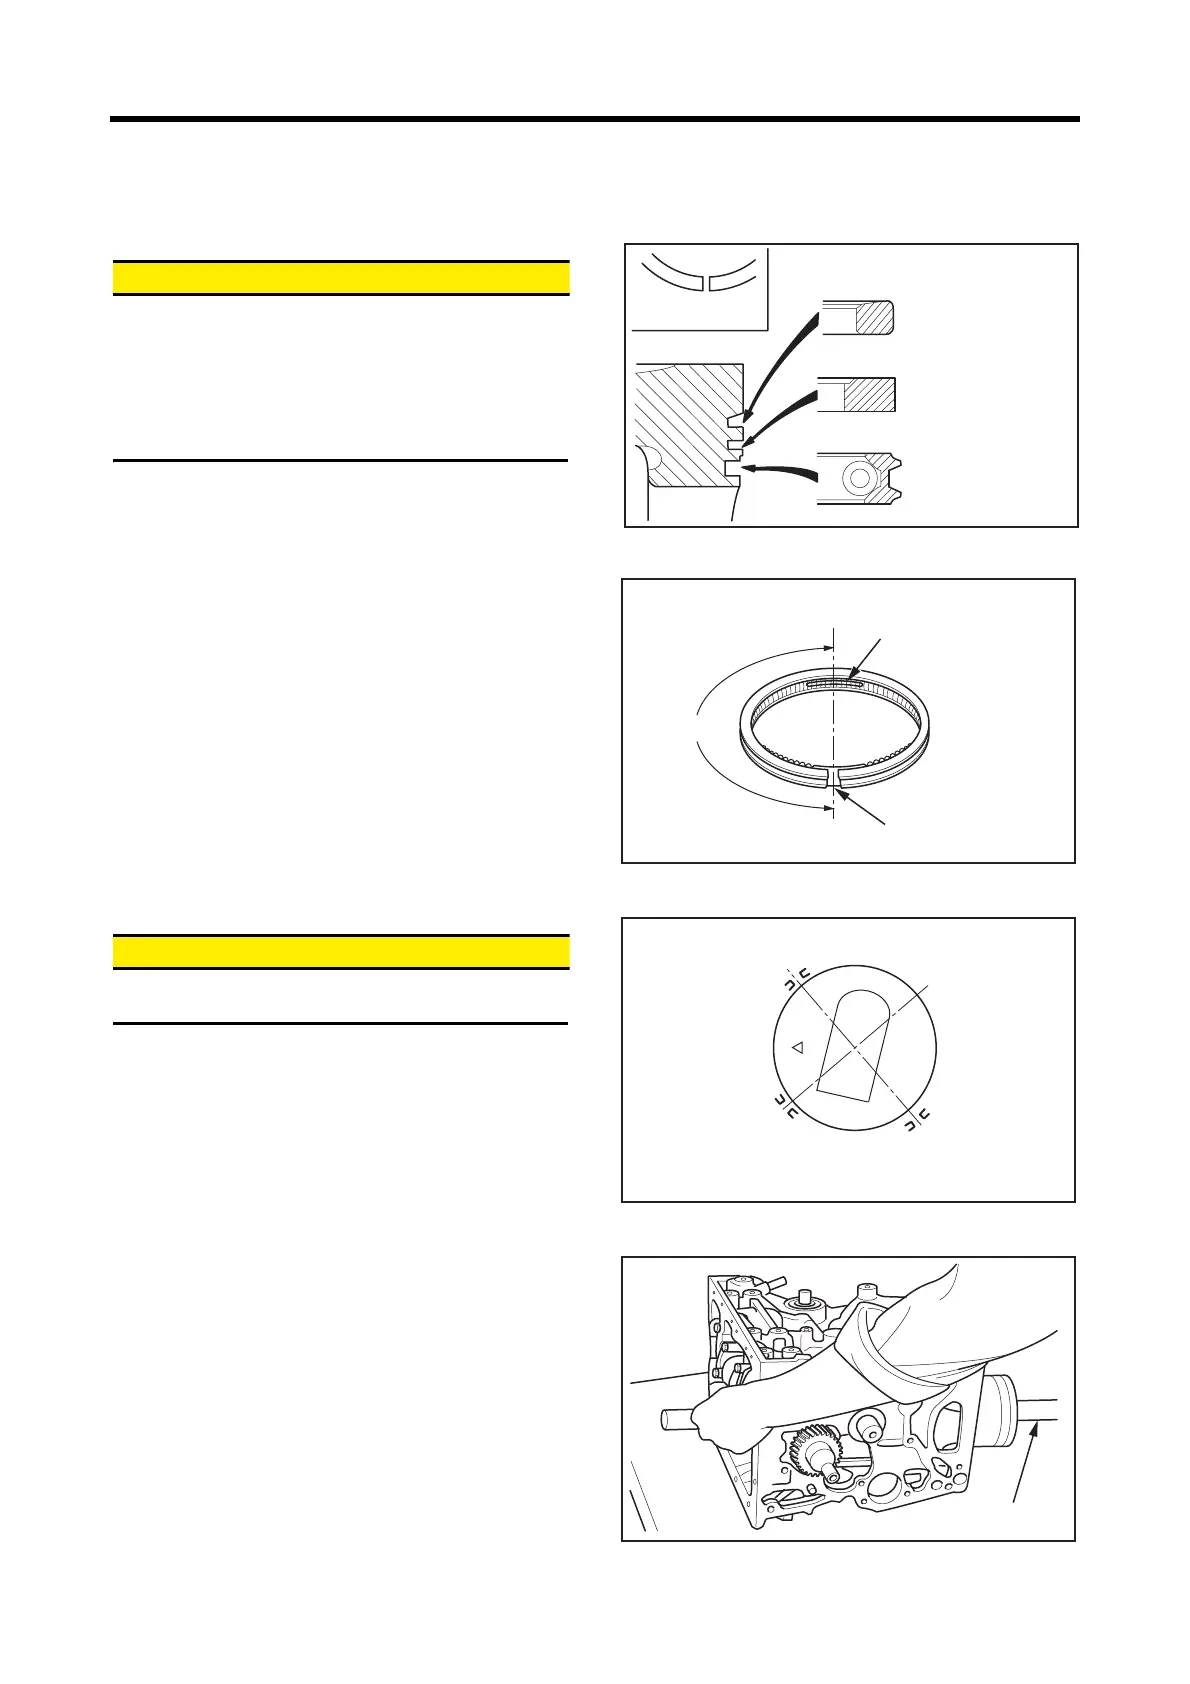
1.8 Installing piston ring
&$87,21
Every piston ring has a top mark such as “R” near the
end gap. Install all piston rings with this mark facing
upward.
If the rings are installed upside down, it could cause
malfunctions such as excessive oil consumption or an
engine seizing.
(1) Install the piston rings to the piston with a piston ring
plier.
(2) Install the oil ring with its end gap 180° away from the
joint of the coil spring, as shown in the illustration.
Piston/piston ring orientation
Reassembling oil ring
1.9 Installing piston and connecting rod
&$87,21
Do not forcefully insert the piston, as it may cause
damage to the piston rings and crank pin.
(1) Apply engine oil to the circumference of the piston and
piston rings.
(2) Place the ring end gaps in diagonal positions avoiding
the piston pin direction and its right angle direction.
(3) Fit the connecting rod bearing (upper) to the connecting
rod aligning the lug and lug groove.
(4) Turn the crankshaft to place the crank pin of the
assembling cylinder to the top dead center.
(5) Face the front mark (arrow) stamped on the piston top
toward the timing gear case side (forward of the
engine).
(6) Insert the piston from the top face of cylinder block
using a piston guide (commercially available).
Orienting piston ring end gaps
Installing pistons and connecting rods
T
Oil ring
No.1
compression ring
No.2
compression ring
Top face mark
Piston ring plier
P/N: 31391-12900
Oil ring abutment
Coil spring butted ends
180°
Oil ring end gap
No.1 compression
ring end gap
Front of
engine
No. 2 compression
ring coil spring butt joint
Piston guide
 Loading...