REASSEMBLY OF BASIC ENGINE
7-7
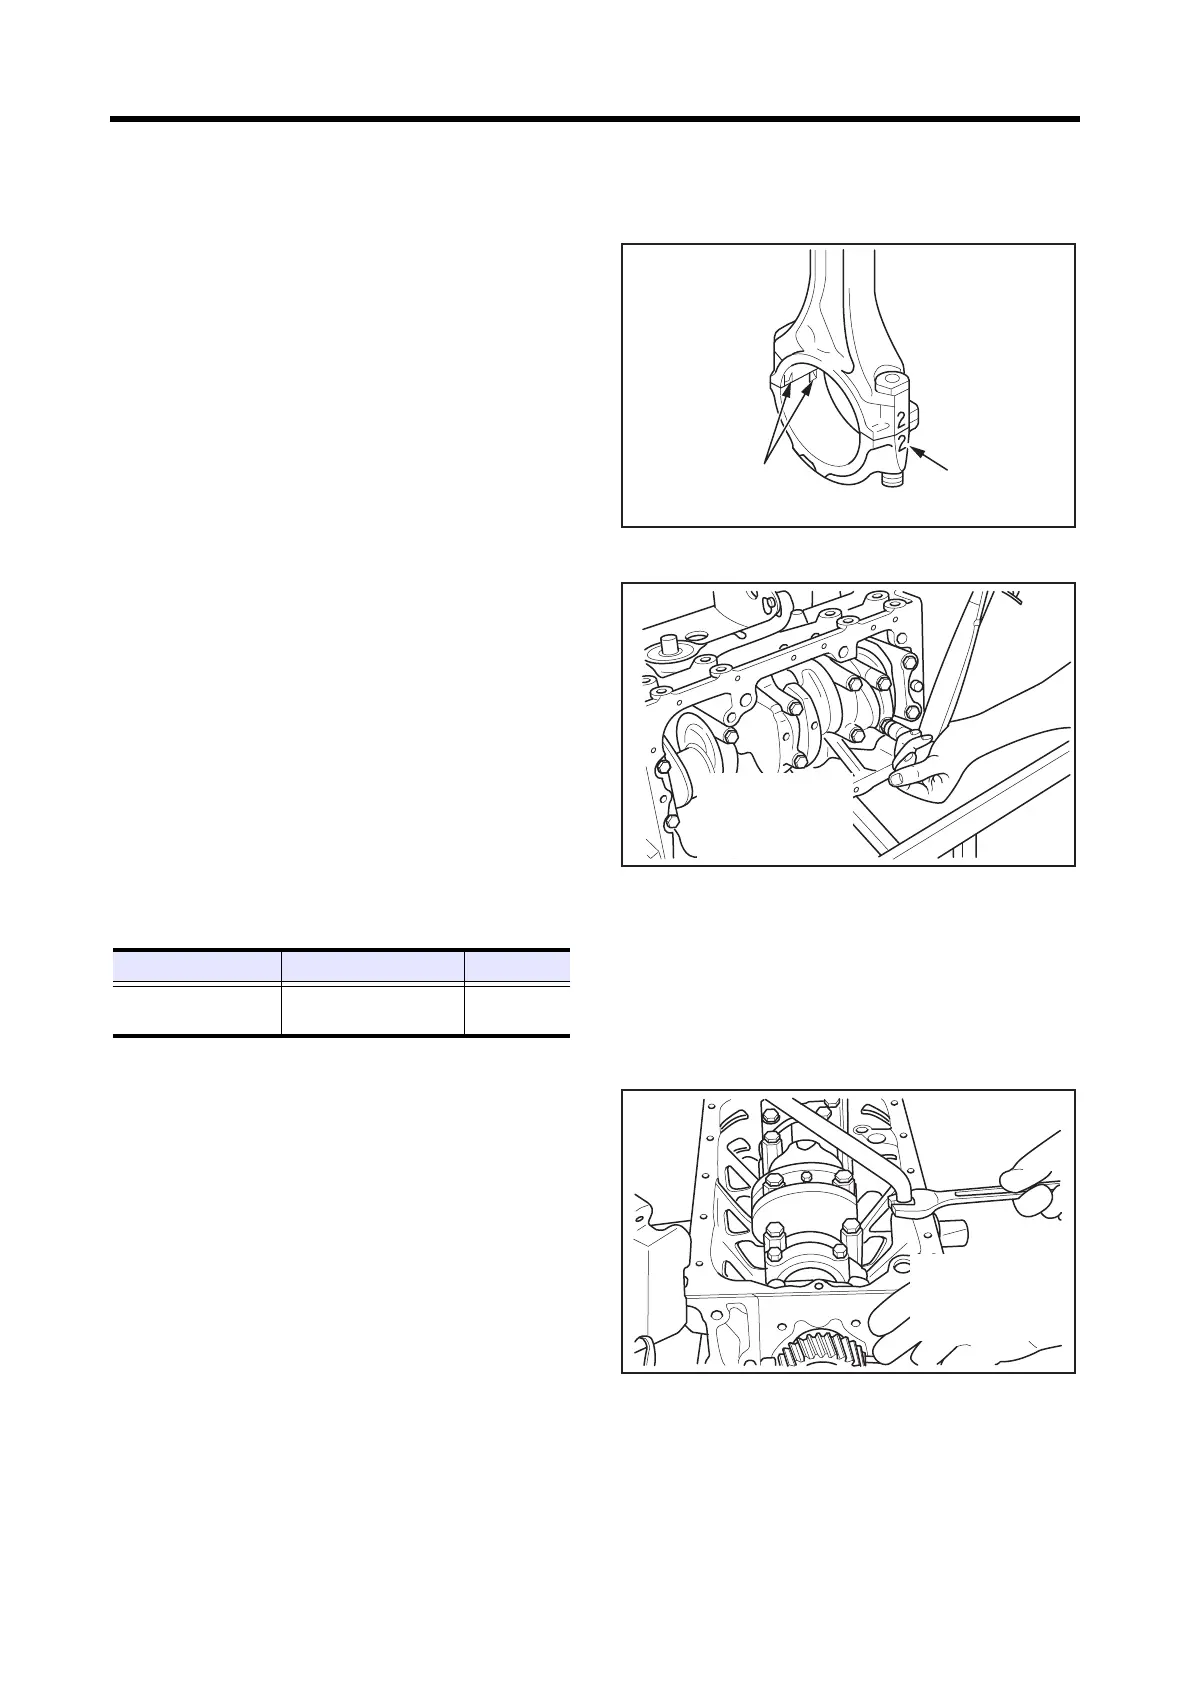
1.10 Installing connecting rod cap
(1)
When the big end of the connecting rod comes into
close contact with the crank pin, turn the crankshaft
180° while pressing the piston head.
(2) Fit the connecting rod bearing (lower) to the rod cap
with the lug aligned with the lug groove.
(3) Install the cap to the connecting rod, aligning the
mating marks made during disassembly.
Note: For new connecting rod on which there is no mating
mark, orient the lugs of upper and lower bearings on
the same side as shown in the illustration.
(4) Tighten the connecting rod cap nuts evenly and
progressively to the specified torque.
(5) Inspect end play of the connecting rod. If end play is
small, loosen and retighten the cap nuts.
Installing connecting rod caps
Tightening connecting rod cap nuts
1.11 Installing oil strainer
(1)
Invert the cylinder block to face up the oil pan
mounting surface.
(2) Make sure that the end of the strainer does not contact
to oil pan, install the strainer and tighten the nut to the
specified torque.
Installing oil strainer
Item Standard Limit
End play of connecting
rods
0.10 to 0.35 mm
[0.0039 to 0.0138 in.]
0.50 mm
[0.0197 in.]
Lug groove
Cylinder No.
32.4 to 37.3 N·m
{3.3 to 3.8 kgf·m}
[23.9 to 27.5 lbf·ft]
24.5 to 29.4 N·m
{2.5 to 3.0 kgf·m}
[18.1 to 21.7 lbf·ft]
 Loading...