Methods of creating stitching data
[9] Methods of creating stitching data
By removing the presser bar lifting from sewing machine, data can be input safety and
accurately. Note that the needle will rise to the UP position when the "Home position
Return" key is pressed.
(If the needle is not at the UP position, it may lower once and then return to the UP position.)
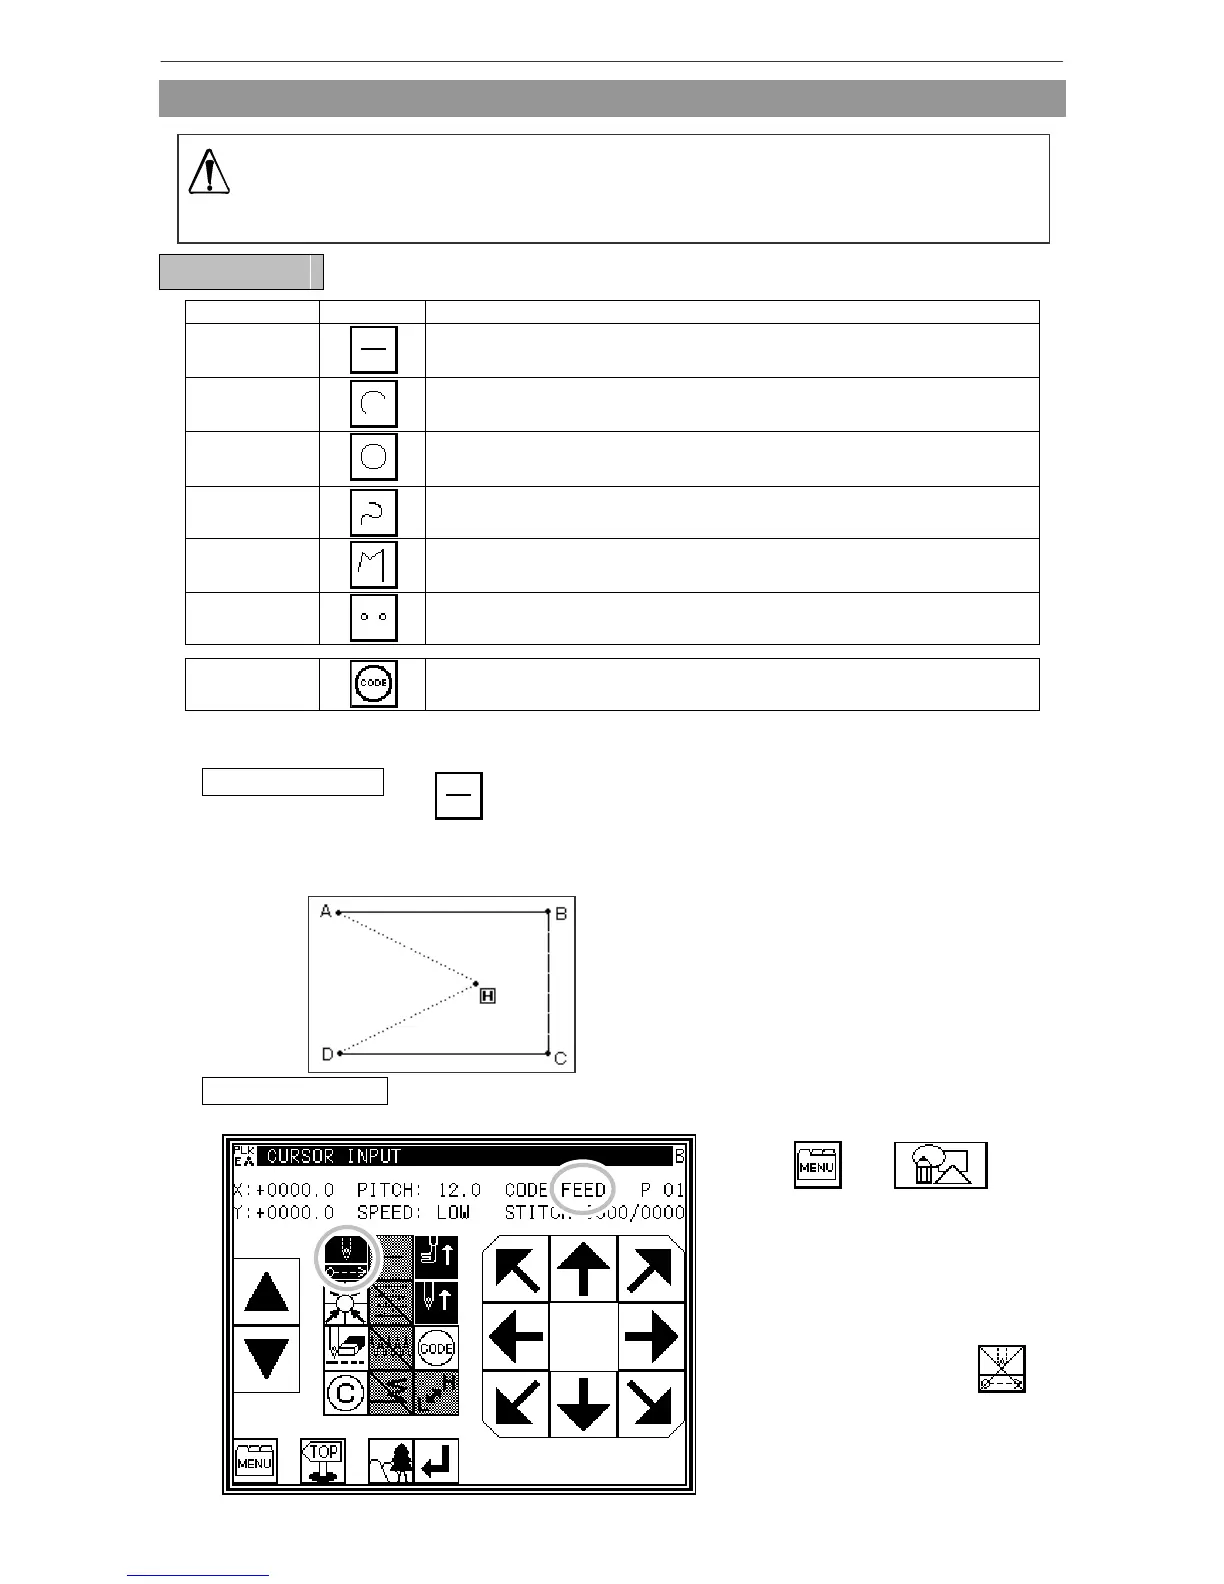
BasicInputs
Function Key Explanation
Linear
2-point input: A linear line is created between the current position
(already input) and the newly input point.
Arc
3-point input: An arc, passing through the current position (already
input) and two newly input points, is created.
Circle
3-point input: A circle, passing through the current position (already
input) and two newly input points, is created.
Curve
A curve passing through the current position (already input) and the
input point (up to 63 points possible) is created.
Broken line
A broken line connecting the current position (already input) and the
input point (up to 63 points possible) is created.
Point
The point can be input one stitch at a time.
* The distance between the points must be within 12.7mm.
Code
The code by which various controls are done can be input.
(1) Linear input
Operation points
* Designate linear input ( )
* Input two points (A linear line is created between the current position (already input) and the
newly input point.)
[Example] The following type of pattern data will be created.
Operation details
1. Inputting feed data to A point
* Press and on
the Standard screen. After making the
various settings on the Data Setting
Input screen, the Arrow Input screen
will open.
* Check that the code is set to FEED.
If different code is set, press
and set the code to FEED.
* Press the arrow keys and move to the
A point.
(Feed data to A point.)
[9]-1