Methods of creating stitching data
[9]-12
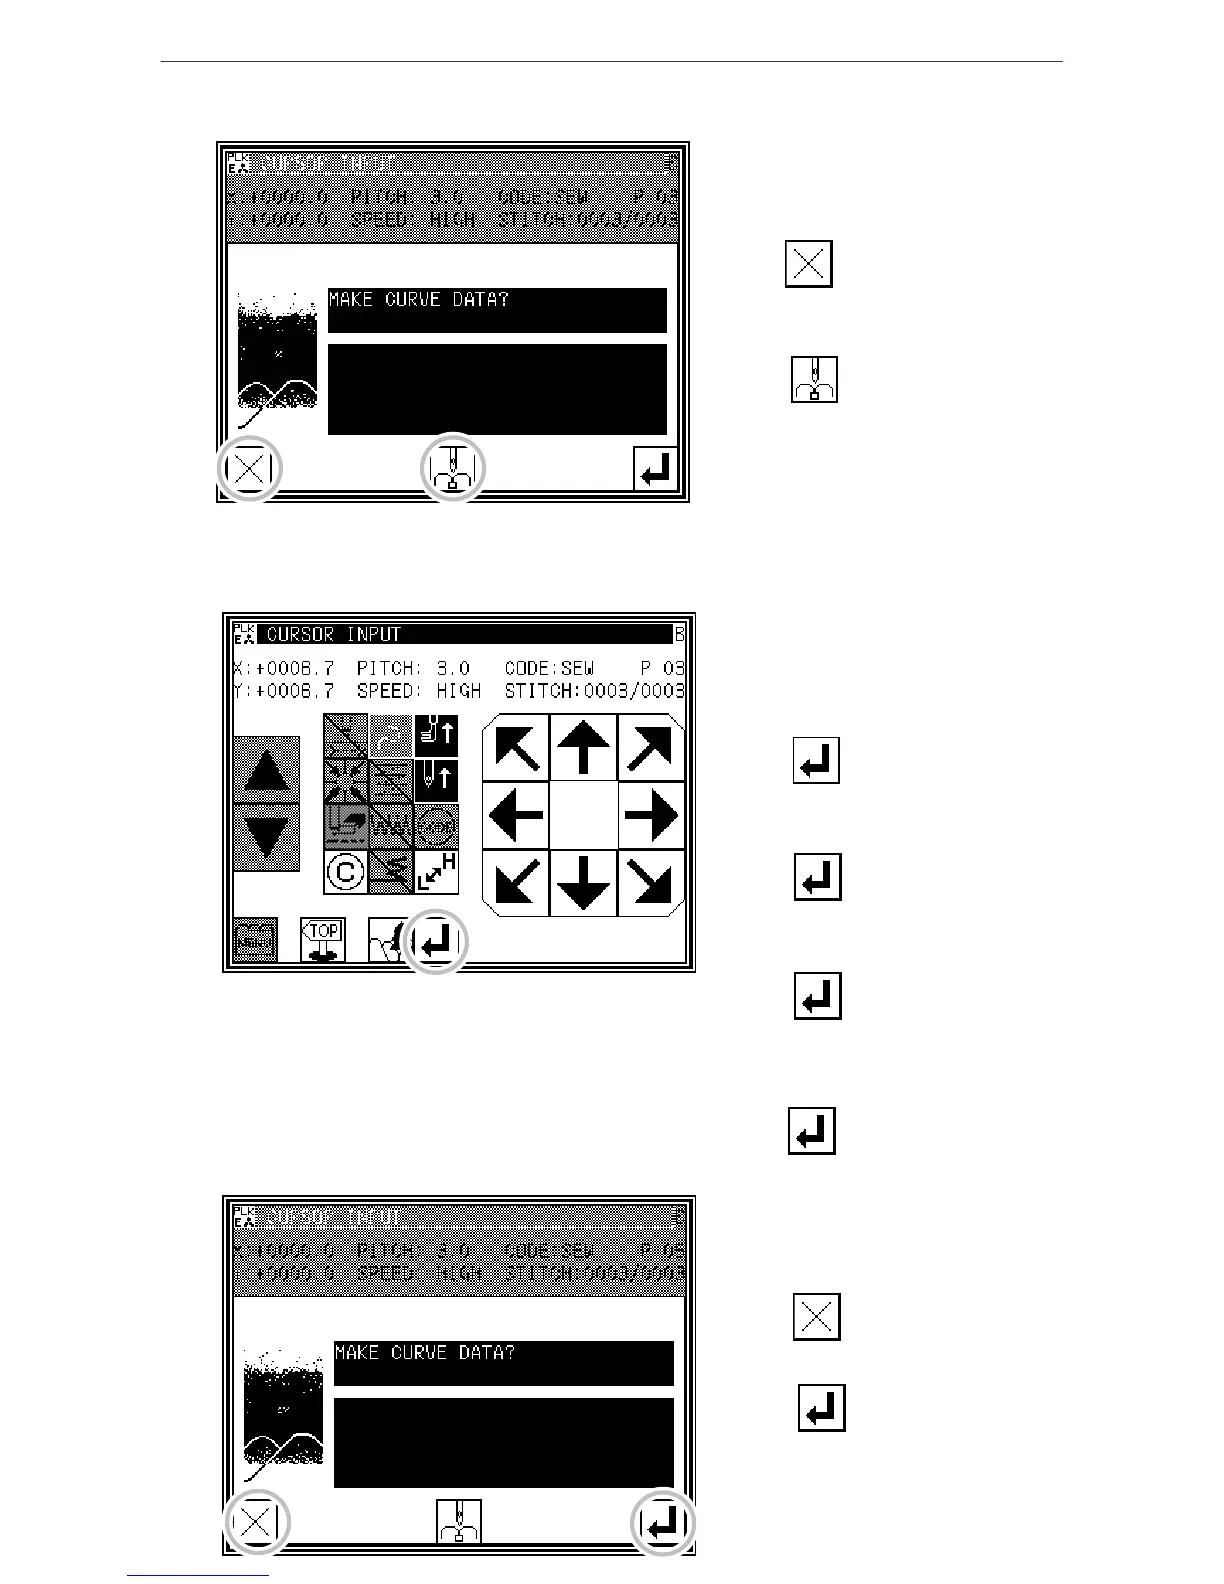
6. Inserting a delimiter point
* The data creation confirmation
message "Create breakpoint data" will
appear.
* Press to return to the point C
data
entry screen.
* Press . The breakpoint will be
set here.
7. Setting the D point, E point and F point, and setting the curve input
* The Arrow Input screen will reappear.
* Press the arrow keys, and move to the
D point.
* Press to determine point D.
* Press the arrow keys again, and move
to the E point.
* Press to determine point E.
* Press the arrow keys again, and move
to the F point.
* Press to determine point F.
(Up to 63 points can be input.)
* At the completion of all point data
entry,
press again to create data.
8. Creating the curve input
* The data creation confirmation
message "Create breakpoint data" will
appear.
* Press to return to the last point
input screen.
* Press to start creation of
the curve input data.
* A message indicating that the data is
being created will appear.
(The curve will be created.)

 Loading...