Methods of creating stitching data
(4)Curve input
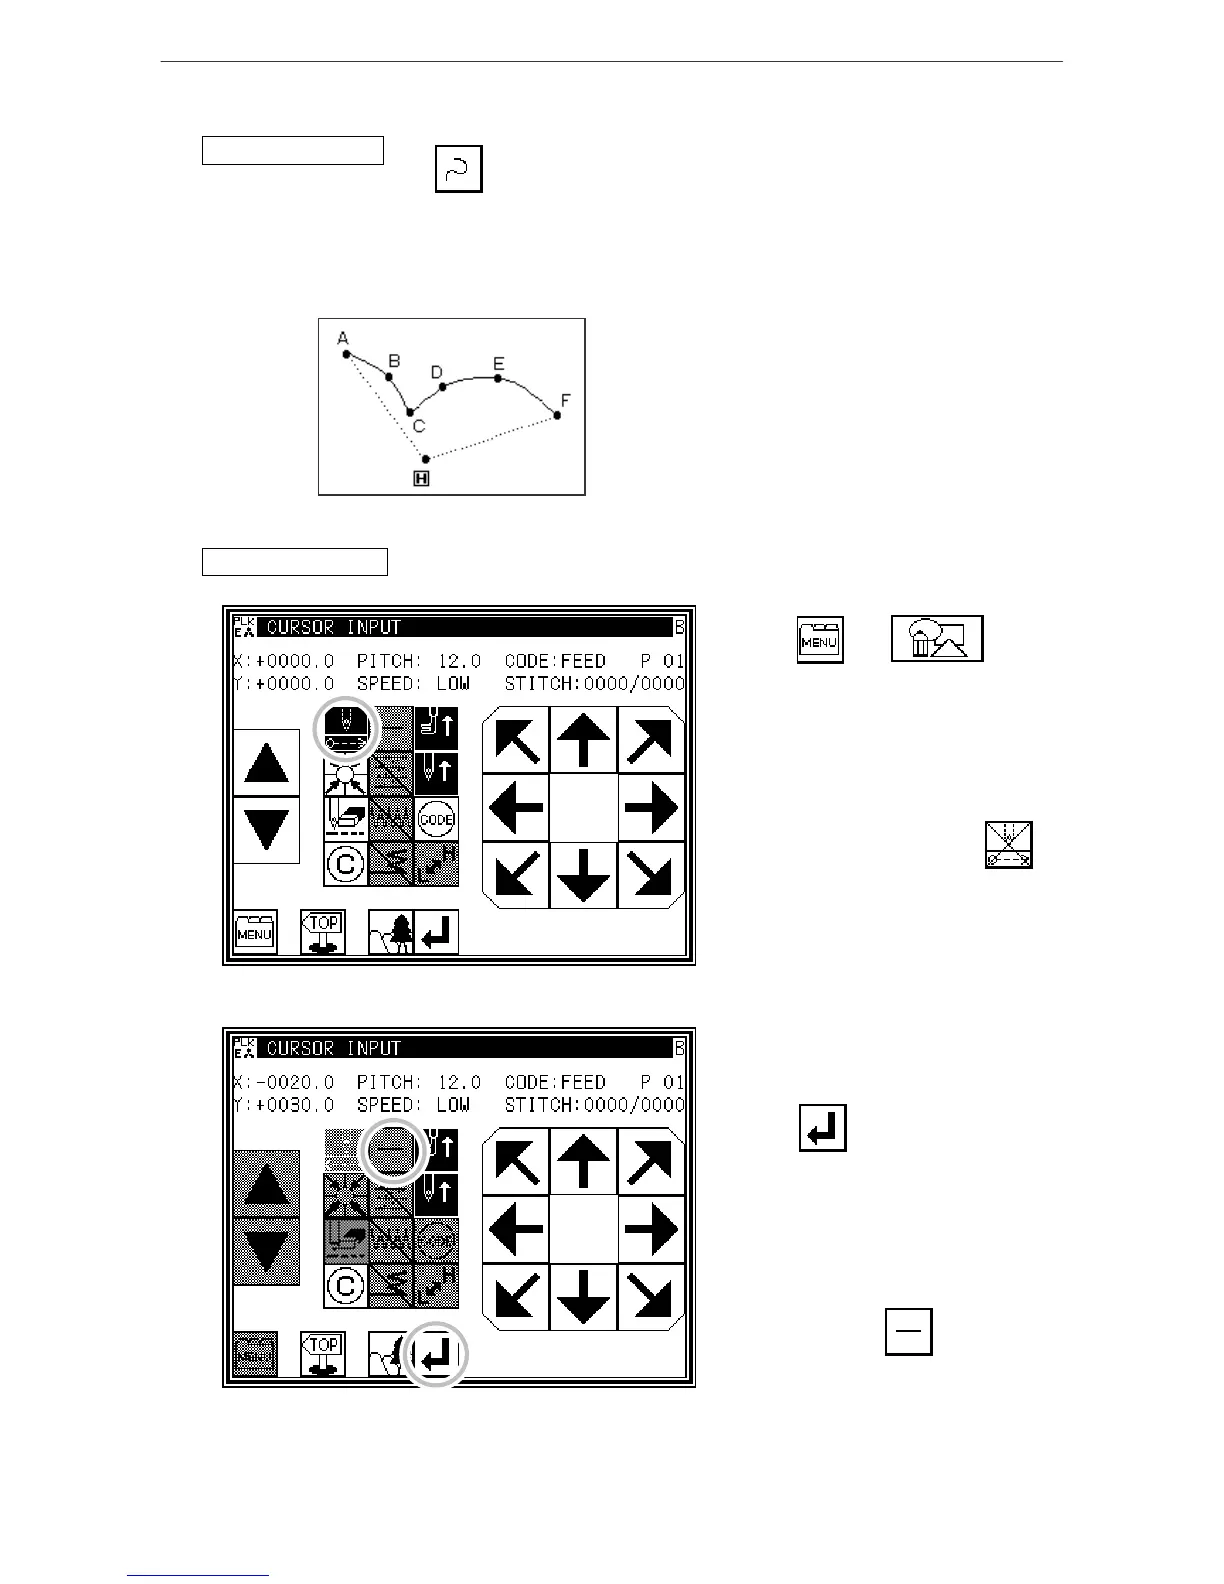
Operation points
* Designate curve input ( )
* Up to 63 points can be input (A curve, passing through the current position and the input
points, is created.)
* A delimiter point can be inserted at a pointed corner to continuously input the curve.
[Example] The following type of pattern data will be created.
A delimiter is set at the C point.
[Memo] Set the stitch length between 0.1 to
10.0mm.
Operation details
1. Inputting feed data to A point
* Press and on
the Standard screen. After making the
various settings on the Data Setting
Input screen, the Arrow Input screen
will open.
* Check that the code is set to FEED.
If different code is set, press
and set the code to FEED.
* Press the arrow keys and move to the
A point.
(Feed data to A point.)
2. Setting feed data to A point
* The movement amount can be
confirmed.
* Press to set the data.
(Data on feed data to point A will be
created.)
* To change the stitching type to
"CURVE INPUT", press the input
method setting key.
(In this case, the key.)