Methods of creating stitching data
[9]-28
Memo Or press the back tacking data setting key on the arrow input screen to directly display the
"detailed back tacking data setting" screen.
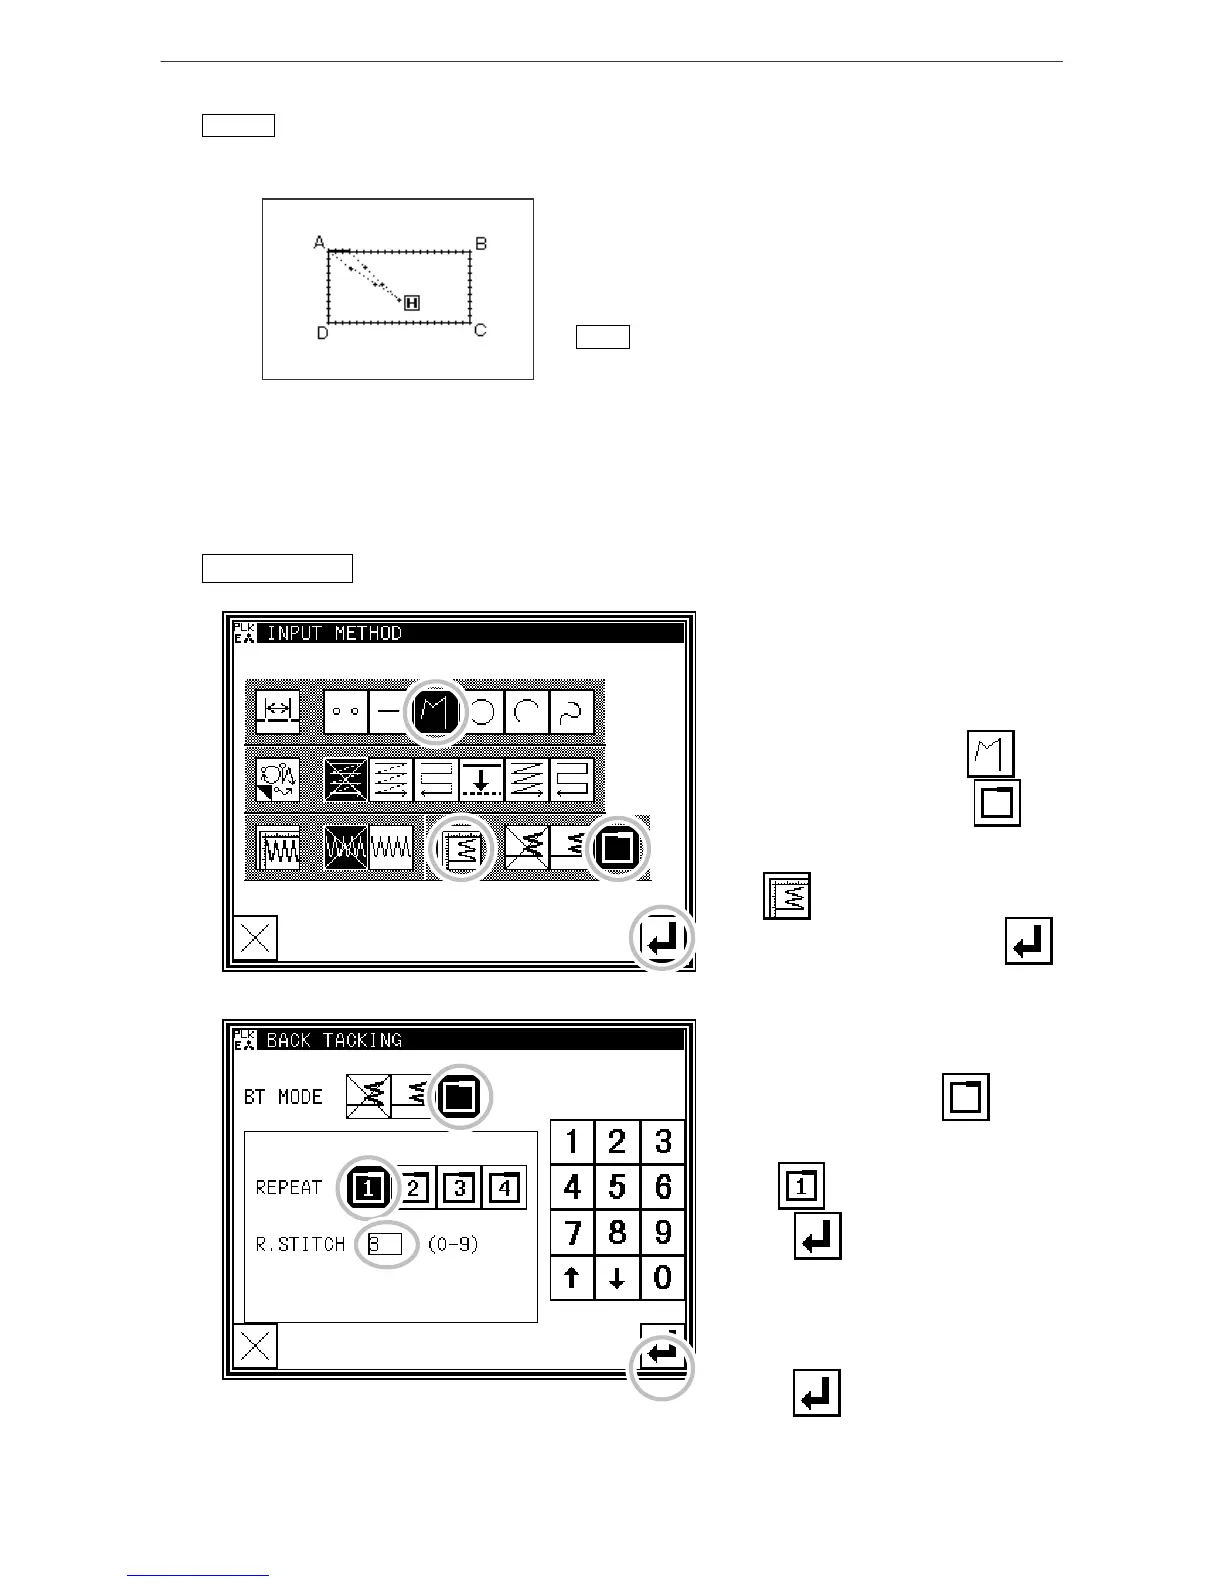
(9)Back tacking (overlap back tacking)
[Example] The following type of pattern data will be
created.
Input a rectangle as a broken line, and then insert overlap
back tacking at the end. (The overlap mode is entered
once; three overlap stitches are made.)
(The bold section is the overlap back tacking section.)
Memo
It is a shutting figure in the figure made in [Broken line],
[Circle], [Arc], [Curve] to be able to do multiple back
tacking.
That is, it is not possible to do by combining "Straight line" in the plural in the enclosed
figure.
Moreover, it is not possible to do by plural combining "Straight line" and "Curve" also even in
the enclosed figure. The multiple back tacking can be made only by 1 place per 1 "Sewing"
data origination.
Operationdetails
1. Setting the input method
* Set the feed data from the home
position to the A point with the
procedures for broken line input, and
open the Input Method Setting screen.
* Press broken Line Input .
* Press Overlap back tacking .
* Press the back tacking details setting
key .
* After inputting the details, press
to set the data.
2. Setting the back tacking details
* The details are set on this screen.
(The details set here are,
(overlap back tacking), overlap
mode , three overlap stitches.)
* Press to determine these set
values.
* The system will return to the input
method setting screen.
*
Press to determine the set
values.
* The system will return to the arrow input screen.
* Determine the B, C, D and A points withthe
broken line procedures, and create the broken
line data. (A broken line having overlap back
tacking will be created.)

 Loading...