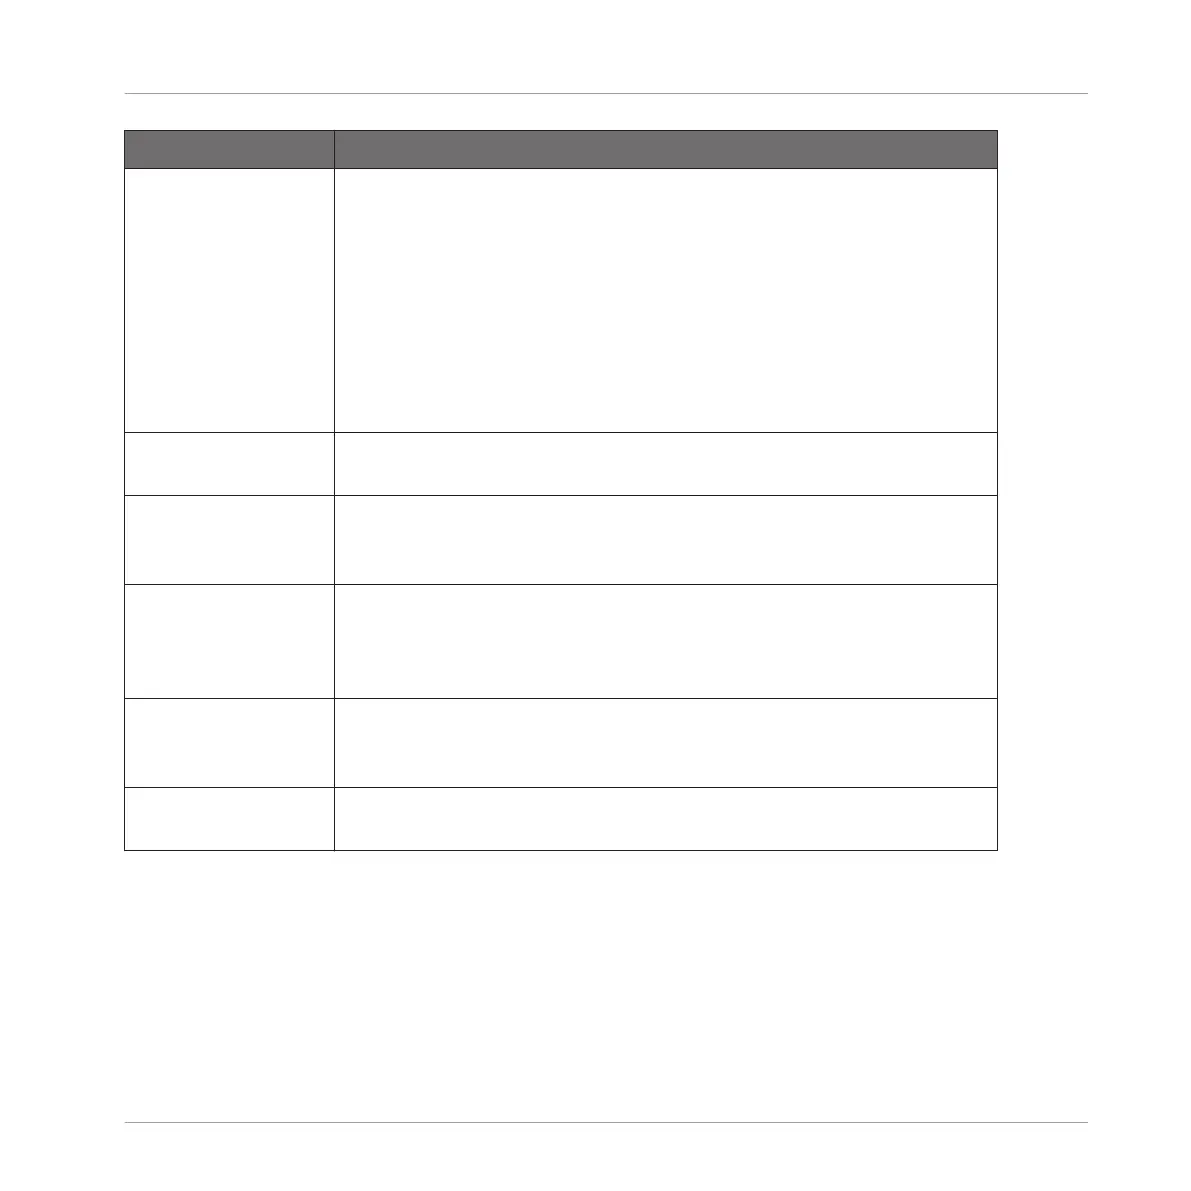
Selection Tool Description
Pads Unlit pads indicate pitches at which the Pattern has no notes. Nothing
happens when you press them.
Dimmed pads indicate pitches at which notes can be selected: Press
any dimmed pad to add all notes at that pitch to the selection. The
pad turns fully lit to indicate that all its notes are selected. You can
press any additional dimmed pad to add its notes to the selection.
Fully lit pads indicate pitches at which all notes are selected: Press any
lit pad to remove all its notes from the selection (the pad turns dim
lit).
Button 7/8 (ALL/
NONE)
Selects/deselects all notes for all pitches of the current Sound — in
short all events of that Sound.
Button 5/6 (UP/
DOWN)
Switch the focus to the previous/next Sound in order to add or remove
some of its notes to/from the selection. The name of the focused
Sound is indicated in the middle left part of the right display.
Knob 1/2 (START/
END)
Define the selection’s start and end points in the timeline for the
focused Sound. All notes within this time interval and within the pitch
interval defined by LOW and HIGH (see below) are included into the
selection.
Knob 3/4 (LOW/
HIGH)
Define the selection’s lowest and highest pitch for the focused Sound.
All notes within this pitch interval and within the time interval defined
by START and END (see above) are included into the selection.
Page buttons Drop the current selection and select the previous/next individual
event for the focused Sound.
By combining these tools you can precisely define the selection of notes you want to edit.
The total number of notes/events included in the current selection is shown in the right dis-
play.
7.4.4 Editing Selected Events/Notes
Once you have selected particular events, you can edit them in various ways.
Working with Patterns
Editing Events
MASCHINE - Manual - 343

 Loading...