genie BASIC Settings
39
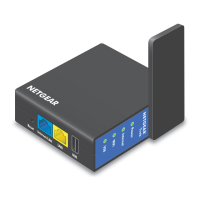
Trek N300 Travel Router and Range Extender PR2000
• Connection Mode. Select Always On, Dial on Demand, or Manually Connect.
• Idle Timeout (In minutes). If you want to change the login time-out, enter a new
value in minutes. This setting determines how long the Trek keeps the Internet
connection active when there is no Internet activity from the LAN. A value of 0 (zero)
means never log out.
10. Enter the settings for the IP address and DNS server.
The default settings usually work fine. If you have problems with your connection, check
the following ISP settings:
• Internet IP Address. Select one of the following radio buttons:
- Get Dynamically from ISP. Your ISP uses DHCP to assign your IP address. Your
ISP automatically assigns these addresses.
- Use Static IP Address. Enter the IP address, IP subnet mask, and the gateway IP
address that your ISP assigned. The gateway is the ISP’s gateway to which your
Trek will connect.
• Domain Name Server (DNS) Address. The DNS server is used to look up site
addresses based on their names. Select one of the following radio buttons:
- Get Automatically from ISP. Your ISP uses DHCP to assign your DNS servers.
Your ISP automatically assigns this address.
- Use These DNS Servers. If you know that your ISP requires specific servers,
select this radio button. Enter the IP address of your ISP’s primary DNS server. If
a secondary DNS server address is available, enter it also.
• Router MAC Address. The Ethernet MAC address that the Trek uses on the Internet
port. Some ISPs register the MAC address of the network interface card in your
computer when your account is first opened. They accept traffic only from the MAC
address of that computer. This feature allows your Trek to use your computer’s MAC
address (also called cloning). Select one of the following radio buttons:
- Use Default Address. Use the default MAC address.
- Use Computer MAC Address. The Trek captures and uses the MAC address of
the computer that you are now using. You must use the one computer that the
ISP allows.
- Use This MAC Address. Enter the MAC address that you want to use.
11. Click the Apply button.
Your settings are saved.
12. Click the Test button to test your Internet connection.
If the NETGEAR website does not display within one minute, see Chapter 9,
Troubleshooting.
Wired WAN Connection Wireless AP Mode
The wireless AP mode allows this device to work as a standalone wireless access point on
your existing network. You can view or change basic ISP information.
 Loading...

