Chapter 2 Individual Operations
51
Chap. 2
Individual Operations
12
Switching Objectives
12.1
Basic Operation
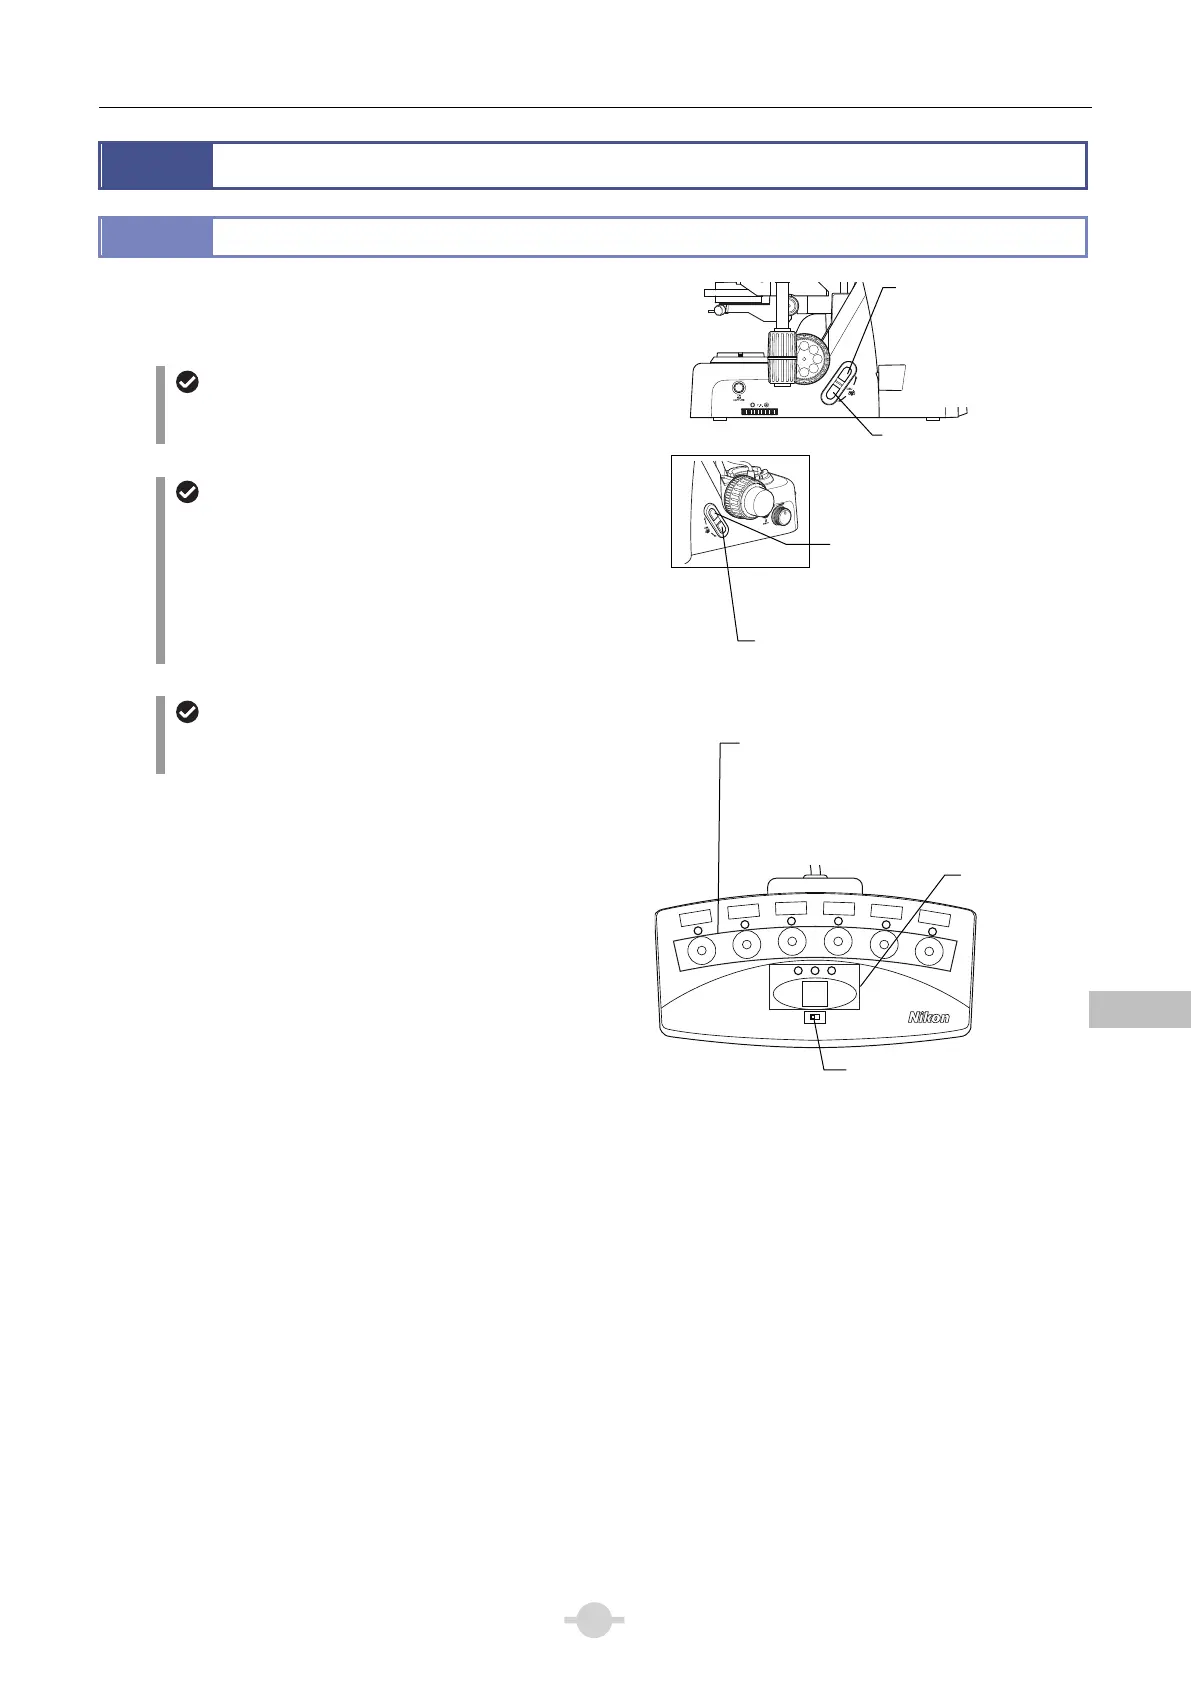
To switch the objective, press the nosepiece forward/reverse
rotation buttons on the main body, or the nosepiece address
button on the remote control pad.
OFF
TOGGLE
PATTERN
MEMORY
12
Setting mode switch
During microscopy, keep this switch set to the left side
(operation mode).
Disabling the reverse rotation from Address 1 to 6
Normally, the nosepiece rotates in the direction that is the
shorter distance to the specified address. However, when
the reverse rotation lock is enabled for the rotation from
Address 1 to 6, a direct movement from Address 1 to the
next Address 6 can be disabled. See Section 13.3 “Reverse
Rotation Lock (Rotation from Address 1 to 6)” when using
the reverse rotation lock.
Brightness during nosepiece rotation
The brightness of the dia-illumination LED degrades during
the nosepiece rotation, but it is not a failure.
The following is interlocked with the switching of the objective:
Brightness of the dia-illumination LED
The brightness previously set for the address is automatically
set. The brightness is reset once the illumination is turned off,
and is set to the initial brightness upon next use. For details on
setting the default brightness, refer to “13.2 Changing the
Initial Brightness of Dia-illumination LED”.
Condenser top lens swing-out
The condenser top lens is interlocked only when using a
motorized swing-out condenser. See “13.1 Configuring the
Motorized Swing-out Condenser” for the settings.
Upper right side:
Nosepiece reverse
rotation button
Rotate toward the
direction so that the
nosepiece address is
decremented
Lower right side:
Nosepiece forward rotation
button
Rotate toward the direction
so that the nosepiece
70
60
50
40
30
20
10
0
90
80
Lower left side:
Nosepiece reverse rotation button
Rotate toward the direction so that
the nosepiece address is
decremented
Upper left side:
Nosepiece forward rotation button
Rotate toward the direction so
that the nosepiece address is
incremented
Nosepiece address button
(1 to 6 from the left)
Pressing each button brings the objective
at the address into the optical path.
The button of the address currently in the
optical path is illuminated.
Toggle pattern
switch
Setting mode switch
Left: Operation mode
Right: Setting mode
 Loading...