Chapter 3 Assembly
73
Chap. 3
Assembly
3
Assembly for Phase Contrast Microscopy
Follow the procedure described in Section 2 “Assembly for Bright-field Microscopy” to perform assembly.
Note the following:
■ Attaching a condenser for phase contrast microscopy
Use a condenser for the phase contrast microscopy in the step 3, “Attach the condenser.”
The procedure is the same.
■ Attaching a Ph objective
A Ph objective must be attached in the step 7, “Attach the objective”.
The procedure is the same.
4
Assembly for the Simple Polarizing Microscopy
Follow the procedure described in Section 2 “Assembly for Bright-field Microscopy” to perform assembly.
Note the following:
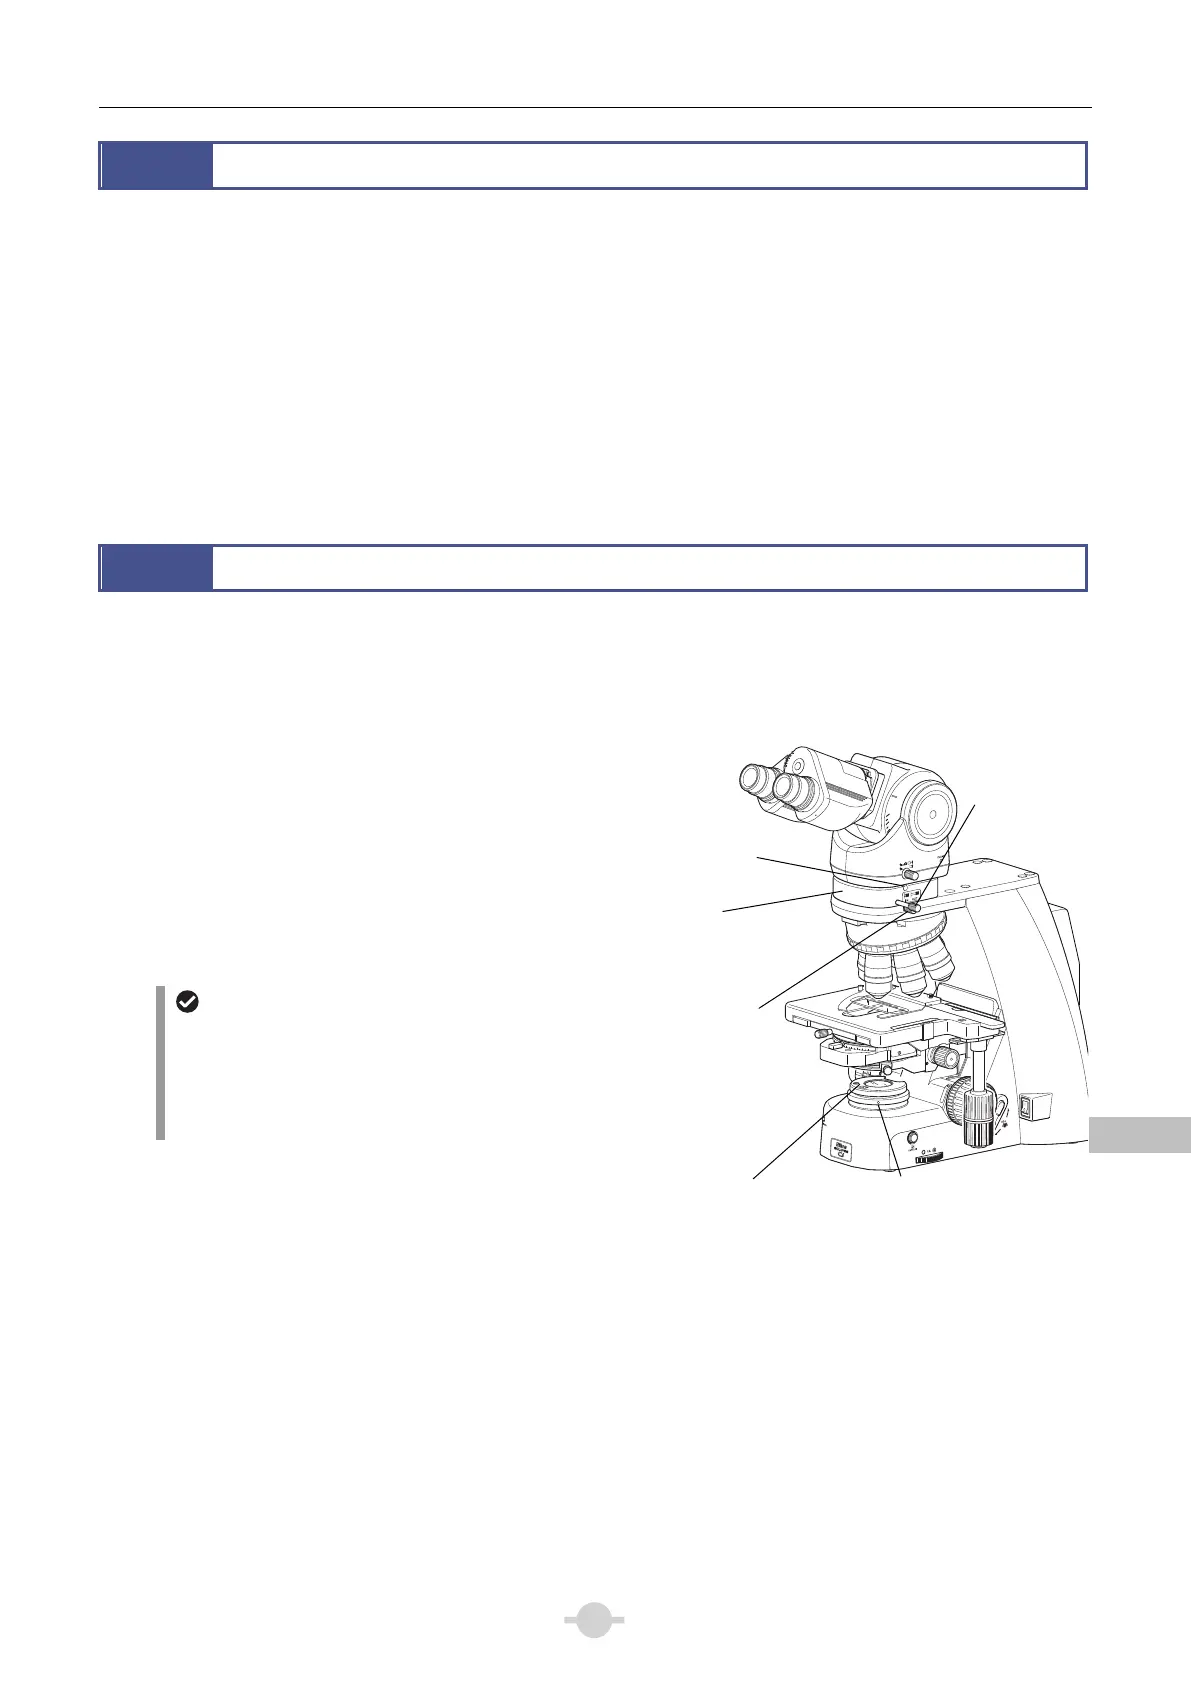
■ Attaching an analyzer tube for simple polarization
Attach an analyzer tube for simple polarization to the
microscope arm prior to the step 4, “Attach the tube.”
Place the analyzer unit (analyzer tube for simple
polarization) on the arm so that the analyzer IN/OUT knob is
positioned to the right, and secure the analyzer unit in place
with the analyzer unit clamp screw.
Place the tube on the analyzer unit and tighten the tube
clamp screws of the analyzer unit using the tool provided
with the microscope to secure the tube.
CLAMP
TORQUE
0.1
0.3
0.4
0.5
0.2
0.9
0.8
Attaching an analyzer tube for simple polarization,
polarizer unit for simple polarization
Slider-type analyzer for simple polarization
When using the D-SA Analyzer Slider for Simple
Polarization instead of an analyzer tube for simple
polarization, insert it into the analyzer slot of the nosepiece.
(To use the D-SA Analyzer Slider for Simple Polarization,
the C-NA sextuple nosepiece with analyzer slot is
required.)
■ Attaching a polarizer unit for simple polarization
Set the polarizer unit for simple polarization over the field lens on the base of the microscope. Make sure the
orientation mark on the polarizer comes to the front at this point and tighten the polarizer unit clamp screw.
The actual securing will take place after the orientation of the analyzer and polarizer has been adjusted in Step 16 o
the simple polarizing microscopy procedure.
Tube clamp screw
(use a tool)
nalyzer
IN/OUT knob
nalyzer unit
clamp screw
nalyzer tube for
simple polarization
Polarizer unit
clam
screw
use a tool
Polarizer unit for
simple polarization
 Loading...