Chapter 2 Microscopy Procedures
8
1
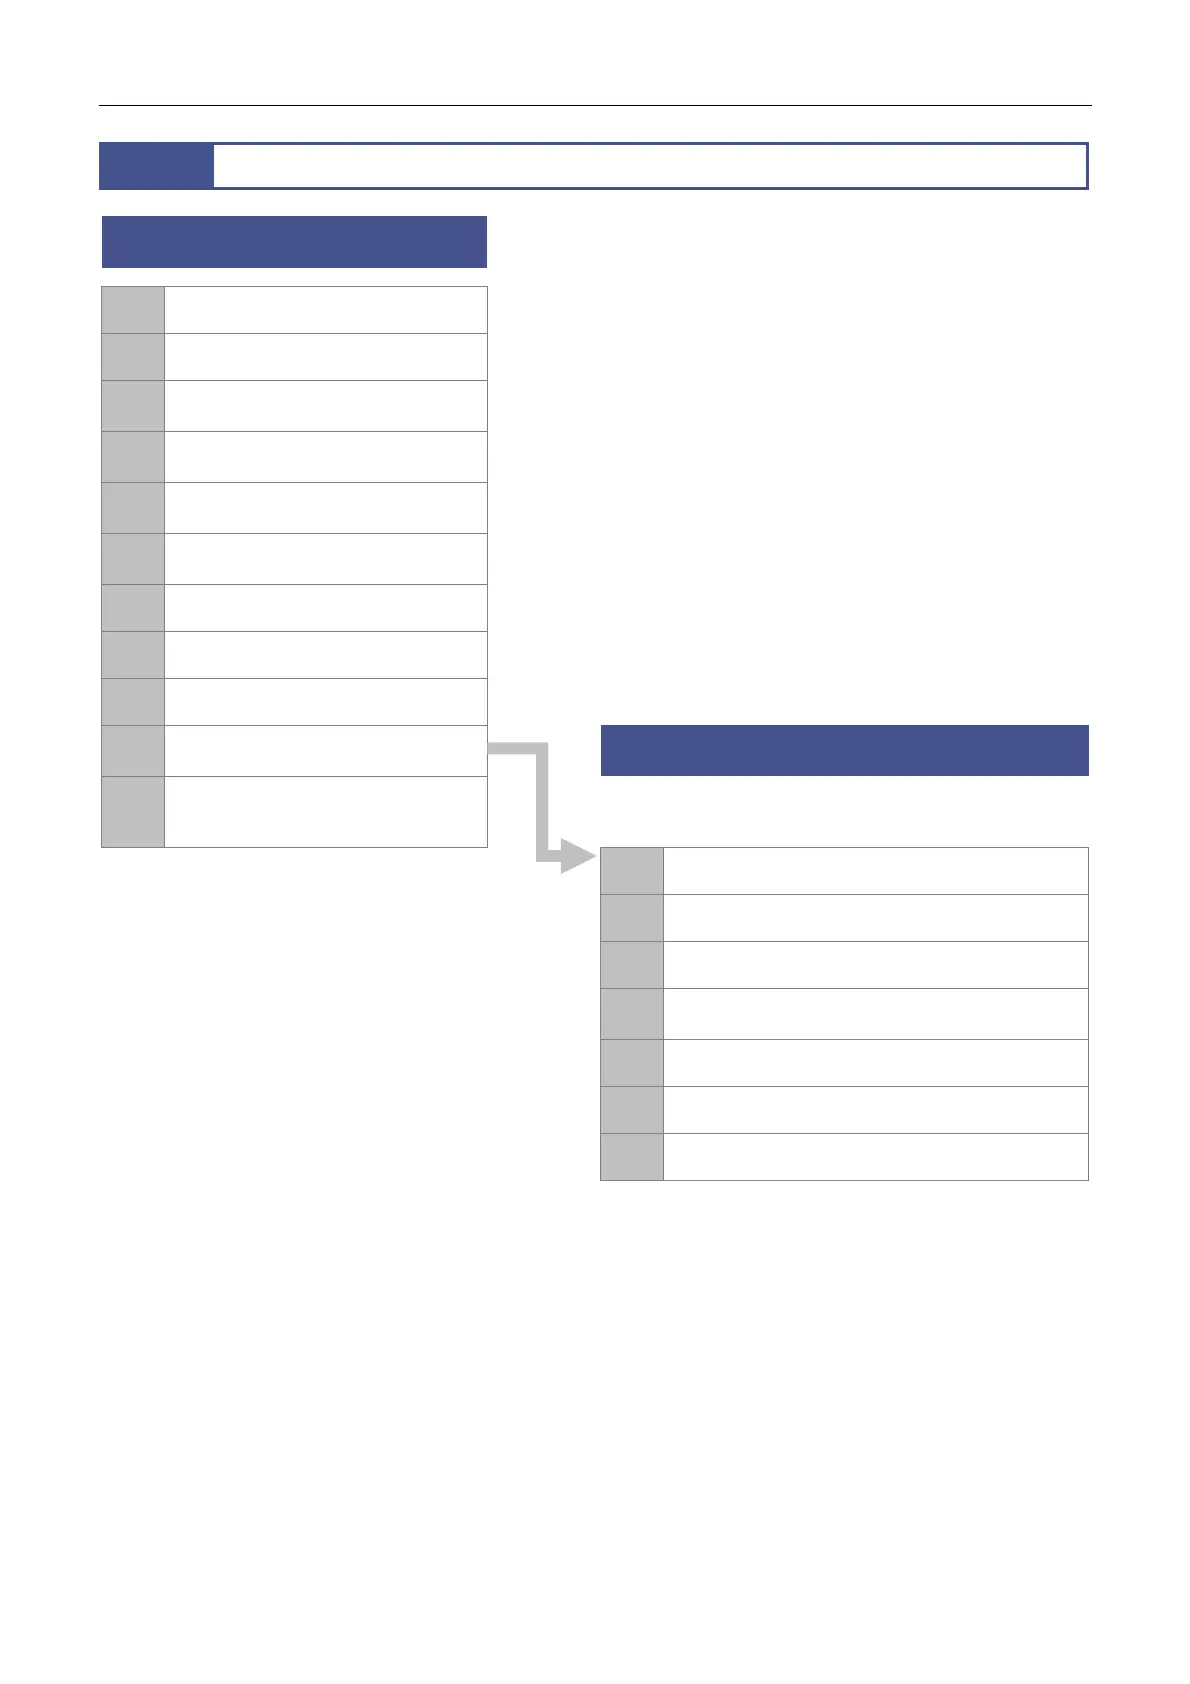
Operation Flowchart
Microscopy under episcopic illumination or
diascopic illumination
1
Turn on the power.
2
Set a sample.
3
Bring an objective into the optical
path.
4
Turn on the illumination and adjust
the brightness.
5
Set the optical path to 100% to the
binocular part.
6
Adjust the depression angle of the
tilting tube.
7
Adjust the diopter.
8
Adjust the interpupillary.
9
Adjust the focus.
10
Change the magnification using the
zoom knobs.
Epi-fluorescence microscopy
11
Turn off the power after completing
microscopy.
After locating the target in the sample with
microscopy under diascopic illumination, follow
the procedure below:
* In microscopy under diascopic
illumination using an epi-fluorescence
attachment, attach an empty cube
(supplied with the microscope) to the
epi-fluorescence attachment and bring it
into the optical path.
* When using a compact system of an
SMZ18 Zooming Body combined with a
P-PS32 Plain Stand and P2-FMDN Focus
Mount without using an illumination
system, perform the steps above in the
order of [2], [5], [6], [7], [8], [9], and [10].
11
Turn off the diascopic LED illumination.
12
Bring the filter cube into the optical path.
13
Adjust the angle of the light shielding plate.
14
Turn on the HG precentered fiber illuminator and
adjust the brightness.
15
Adjust the focus.
16
Change the magnification by zooming in and out.
17
Turn off the power after completing microscopy.
 Loading...