Chapter 2 Microscopy Procedures
17
4
Procedure for Epi-fluorescence Microscopy
After locating a target in a sample in “3 Procedure for Microscopy Under Diascopic Illumination” (steps 1 to 10), follow the
procedure below:
Notes on epi-fluorescence microscopy
• Do not use the epi-fluorescence attachment when the filter cube replacement cover is open. Harmful light including ultraviolet
light may leak and affect fluorescence observation.
• Immediately after diascopic observation using an epi-fluorescence attachment, the front face of the empty cube may become
hot, resulting in burns. Do not touch the front face of the empty cube. Replace the empty cube several minutes after finishing
the diascopic observation.
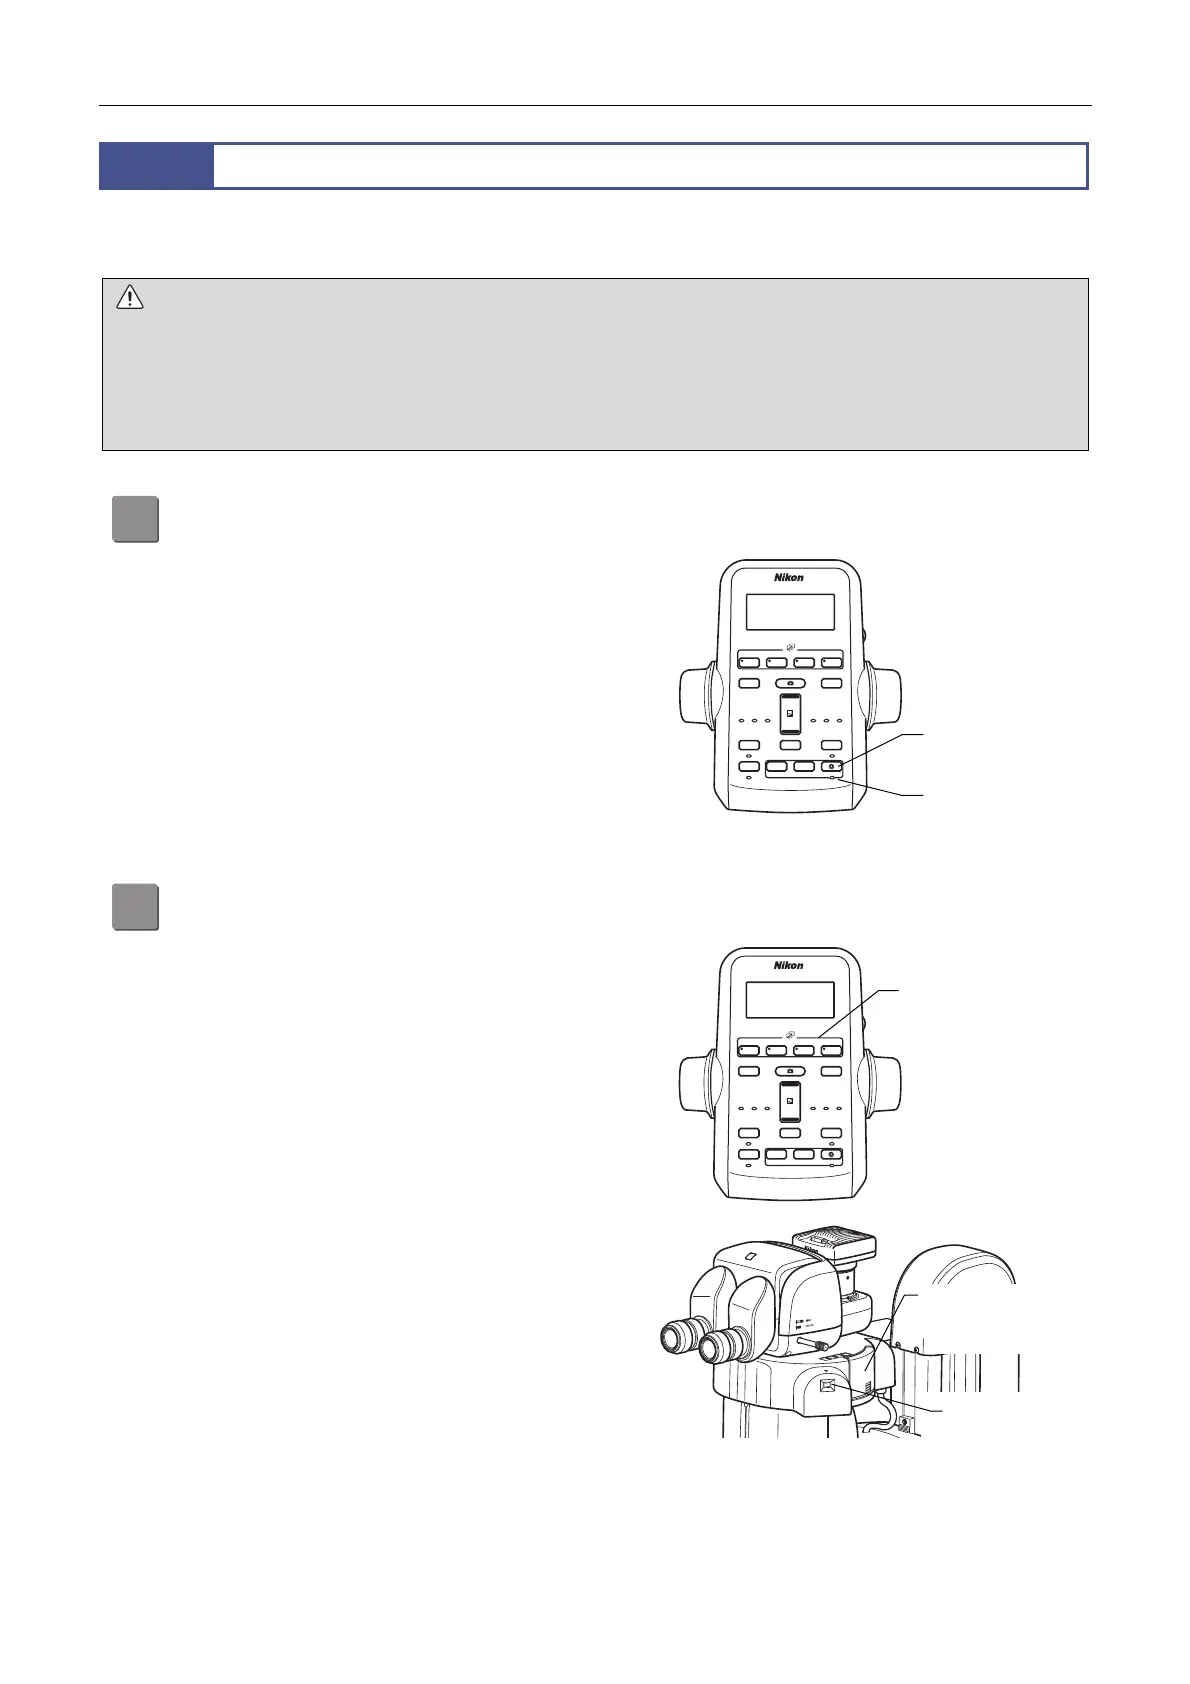
11
Turn off the diascopic LED illumination.
Press the diascopic LED ON/OFF button on the remote
controller to turn off LED illumination.
Check that the diascopic LED ON/OFF indicator turns off.
DISPLAY
BRIGHTNESS
ESCAPE
ALZ
−+
LIMIT
ZOOM
STEP
Z-RESET
Z-SPEED
ZOOM STEP
Coarse
FL Cube
ON/OFF
ON/OFF
ON/OFF
ON/OFF
Fine
Ex Fine
1x
0.5x
0.1x
+
−
Diascopic LED illumination off
12
Bring the filter cube into the optical path.
Press the filter cube switching buttons (FL1 to FL4) on the
remote controller to bring the desired filter cube into the
optical path. FL1 to FL4 designate the turret addresses of
the epi fluorescence attachment. The LED of the pressed
button lights so that the turret address on the optical path
can be identified. The address on the optical path can be
identified also through the turret address check window of
the epi fluorescence attachment.
DISPLAY
BRIGHTNESS
ESCAPE
ALZ
−+
LIMIT
ZOOM
STEP
Z-RESET
Z-SPEED
ZOOM STEP
Coarse
FL Cube
ON/OFF
ON/OFF
ON/OFF
ON/OFF
Fine
Ex Fine
1x
0.5x
0.1x
+
−
Bringing the filter cube into the optical path
Diascopic LED
ON/OFF button
Diascopic LED
ON/OFF indicato
Filter cube switching
button
Turret rotation in the
epi fluorescence
attachment
Turret address
check window
 Loading...