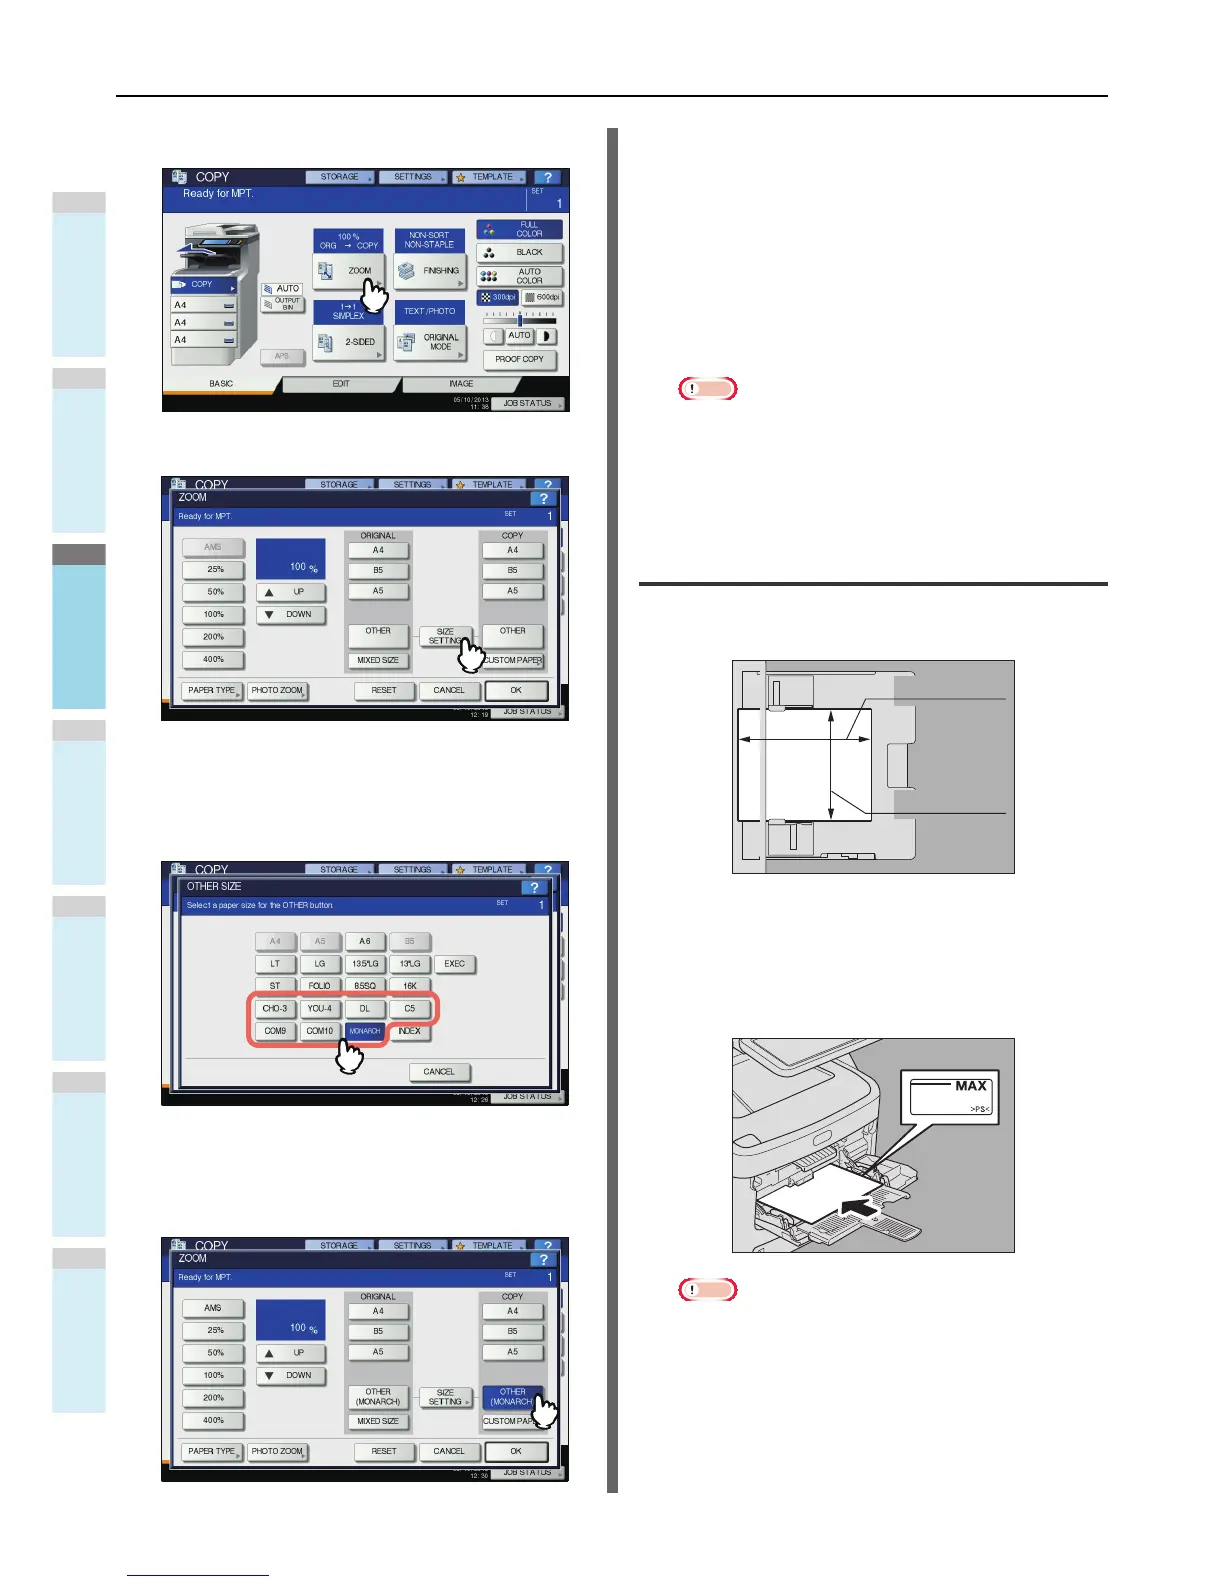
6
Press [ZOOM] on the touch panel.
7
Press [SIZE SETTING] on the touch panel.
8
Press the button of the same size as the
envelope you placed on the multi-purpose
tray.
The size of the selected envelope will be registered as an
“OTHER” size.
9
Press [OTHER] under “COPY”.
The paper size is now set to the size of the envelope
placed on the multi-purpose tray. The paper type is
automatically set to [ENVELOPE].
10
Select other copy modes as required, and
then press the [START] button on the
control panel.
Copying starts.
When the Inner Finisher is installed, the envelope exits to
the receiving tray of the finisher.
Note
• Every 10 copies, take the envelopes out from the face
down/up stacker.
Bypass copying on non-standard size
paper
You can use non-standard size paper within the sizes shown
on the right.
1
Place the original on the original glass.
2
Place the paper with its copy side face up
on the multi-purpose tray.
Note
• The height of the paper must not exceed the indicator
on the side guides.
• When you use more than one sheet of paper, fan the
sheets well before placing them on the multi-purpose
tray. Be careful not to cut your fingers when fanning.
• Do not push paper into the entrance of the bypass
feeder. This could cause a paper misfeed.
 Loading...