4-50
CHAPTER 4 Adjustment
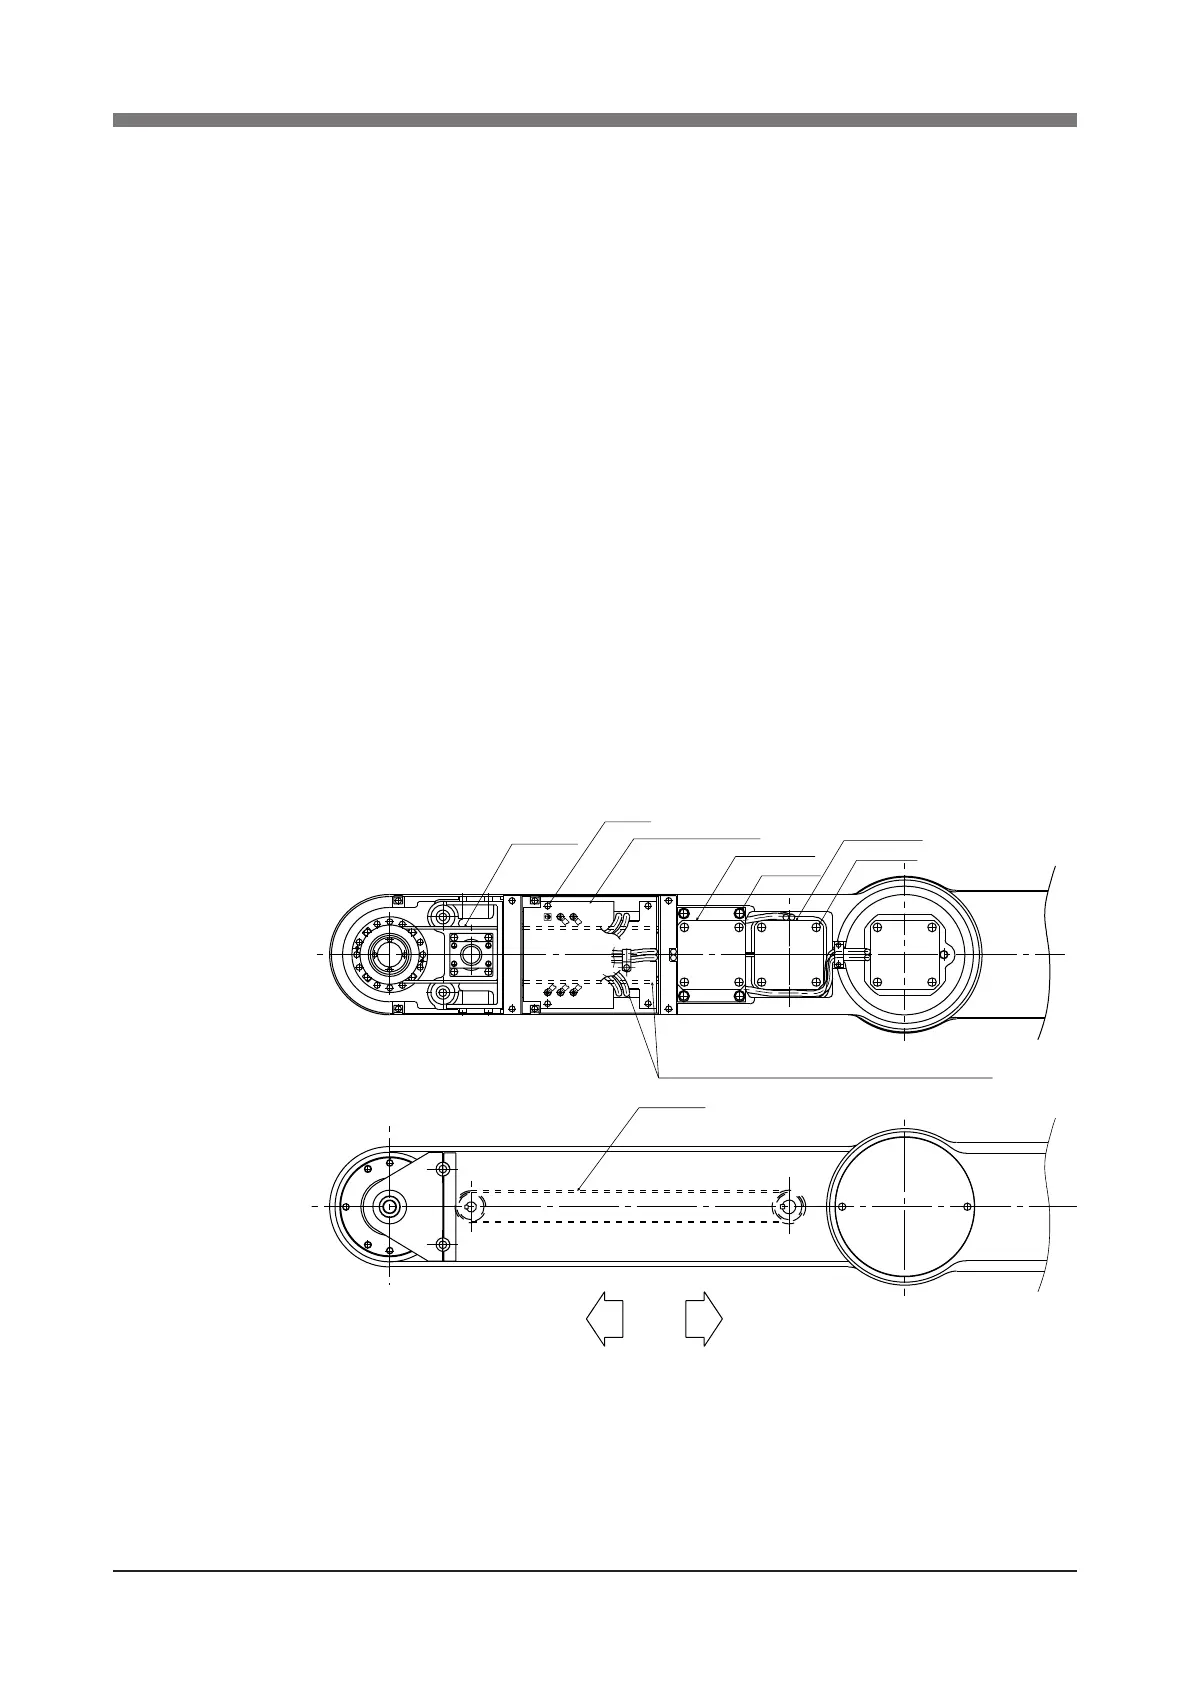
(2) R-axis belt adjustment
1. Loosen the bolt 2 shown in Fig. 4-19.
2. If the load producing the slack specied in Table 4-7 (step 7) above) is
smaller than the specied range, move the R-axis motor in the direc-
tion increasing the tension. If the load is greater than this, move it in the
direction reducing the tension. Then, retighten the bolt.
3. Recheck the belt tension using the same procedure in step 7). When the
load applied to produce the specied slack is within the specied range
of Table 4-7, the adjustment is okay. If not, repeat the above procedure
from steps 1 to 3.
10) After adjustment is complete, tighten the bolt q or w to the torque specied
in Table 4-8.
11) Reattach the harness clamp stay to the Y-axis arm. (See Fig. 4-19.)
Be careful not to allow the R-axis belt to make contact with the harness
clamp stay and harness.
12) Reattach the Y-axis arm front cover and side cover.
Refer to "7 Removing the Robot Covers" in Chapter 4 for attaching the
covers.
13) Go outside the safeguard enclosure.
14) Check that no one is inside the safeguard enclosure, and then turn on the
controller.
M4×10
harness clamp stay
R-axis belt
wM6×20
R-axis motor
Z-axis motor
qM6×20
Install the harness clamp stay so that the R-axis belt
and the harness do not make contact with each other.
Z-axis belt
Tension reduces
Tension increases
Fig. 4-19 R6YXX1200
 Loading...