5-36
CHAPTER 5 Periodic Inspection
6-3-1 Replacing the X-axis grease
(rst product to products manufactured in September 2009)
1) Prepare the following tools and items.
• Daphne Eponex grease EP-0 • Hex wrench set
• Air tube coupler (PT1/8) • Air tube
• Rag • Grease gun
2) Turn off the controller.
3) Place a sign indicating that the robot is being inspected, to keep others from
operating the controller switch.
4) Enter the safeguard enclosure.
5)
Remove the base (robot pedestal) front cover and the X-axis arm top cover.
Refer to "7 Removing the Robot Covers" in Chapter 4 for removing the cov-
ers.
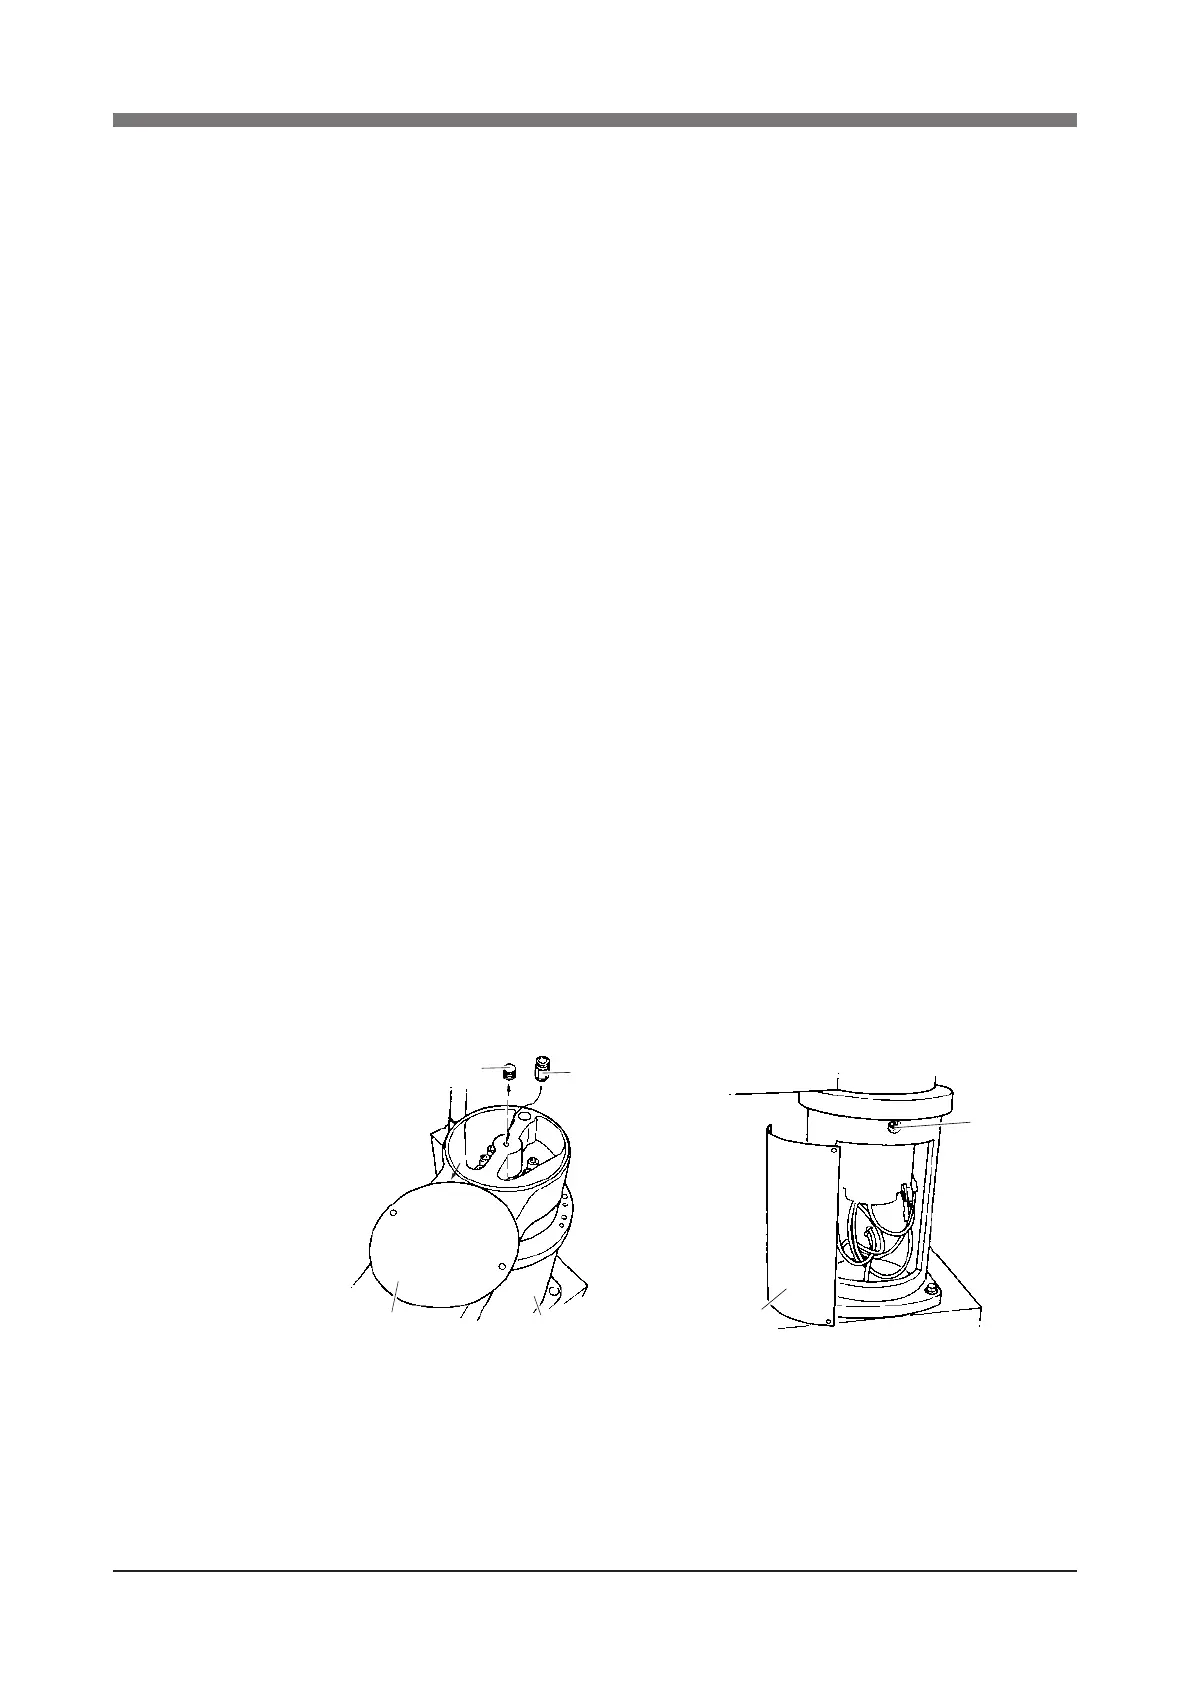
6) Remove the plug on the top of the X-axis arm. (See Fig. 5-25.)
7) To remove the old grease from the X-axis, attach the air coupler (PT1/8)
into the screw hole where the plug was tted and connect the air tube to
the air coupler. The old grease inside the X-axis will be squeezed out by
replenishing new grease with a grease gun as explained in the next steps.
8) Using the grease gun, pump the specied grease into the grease nipple lo-
cated on the front of the robot base. (See Fig. 5-26.)
9) After replenishing the grease, move the X-axis arm by hand back and forth
a few times (about 90 degrees) and then remove excess grease.
10) Remove the air coupler and then reattach the plug, X-axis top cover and
base front cover.
11) Go outside the safeguard enclosure.
12)
Check that no one is inside the safeguard enclosure, and then turn on the control-
ler.
Plug
Air tube coupler
X-axis arm top cover
Base
Grease nipple
Base front cover
Fig. 5-25 Fig. 5-26
 Loading...