5-38
CHAPTER 5 Periodic Inspection
6-3-3 Replacing the Y-axis grease
(rst product to products manufactured in September 2009)
1) Prepare the following tools and items.
• Daphne Eponex grease EP-0 • Hex wrench set
• Air tube coupler (PT1/8) • Air tube
• Rag • Grease gun
2) Turn off the controller.
3) Place a sign indicating that the robot is being inspected, to keep others from
operating the controller switch.
4) Enter the safeguard enclosure.
5) Remove the X-axis arm under cover.
Refer to "7 Removing the Robot Covers" in Chapter 4 for removing the
covers.
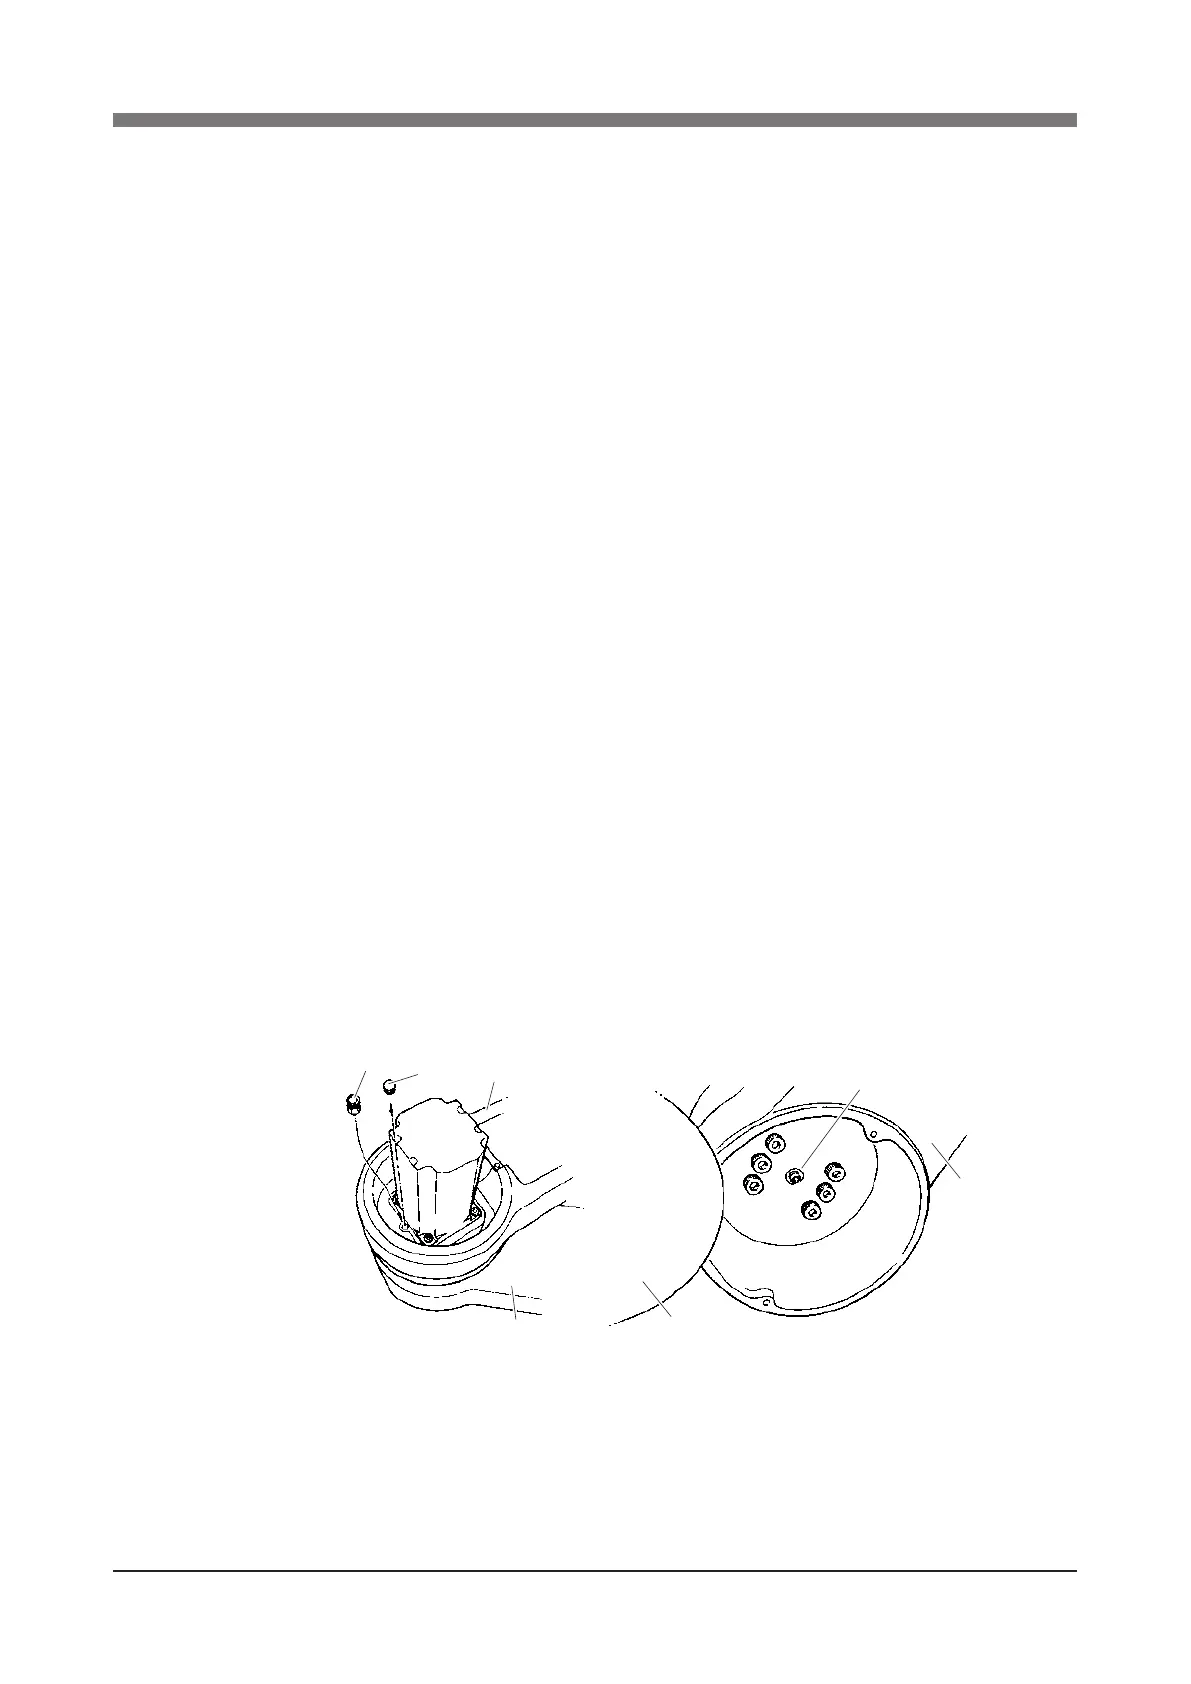
6) Remove the plug on the top of the Y-axis arm. (See Fig. 5-29.)
7) To remove the old grease from the Y-axis, attach the air coupler (PT1/8)
into the screw hole where the plug was tted and connect the air tube to the
air coupler. The old grease inside the Y-axis will be squeezed out by replen-
ishing new grease with a grease gun as explained in the next steps.
8) Using the grease gun, pump the specified grease into the grease nipple
located on the bottom of the X-axis arm. (See Fig. 5-30.)
9) After replenishing the grease, move the Y-axis arm by hand back and forth
a few times (about 90 degrees) and then remove excess grease.
10)
Remove the air coupler and then reattach the plug and X-axis arm under
cover.
11) Go outside the safeguard enclosure.
12)
Check that no one is inside the safeguard enclosure, and then turn on the control-
ler.
Plug
Air tube coupler
Y-axis arm
X-axis arm
Grease nipple
X-axis arm
(viewed from bottom)
X-axis under cover
Fig. 5-29 Fig. 5-30
 Loading...