.
5.
Remove the breaker
points
mounting screws
(screw C) and lift out the point assembly.
C
6.
7.
8.
ES-1529
FIGURE
6-6.
BREAKER POINTS
Replace the condenser and point assembly and
install in reverse order of removal.
Use an allen head wrench to adjust set screw
D
to
obtain the gap setting specified in section
2,
Specifications. Measure the point gap with a flat
thickness gauge (see Figure
6-6).
Clean points
after adjusting.
Make sure feeler gauge
is
clean and free
of
any grease,
oil
or
dirt.
The timing is adjusted during initial engine
assembly and is fixed by the point gap adjust-
ment.
No
other adjustment
or
alignment is
necessary.
Replace the point box cover, spark plugs and
spark plug leads.
9.
Connect negative
(-)
battery cable to negative
battery terminal.
lgntion
Coil
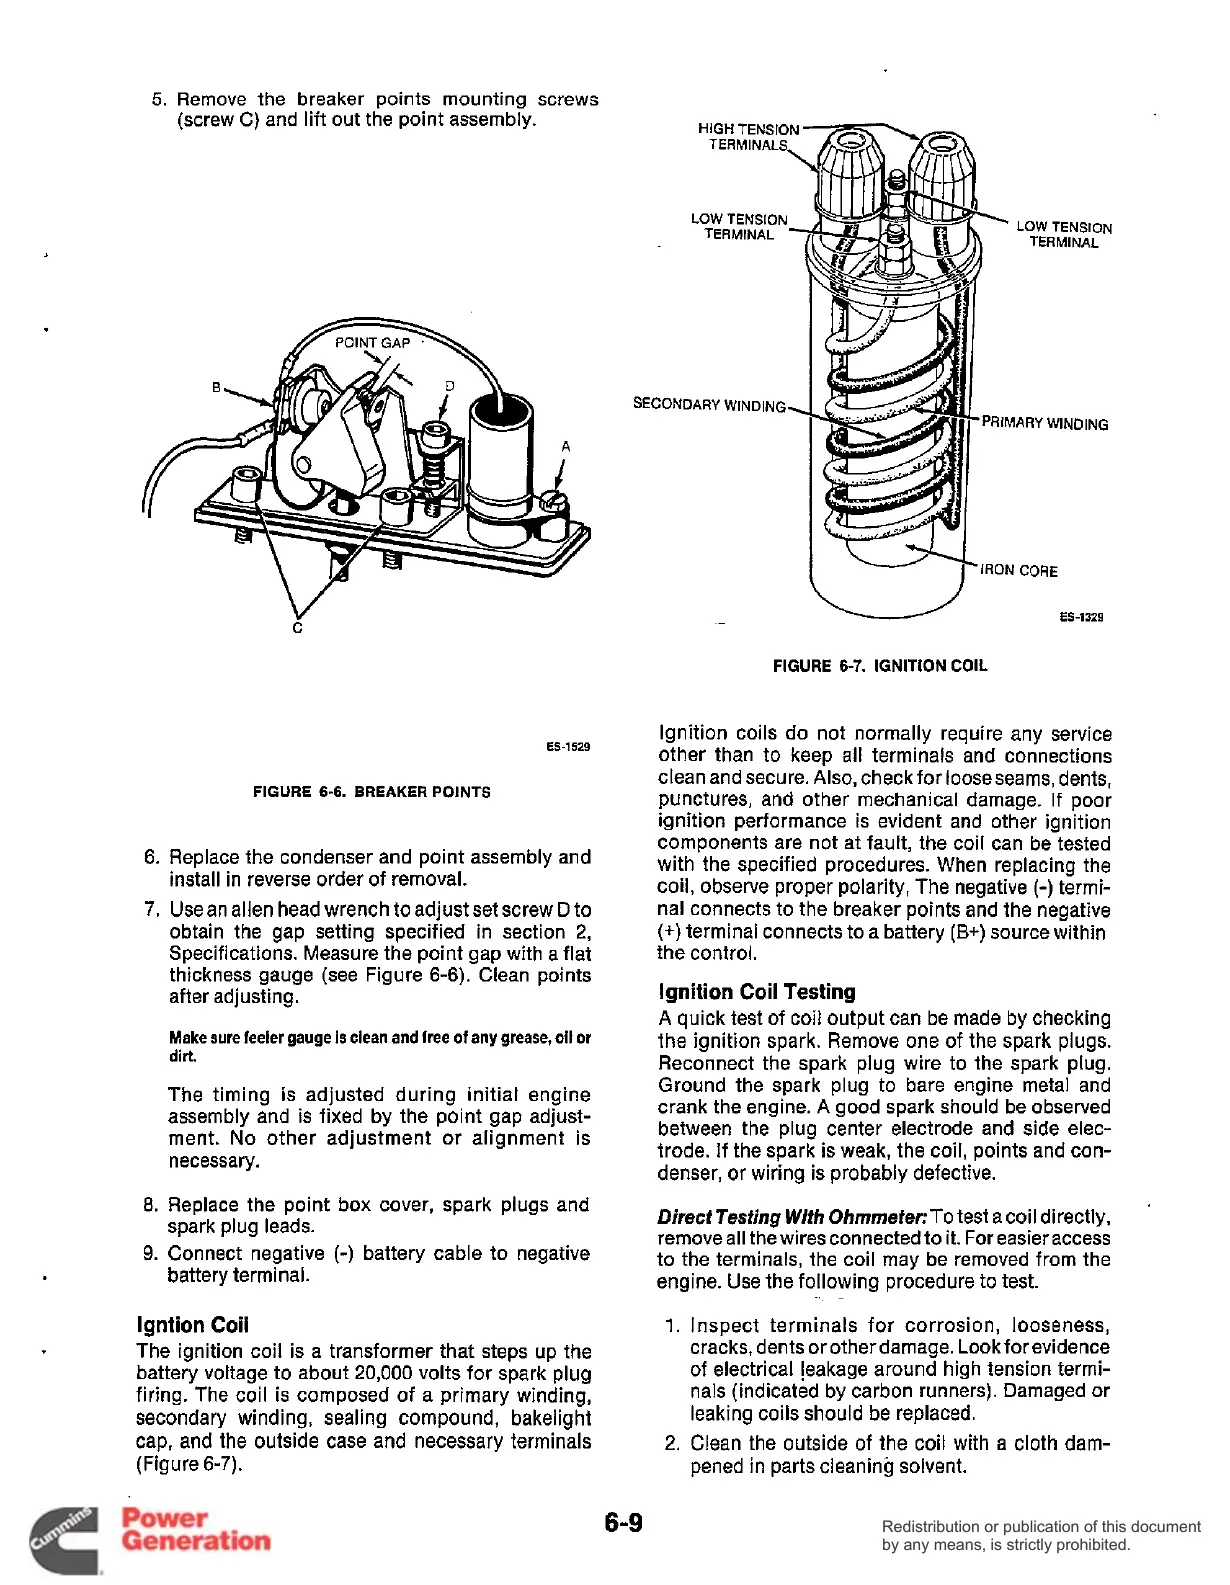
The ignition coil is a transformer that steps up the
battery voltage to about
20,000
volts for spark plug
firing. The coil
is
composed of a primary winding,
secondary winding, sealing compound, bakelight
cap, and the outside case and necessary terminals
(Figure
6-7).
SECONDARY
WINDING
PRIMARY
WINDING
-
ES-1329
FIGURE 6-7.
IGNITION
COIL
Ignition coils do not normally require any service
other than to keep all terminals and connections
clean and secure.
Also,
check for looseseams, dents,
punctures, and other mechanical damage. If poor
ignition performance
is
evident and other ignition
components are not at fault, the coil can be tested
with the specified procedures. When replacing the
coil, observe proper polarity, The negative
(-)
termi-
nal connects
to
the breaker points and the negative
(+)
terminal connects to a battery
(B+)
source within
the control.
Ignition
Coil
Testing
A
quick test
of
coil output can be made by checking
the ignition spark. Remove one of the spark plugs.
Reconnect the spark plug wire to the spark plug.
Ground the spark plug to bare engine metal and
crank the engine.
A
good spark should be observed
between the plug center electrode and side elec-
trode.
If
the spark is weak, the coil, points and con-
denser,
or
wiring is probably defective.
Direct
Testing
With
OhmmetecTo
test a coil directly,
remove all the wires connected to
it.
For easier access
to the terminals, the coil may be removed from the
engine. Use the following procedure to test.
1.
Inspect terminals for corrosion, looseness,
cracks, dents
or
other damage. Look forevidence
of electrical leakage around high tension termi-
nals (indicated by carbon runners). Damaged
or
leaking coils should be replaced.
2.
Clean the outside
of
the coil with a cloth dam-
pened in parts cleaning solvent.
6-9
Redistribution or publication of this document
by any means, is strictly prohibited.
Redistribution or publication of this document
by any means, is strictly prohibited.
 Loading...


