4.
Check the frequency and voltage first with a load
applied and then with no load applied. The fre-
quency and voltage should stay within the limits
shown in Table 6-1.
TABLE
6-1.
VOLTAGE AND SPEED
CHARTS
VOLTAGE CHART
FOR
CHECKING
1
PHASE
Maximum 132
Minimum 108
GOVERNOR
REGULATION
2
WIRE
No-Load Voltage
Full-Load Voltage
SPEED CHART
FOR
CHECKING
GOVERNOR
REGULATION
Maximum No-Load Speed (Rpm) 1890
Hertz (Frequency) 63
Minimum Full-Load Speed 1770
(Rpm) Hertz 57
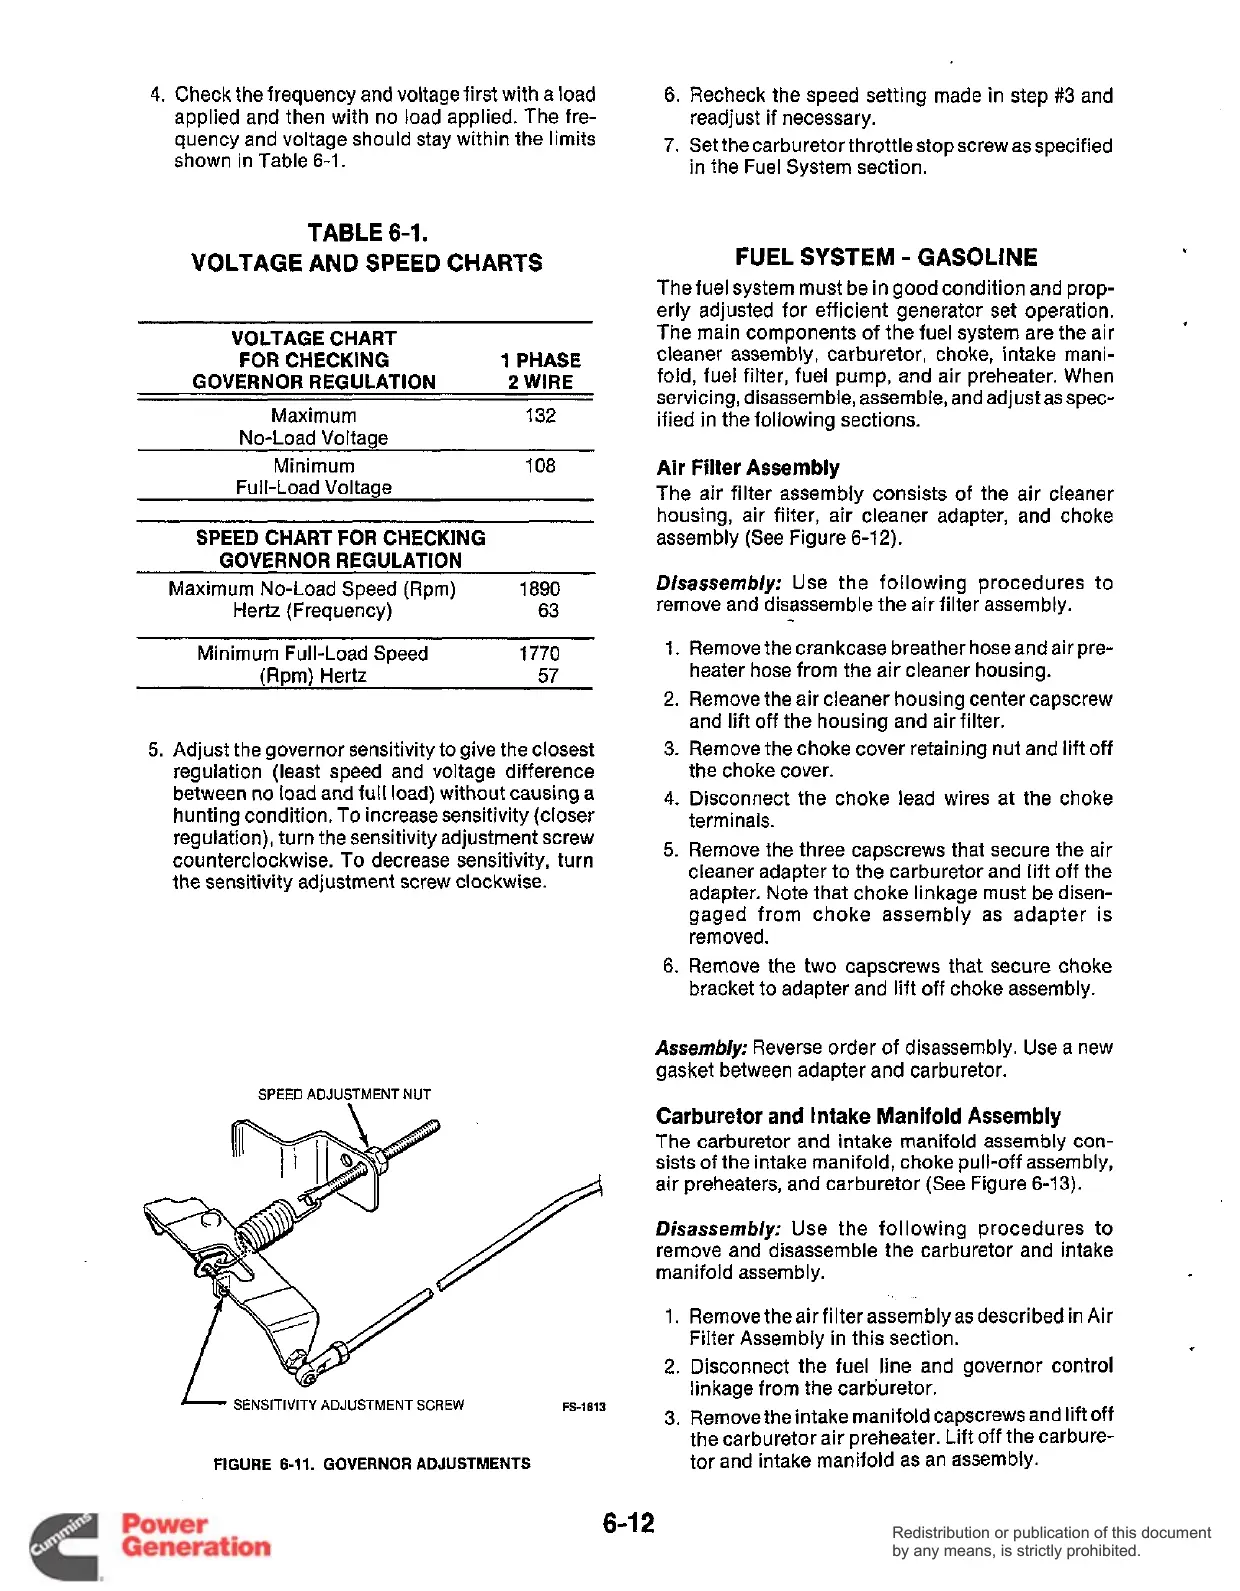
5.
Adjust the governor sensitivity to give the closest
regulation (least speed and voltage difference
between
no
load and full load) without causing a
hunting condition.
To
increase sensitivity (closer
regulation), turn the sensitivity adjustment screw
counterclockwise. To decrease sensitivity, turn
the sensitivity adjustment screw clockwise.
SPEED ADJUSTMENT NUT
-
SENSITIVITY
ADJUSTMENT
SCREW
FS-1613
FIGURE
6-11.
GOVERNOR ADJUSTMENTS
6.
Recheck the speed setting made in step
#3
and
7. Set thecarburetor throttlestop screw as specified
readjust if necessary.
in the Fuel System section.
FUEL
SYSTEM
-
GASOLINE
The fuel system must be in good condition and prop-
erly adjusted for efficient generator set operation.
The main components of the fuel system are the air
cleaner assembly, carburetor, choke, intake mani-
fold, fuel filter, fuel pump, and air preheater. When
servicing, disassemble, assemble, and adjust as spec-
ified in the following sections.
Air Filter Assembly
The air filter assembly consists of the air cleaner
housing, air filter, air cleaner adapter, and choke
assembly (See Figure 6-12).
Disassembly:
Use the following procedures to
remove and disassemble the air filter assembly.
1. Remove the crankcase breather hose and air pre-
heater hose from the air cleaner housing.
2. Remove the air cleaner housing center capscrew
and lift off the housing and air filter.
3. Remove the choke cover retaining nut and lift off
the choke cover.
4.
Disconnect the choke lead wires at the choke
terminals.
5.
Remove the three capscrews that secure the air
cleaner adapter to the carburetor and lift off the
adapter. Note that choke linkage must be disen-
gaged from choke assembly as adapter is
removed.
6. Remove the two capscrews that secure choke
bracket to adapter and lift off choke assembly.
-
Asseddy:
Reverse order of disassembly. Use
a
new
gasket between adapter and carburetor.
Carburetor and Intake Manifold Assembly
The carburetor and intake manifold assembly con-
sists of the intake manifold, choke pull-off assembly,
air preheaters, and carburetor (See Figure 6-13).
Disassembly:
Use the following procedures to
remove and disassemble the carburetor and intake
manifold assembly.
1. Removetheair filterassembly asdescribed in Air
Filter Assembly in this section.
2. Disconnect the fuel line and governor control
linkage from the carburetor.
3. Remove the intake manifold capscrews and lift off
the carburetor air preheater. Lift off the carbure-
tor and intake manifold as an assembly.
Redistribution or publication of this document
by any means, is strictly prohibited.
Redistribution or publication of this document
by any means, is strictly prohibited.