FINAL DRIVE
7.8
6. Without removing the garter spring, inspect the
coils for consistency. If coils are distorted or
uneven, cut the old spring with a side cutter to
remove it, and replace it.
12
3
5
4
A
Engage tabs in the slots
1.Armature Plate NOTE: Armature plate is
positioned with tabs in round holes of cage.
2.Roller Cage
3.Roller
4.Garter Spring
5.Cam
Spacer
Inspect for cracks
7. If garter spring replacement is necessary, it is
very important that the correct installation
procedure and special tool be used. Hold rollers
in place on roller cage with a light film of grease.
Gentlyand evenly rollthespringdown theHilliard
Clutch Garter Spring Installation Tool (PN
2870888) and into the groove of the rollers and
cage. WARNING: If this procedure is not
followed the spring will be over stressed and lose
its tension. Springs with incorrect tension may
allow rollers to move outward at high vehicle
speeds. If the rollers move outward, the front
hub(s) will engage and cause vehicle instability,
which could result in serious injury or death.
Must use Hilliard Clutch Garter
Spring Installation Tool
(PN 2870888)
W ARNING: Be sure to use correct garter spring.
Thesesprings areverysimilarinappearanceto those
usedonearlier models. Iftheold, lighterspringswere
installed on a machine requiring the heavier spring,
the front wheels may engage at high speed, possibly
resulting in serious injury or death. Check springs
before installation. Always verify the correct
replacement spring part number by referring to
the appropriate parts manual.
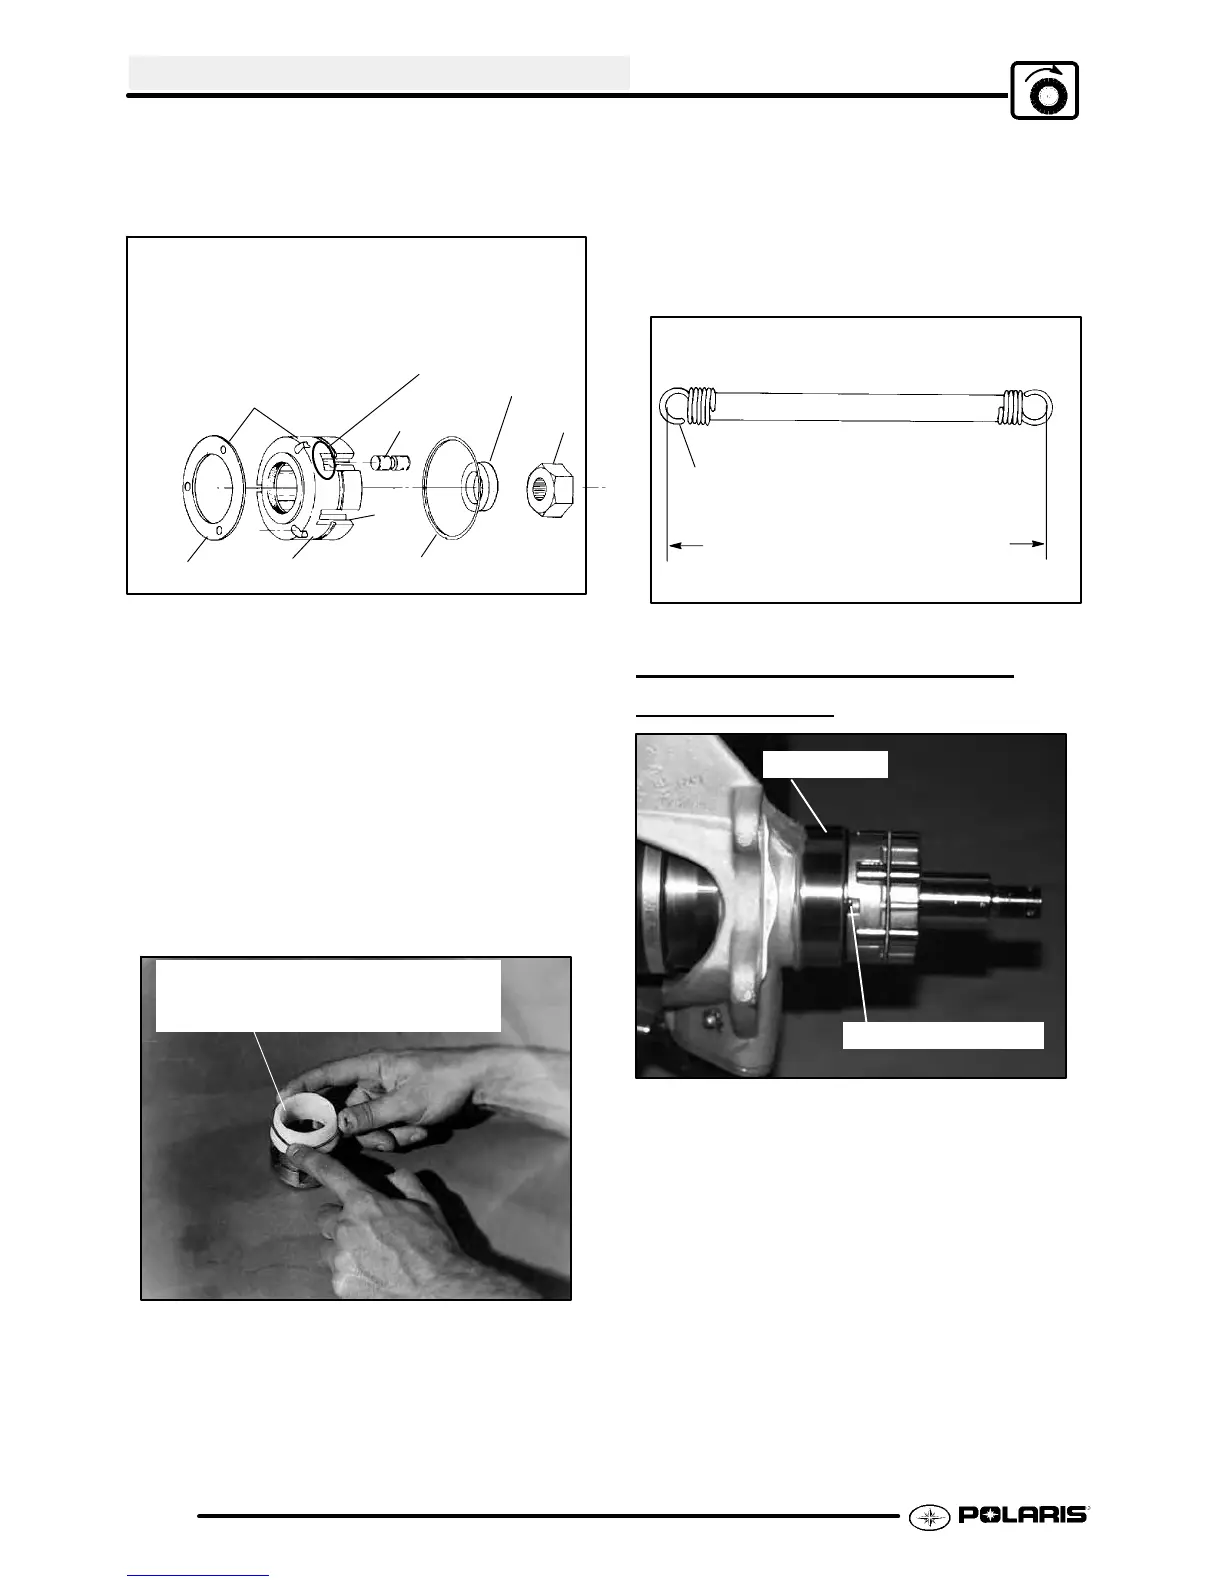
8. Current electro-mechanical spring, (PN
3250032); wire diameter .018″ (.46 mm); spring
free length end to end inside hooks 6.968″ (177
mm).
Measure wire diameter
Measure free length to inside of
loops as shown
AWD ARMATURE PLATE
INSPECTION
Armature Plate Tabs
Seal Sleeve
1. As the armature plate is engaged, it should
contact the outer magnet pole (seal sleeve) and
the inner magnet pole. Also, the armature plate
must be flat when placed on a flat surface. Bent
armature plates should be replaced.
NOTE: Itis notunusualtoseeadouble wearring
on the armature plate; however, the wear rings
should be even.
2. Install the roller clutch (Hilliard Clutch) assembly
and be sure the armature plate (A) is positioned
properly. Also,when installingthe hub assembly,
be sure the armature plate tabs remain engaged
with the roller clutch cage.
CAUTION: After the hub is installed, the slightest
movement outward with the hub may cause the
armatureplatetabstodisengagefromtherollerclutch

 Loading...